
|
|
|||||||
| Custom Units & Army Cards Fan-created HS army cards for units, glyphs, and equipment |
|
|
Thread Tools | Search this Thread | Display Modes |
|
#1
 October 4th, 2011, 09:59 AM
|
||||
|
||||
|
How to make a custom card using GIMP. PICTURES INCLUDED.
Step 1: Download GIMP.
Step 2: Copy the image of the faction you want to create a custom card for. Paste the image onto gimp. Step 4: Get the mini. Choose and copy your miniature. 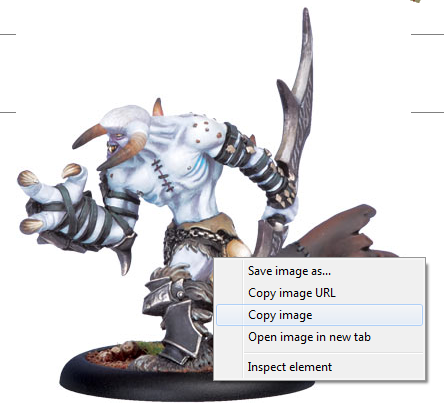 Paste it onto GIMP. Step 5: Erase the background. Choose the Bucket Fill tool and set it onto color erase. 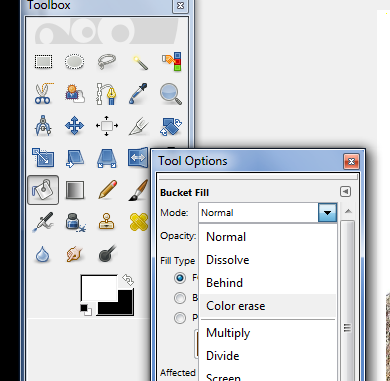 Set the color to white and click on all white areas. 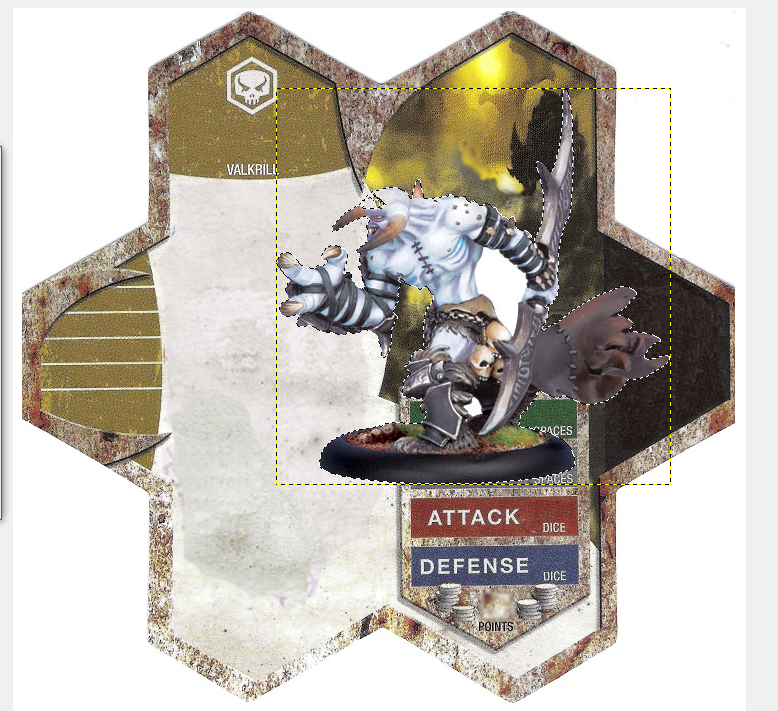 (You may have to erase some leftover background.) Step 6: Size the figure. Choose the Scale tool and change the miniature to the right size by dragging the mouse. 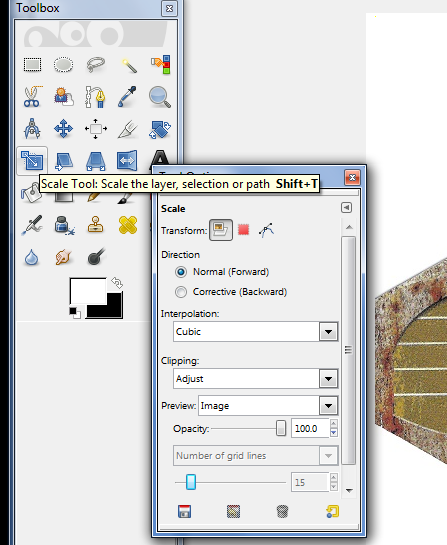 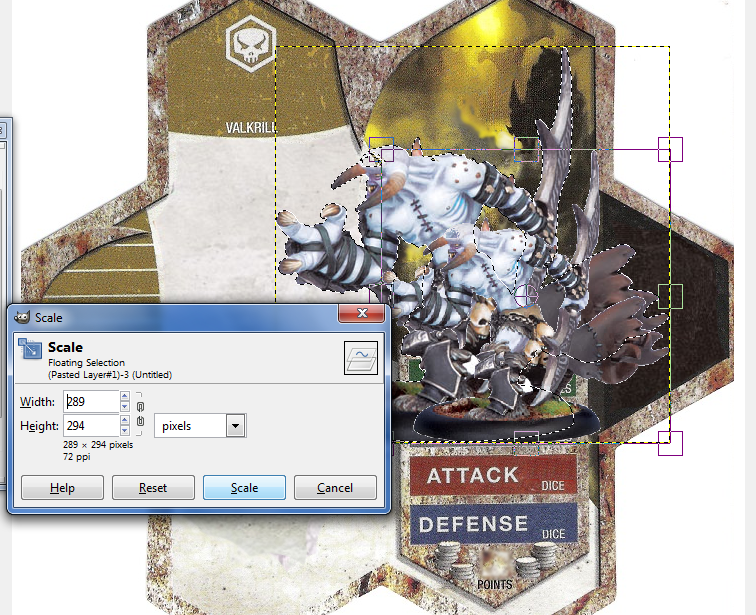 Move the miniature to the correct spot using the Move tool, then wrong click on the Floating section and click 'New Layer'. 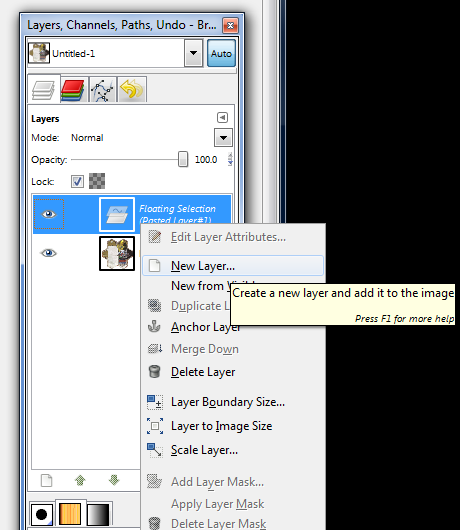 Step 7: Erase the sticking out parts. Using the Eraser tool, erase the stand to the miniature and any other parts of the miniature that are sticking out of the card. 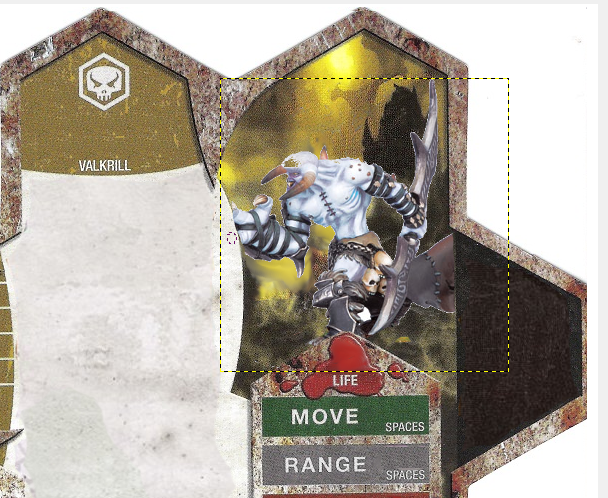 Step 8: The mist. Create a new layer for the mist. 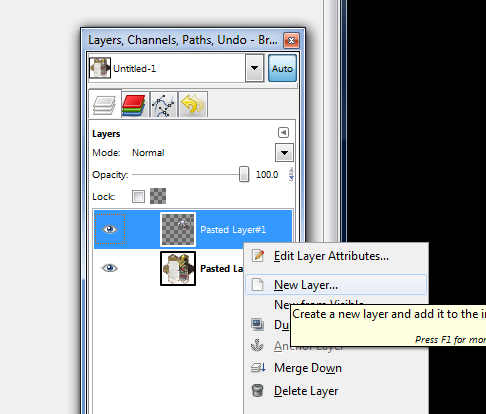 Click on the original layer and use the Color Pick tool to find the right color for the mist. 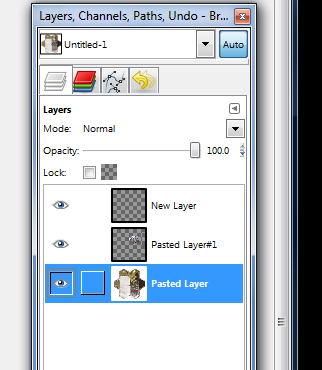 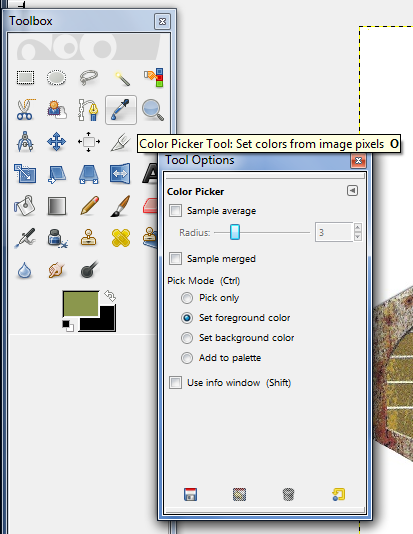 Click on the new layer (The one for the mist.), and use the Airbrush tool to create mist. 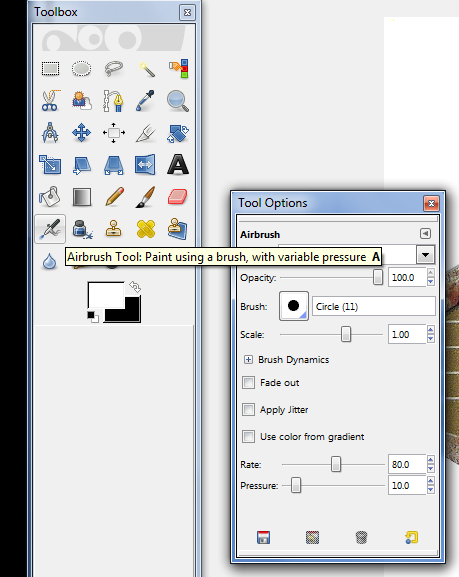 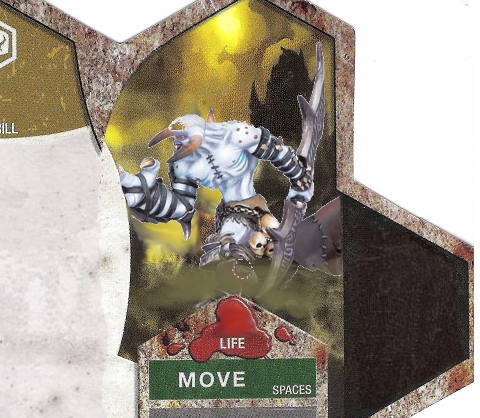 Step 9: The hit zone. Repeat steps 4-5 and erase the stand. Using the Scale and Move tools, move the correctly sized figure to the hit zone area. 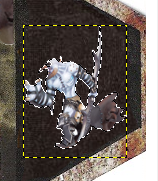 Use these colors and the Paintbrush tool to make the hit zone.  When you`re done, it should look something like this: 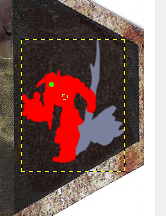 Step 10: The text. Now it`s time for the simplest, but also the longest part. The text. Just click on the Text tool and start typing. I`ve made a few guide images to help you. 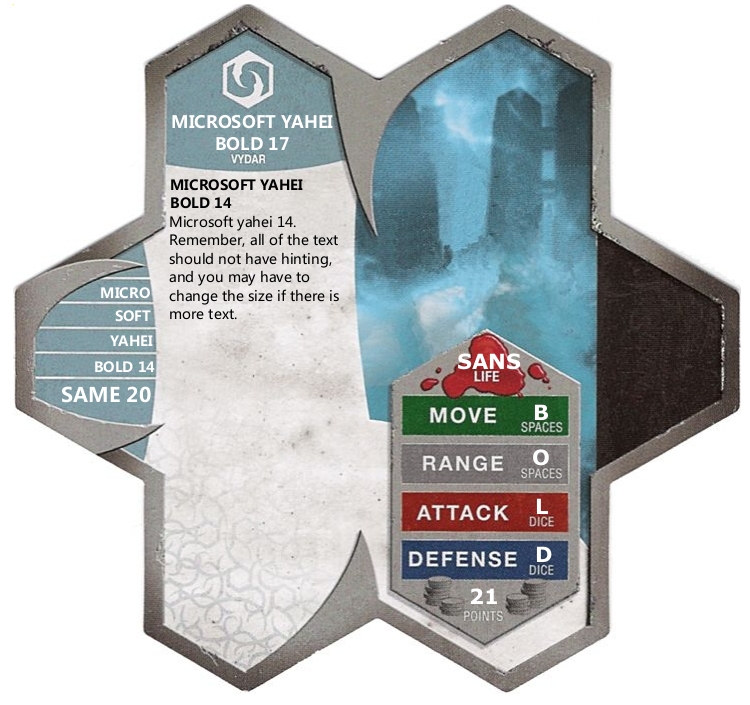 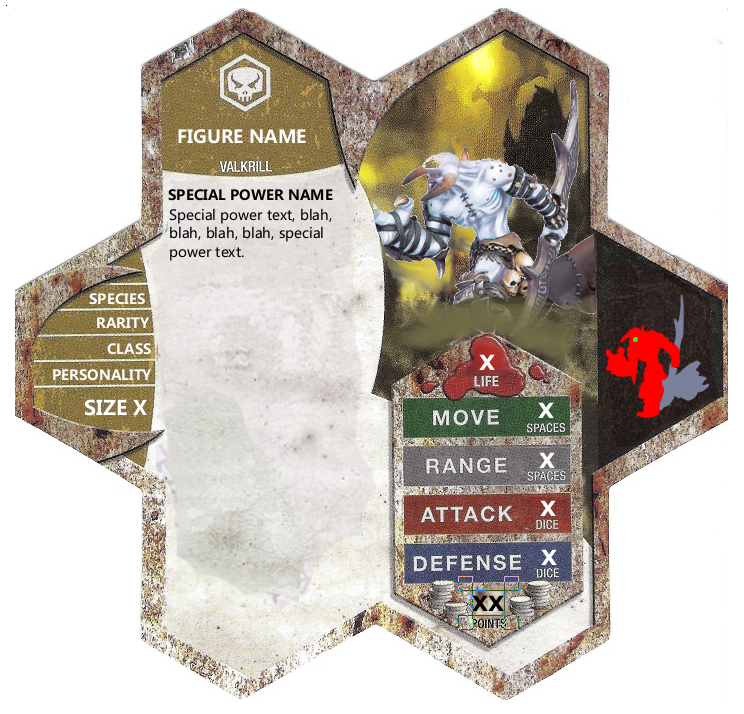 You have now finished your Custom card! Have fun play testing! If you have any questions please ask them! 
|
|
|||||||
|
|
 Similar Threads
|
||||
| Thread | Thread Starter | Forum | Replies | Last Post |
| You can't make this custom card | mr_rex777 | Custom Units & Army Cards | 87 | February 10th, 2009 03:19 AM |
| Leave One Space rule (pictures included) | Soul Shackle | Heroscape Strategy Articles | 25 | May 18th, 2008 05:53 PM |
| Draft choices based on map terrain (pictures included) | Soul Shackle | Heroscape Strategy Articles | 12 | May 12th, 2008 07:59 PM |
| How to make pictures for buildings? | Sev_ | Other Customization & HS Additions | 3 | September 4th, 2007 10:00 AM |
| Requesting pictures of Sir Hawthorne fig and card | bluekitsune13 | HeroScape General Discussion | 6 | August 17th, 2006 09:42 AM |


 Threaded Mode