Dwarven Strategic Bonding
Before taking a turn with The Axegrinders of Burning Forge, you may first take a turn with any Dwarf Hero you control. If you do not take a turn with any Dwarf Hero you control, add 2 to the Axegrinders' Move value.
Master of the Elements
After revealing an Order Marker on Kurrok the Elementalist, instead of taking a turn with Kurrok, you may take a turn with three small or medium elementals you control that are within 8 clear sight spaces of Kurrok the Elementalist.
Human Gladiator Bonding
Before taking a turn with the Capuan Gladiators, you may first take a turn with any Human Gladiator Hero you control.
Human Champion Bonding
Before taking a turn with the Knights of Weston, you may first take a turn with any Human Champion you control.
Utgar's Orders
Instead of taking a turn with the Minions of Utgar, you may take a turn with any Kyrie Warrior you control who follows Utgar.
Lizard King Bonding
Before taking a turn with the Greenscale Warriors, you may first take a turn with their chosen Lizard King if it is under your control.
Moon Frenzy
After revealing an Order Marker on this Werewolf Lord, before taking this Werewolf Lord's turn, roll the 20-sided die. If you roll an 11 or higher, you may first take a turn with any Hybrid Hero in play. If you take a turn with an opponent's Hybrid Hero, you control that Hero for the duration of its turn. At the end of its turn, control of the Hybrid Hero return to its previous owner. All order markers that were on the figure's Army Card will stay on the Army Card.
Marro Warlord Bonding
Before taking a turn with Grok Riders, you may first take a turn with any Marro Warlord you control.
Hive Swarm
Before moving Marro Drones, roll the 20-sided die. If you roll a 1-12, you may move and attack with 3 Marro Drones you control. If you roll a 13-16, you may move and attack with 6 Marro Drones you control. If you roll a 17-20, you may move and attack with 9 Marro Drones you control.
Hive Mind
After revealing an order marker on this Army Card, you may take a turn with any small or medium common Marro Squad figure you control before taking a turn with the Marro Hive. Any figure that is taking a turn must be within 12 clear sight spaces of Marro Hive prior to its movement.
Hivelord Life Bonding
Before taking a turn with Marrden Nagrubs, you may first take a turn with any Hivelord you control. Before moving the chosen Hivelord, you may destroy one adjacent Marrden Nagrub you control. If you destroy a Marrden Nagrub with Hivelord Life Bonding, remove 1 wound marker from the chosen Hivelord's Army Card.
Orc Champion Bonding
Before taking a turn with Heavy Gruts, you may first take a turn with any Orc Champion you control.
Defensive
Strength of Oak Aura 1
All friendly Elves adjacent to Kyntela Gwyn add 1 to their defense dice.
Gift of the Empress Aura
When you roll defense dice for any Kyrie you control that follows Einar and is within 5 clear sight spaces of Empress Kiova, you may re-roll all defense dice that did not show shields. Gift of the Empress Aura can be used only once for each defense roll. Empress Kiova's Gift of the Empress Aura does not affect Empress Kiova.
Lumbering Bully
When attacking with this Ogre Pulverizer, all excess shield rolled by the defending figure count as unblockable hits by the defending figure on this Ogre Pulverizer.
Orc Defensive Aura
All orc figures you control within 4 clear sight spaces of Nerak add 1 to their defense dice. Nerak's Orc Defensive Aura does affect Nerak.
Range Enhancement
Any Soulborg Guards adjacent to Deathwalker 9000 add 2 spaces to their range.
Staff of Lerkintin
When defending with Arkmer, add as many defense dice as the number of Elves you control adjacent to Arkmer.
Enhancements/Auras
Highland Fury
At the start of the game, choose a Human Champion you control. While that champion is in play, Macdirk Warriors roll an additional attack die for each wound marker on the chosen hero. There can be only one Human Champion for all the Macdirk Warriors you control. Macdirk Warriors cannot attack their chosen Human Champion.
Kyrie Leadership
All Kyrie you control, except Atlaga, move one additional space.
Loyalty to the Lizard King
At the start of the game, choose a Unique Lizardfolk hero, or a Unique large or huge you control, to be the Greenscale Warriors' Lizard King. A Greenscale Warrior rolls 1 additional attack and defense die when its chosen Lizard King is within 2 clear sight spaces. You can choose only one Lizard King for all the Greenscale Warriors you control.
Mark of the Warlord
When attacking a figure that is adjacent to any Marro Warlord you control, Grok Riders add 2 to their attack dice.
Orc Warrior Enhancement
All friendly Orc Warriors adjacent to Grimnak roll an additional attack die and additional defense die.
Orc Archer Enhancement
All friendly Orc Archers adjacent to a Swog Rider receive an additional attack die and an additional defense die.
Miscellaneous
Summon Elemental
After moving and before attacking with Kurrok the Elementalist, you may roll the 20-sided die. If you roll an 11 or higher, you may, if possible, place one of your previously destroyed small or medium Elementals on a empty space within 3 spaces of Kurrok the Elementalist.
Lycanthropy
This Werewolf Lord starts with 3 green Lycanthropy markers on its Army Card. If an opponent's Unique Hero receives at least 1 wound from this Werewolf Lord, you may place a Lycanthropy marker on that figure's Army Card. For the duration of the game, that figure loses its Species, Class and Personality. Instead, it has the following characteristics.
Species: Hybrid
Class: Hunter
Personality: Tormented
Lycanthropy never affects Constructs, Lycanthropes, Soulborgs or Destructible Objects.
Hive Supremacy
Any time you roll the 20-sided die for a Marro or Wulsinu Army Card, you may add 1 to your roll.
Mine!
When you roll the 20-sided die for a treasure glyph trap with this Ogre Warhulk, you must subtract 4 from your die roll.
Regenerate
After a turn with this Feral Troll, remove 1 wound marker from the Feral Troll's Army Card.
Cold Regenerate
After a turn with this Ice Troll Berserker, remove 1 wound marker from the Ice Troll Berserker's Army Card. If it is on a snow or ice space, remove 1 additionall wound marker. Movement
Elven Summoning Spell
After moving & before attacking, you may roll the 20-sided die. Add the number of Elves you control adjacent to Emirroon to your die roll.
If you roll a 1-4, nothing happens.
If you roll a 5-11, you may place 1 Elf you control adjacent to Emirroon.
If you roll a 12-17, you may place 2 Elves you control adjacent to Emirroon.
If you roll a 18-20, you may place 3 Elves you control adjacent to Emirroon.
If the summoned elves are engaged, they will not take any leaving engagement attacks. Emirroon cannot summon an elf he is already adjacent to.
Swamp Water Tunnel
If a Marro Drudge end its normal movement on a swamp water space, you may immediately place it on any same-level swamp water space within 5 spaces. If a Marro Drudge is engaged when it starts to tunnel, it will take any leaving engagement attacks.
Teleport Reinforcements
When Tul-Bak-Ra receives one or more wounds from a opponent's Normal or Special Attack but is not destroyed, you may choose one friendly Marro Squad for every wound Tul-Bak-Ra received. Place the chosen figure(s) on any empty space(s) adjacent to Tul-Bak-Ra. If the teleported figure(s) are engaged, they will not take leaving engagement attacks.
Orc Movement Aura
If an Orc figure you control begins its turn within 2 clear sight spaces of Hrognak, it may move 1 additional space. Hrognak's Orc Movement Aura does not affect Hrognak.
Tactical Switch
When a Warforged Soldier you control attacks an small or medium figure, before rolling attack dice, you may switch that Warforged Soldier with the defending figure. After switching spaces, the Warforged Soldier must continue that attack, if possible, and cannot attack any other figure that turn. Figures moved by Tactical Switch never take leaving engagement attacks. An opponent's figure can be moved by Tactical Switch only once per turn.
Talon Grab
While this Wyvern is flying, you may choose one opponent's small or medium figure that it passed this turn. Place the chosen figure on an empty same-level adjacent to this Wyvern at the end of its turn. If the chosen figure is engaged when moved by Talon Grab, it will not take any leaving engagement attacks. Figures under overhangs can never be moved by Talon Grab.
Terrain
Swamp Water Strength
When a Marro Drudge is on a swamp water space, add 1 to its attack and defense.
Utility
Lolth's Judgement Aura
All Arachnid figures you control within 6 clear sight spaces of Estivara roll 1 additional attack die when attacking normally.
Leaf of the Home Tree Aura
When any Elf you control within 8 clear sight spaces of Acolarh receives enough wounds to be destroyed, you may roll 10 Ullar Valkyrie dice before removing the figure. If you roll at least 3 Ullar symbols, ignore any wounds that figure just received. Acolarhs Leaf of the Home Tree Aura does not affect Acolarh.
Expendable Rabble
If a Horned Skull Brute you control is attacked with a normal attack by an opponent's figure and receives 1 or more wounds, you may destroy a small Goblin figure you control that is adjacent to that Horned Skull Brute to ignore any wounds that Horned Skull Brute just received.
Giant Killer
When Sir Denrick attacks a huge figures, add 2 attack dice.
Grok Training
Marro Hive cannot rebirth Grok Riders with its Marro Rebirth special power.
Cell Divide
When a Marro Divider you control receives one or more wounds from a Normal or Special Attack, you may roll the 20-sided die before removing that figure. If you roll a 17 or higher, ignore any wounds that figure just received and, if possible, place one previously destroyed Marro Dividers on a same-level adjacent to the defending Marro Divider.
Self-Replicating
Marro Hive cannot rebirth Marro Dividers with its Marro Rebirth special power.
Marro Rebirth
After taking a turn with Marro Hive, you may roll the 20-sided die. If you roll a 13 or higher, you may place any previously destroyed Common Marro Squad from your army on an empty space adjacent to Marro Hive.
Stinger Drain
After moving and before attacking, you may roll the 20-sided die. If you roll a 1-4, you must destroy a Marro Stinger you control and you cannot attack this turn. If you roll a 5-9, add 0 to the attack value of this card. If you roll a 10 or higher, add 1 to the attack value of this card.
Water Clone
Instead of attacking all of the Marro Warriors, one at a time, you may roll the 20-sided die for each Marro Warrior in play. If you roll a 15 or higher, you may place a previously destroyed Marro Warrior on a same-level space adjacent to that Marro Warrior. Any Marro Warrior on a water space needs a 10 or higher to Water Clone. You may Water Clone after you move.
Enslave 17
When revealing an order marker on this Mind Flayer Mastermind, after taking this Mind Flayer Mastermind's turn, you may choose any Unique Hero figure within 4 clear sight spaces of this Mind Flayer Mastermind. Roll the 20-sided die. If you roll a 17 or higher, take temporary control of the chosen Hero and immediately take a turn with that Hero. At the end of that turn, control of that Hero returns to its previous owner. All order markers that were on a figure's Army Card will stay on the Army Card. Enslave does not Mind Flayers.
Techno Hatred
When attacking a Soulborg figure, Quasatch Hunters receive one additional attack die.
Flail Hurricane
After moving and before attacking with this Ogre Warhulk, you must roll the 20-sided die. If you roll a 1-10, it may attack normally. If you roll an 11 or higher, instead of attacking normally, it must attack every figure adjacent to it, if possible. Roll each attack separately.
Orc Battle Cry Aura
When attacking with any Orc Warrior figure you control within 2 clear sight spaces of Ornak, you may roll Utgar Valkyrie dice. Each Utgar symbol rolled counts as an additional skull.
Blood Frenzy
When attacking with a Sahuagin Raider, it receives 1 extra attack die for each wound marker on the defending figure's Army Card to a maximum of 3 attack dice for Blood Frenzy.
Amphibious
While a Sahuagin Raider is on a water space, add 2 to its Defense. If a Sahuagin Raider starts its turn on a water space, add 1 to its Movement for that turn. A Sahuagin Raider does not have to stop its movement when entering a water space.
Homing Device
When attacking a non-adjacent figure, add 1 attack die for every Soulborg you control who follows Vydar that is adjacent to the defending figure.
Circuity Overload
After moving and before attacking, you must roll the 20-sided die for each Soulborg figure adjacent to any Omnicron Repulsor you control. If the figure is a Squad figure and you roll a 13 or higher, destroy that figure. If the figure is a Hero figure and you roll a 16 or higher, that figure receives a wound. Omnicron Repulsors are not affected by Circuity Overload.
Targeting Beacon
When attacking a non-adjacent figure, all Soulborg you control who follows Jandar add 1 attack die. If at least one Omnicron Repulsor you control is adjacent to the defending figure.
EMP Response
If an Omnicron Repulsor you control successfully defends against an attack by a Soulborg figure, you must roll the 20-sided die. If you roll a 14 or higher, the attacking figure immediately end its turn and all order marker must be removed from its Army Card (or cards if your opponent has more than one Common Army Card for that figure).
Circuity Replacement
If a friendly Soulborg Hero who follows Utgar receives one or more wounds from a special power that is not an attack, you may destroy a guard in the Zettian Infantry you control that is adjacent to that Hero to ignore any wounds that Hero just received.
Zombies Rise Again
If a Zombie of Morindan that you control destroys an opponent's small or medium figure, replace that figure immediately, if possible, with one of your own previously destroyed Zombie of Morindan. Newly placed Zombies of Morindan cannot attack this turn. Undead are not affected by Zombies Rise Again.
Warforged Resolve
When rolling defense dice against a normal or special attack, Heirloom always add 1 automatic shield to whatever is rolled.
Marro Plague
After moving and before attacking, you must roll the 20-sided die for each figure adjacent to any Marrden Hounds you control. If you roll a 16 or higher, that figure receives a wound. Soulborgs and Wulsinu are not affected by Marro Plague.
Venomous Sting
When rolling attack dice, if this Wyvern rolls a skull on every die, the defending figure cannot roll any defense dice. Venomous Sting does not affect Destructible Objects.
Abilities by Class
Spoiler Alert!
Bonding/Turns
Beast Bonding
Before taking a turn with Arrow Gruts, you may first take a turn with any Beast you control.
Kato Katsuro's Command
Instead of taking a turn with Kato Katsuro, you may take a turn with one of the following that you control:
1 Samurai Hero
or
1 Samurai Squad
or
1 Ashigaru Harquebus and/or 1 Ashigar Yari Squad. You may choose which Squad to activate first.
Any figure in the above list that is taking a turn instead of Kato Katsuro must be within clear sight of Kato Katsuro before moving.
Ullar Warlord Bonding
Before taking a turn with Armoc Vipers, you may first take a turn with any Warlord you control who follows Ullar.
Predator Bonding
Before taking a turn with Fylorlag Spiders, you may first take a turn with any Predator you control.
Warlord Bonding
Before taking a turn with Roman Legionnaires, you may first take a turn with any Warlord you control.
Einar Warlord Bonding
Before taking a turn with Sacred Band, you may first take a turn with any Warlord you control who follows Einar.
Wyrmling Bonding
ssAfter revealing an order marker on a Black Wyrmling Army Card, before taking that Black Wyrmling's turn, you may take a turn with one other Wyrmling you control. Defensive
Heroic Defense Aura
When defending against a normal attack by an adjacent figure with any Samurai or Ashigaru figures you control within 8 clear sight spaces of Hatamoto Taro, you may roll Einar Valkyrie dice. Each Einar symbol rolled counts as an additional shield. Heroic Defense Aura does not affect Hatamoto Taro.
Counter Strike
When rolling defense dice against a normal attack from an adjacent figure, all excess shields count as unblockable hits on the attacking figure. This power does not work against other Samurai.
Enhancements/Auras
Devourer Attack Enhancement
All friendly Devourers adjacent to Dumutef Guard roll an additional attack die.
Soldier Attack Enhancement
All friendly Soldiers adjacent to Marcus Decimus Gallus roll an additional attack die. Miscellaneous
Movement
Guard Leadership
All Guards you control move one additional space.
Soldier Leadership
All Soldiers you control move one additional space.
Scout Leadership
All Scouts you control move an additional 2 spaces.
Terrain
Utility
Warrior's Swiftness Spirit
When Eldgrim is destroyed, you may place this figure on any unique Army Card. Eldgrim's Spirit adds 1 to the move number on that card.
Warrior's Attack Spirit 1
When Finn is destroyed, you may place this figure on any unique Army Card. Finn's Spirit adds 1 to the normal attack number on that card.
Warrior's Armor Spirit 1
When Thorgrim is destroyed, you may place this figure on any unique Army Card. Finn's Spirit adds 1 to the defense number on that card.
Gladiator Inspiration
If all order markers for a round are placed on Gladiator Army Cards, and one Order Marker is placed on Spartacus then all Gladiators(except Spartacus) become inspired. Inspired Gladiators add one to their move number and add 1 extra attack die and defense die for the rest of the round.
Knights Courage
Add 1 to Sir Dupuis' attack dice for every Knight you control within 4 clear sight spaces of Sir Dupuis up to a maximum of +3 attack dice.
Master's Influence
All Monk Squad figures you control may leap an additional 13 levels up or down when using their Stealth Leap special power. All Monks you control within 2 clear sight space of Master Woo add 1 to their attack dice and 1 to their defense dice.
Abilities by Personality
Spoiler Alert!
Bonding/Turns
Unholy Bonding
Before taking a turn with the Death Knights of Valkrill, you may first take a turn with any small, medium, or large relentless Hero you control.
Taskmaster Bonding
Before taking a turn with the Death Chasers of Thesk, you may first take a turn with any large wild Hero you control.
Defensive
Disciplined Army Defense Bonus
If every Army Card you control has a disciplined personality, each soldier in the Sacred Band receives 1 additional defense die.
Enhancements/Auras
Relentless Assault
All friendly figures adjacent to Khosumet with a relentless personality receives an additional attack die.
Miscellaneous
Disciplined Influence
At the start of the game, you may choose any unique Army Card you control. For this game the chosen card's personality is disciplined, regardless of what is listed on the card.
Movement
Tricky Speed 4
If Otonashi starts her turn adjacent to a figure you control who has a Tricky personality, she may move 4 additional spaces.
Terrain
Utility
Attack the Wild 2
When attacking a figure who has a Wild personality, Otonashi rolls 2 additional attack dice.
Abilities by Other
Spoiler Alert!
Bonding/Turns
Gorillinator Movement Bonding
Before taking a turn with Nakita Agents, you may move 3 Gorillinators you control up to 7 spaces each.
Red Flag of Fury Aura
If Order Marker 1 is placed on Ornak, then instead of taking that turn with Ornak, you may take a turn with 2 Unique Heroes you control who follow Utgar. Ornak cannot be one of the 2 Unique Heroes. Any Unique Hero taking a turn instead of Ornak must be within 8 clear sight spaces of Ornak prior to its movement.
Eternal Hatred
After revealing an order marker on this card, you must roll the 20-sided die. If you roll a 17 or higher, choose an opponent. That opponent will control Marcu Esenwein for the remainder of your turn, but will not be able any unrevealed order markers on his card. At the end of that turn, control of Marcu returns to you. All order markers and figures on Marcu's Army Card will stay on his Army Card.
Iskra's Summoning
Rechets of Bogdan do not start the game on the battlefield. They must be summoned on the battlefield by Iskra Esenwein.
Summon the Rechets of Bogdan
After taking a turn with Iskra Esenwein, you may attempt to summon the Rechets of Bogdan if they are in your army and they have been successfully summoned. Roll the 20-sided die. If you roll a 17 or higher, you must place all 3 Rechets of Bogdan on empty spaces within 6 clear sight spaces of Iskra Esenwein. Any Rechets of Bogdan that you cannot place on the battlefield are immediately destroyed and cannot be summoned again. When the Rechets of Bogdan are summoned, you may immediately take a turn with them.
Orc Battle Rush
At the start of the first round of the game, after all order markers have been placed, you may move all Death Chasers of Thesk you control up to 5 spaces each. They must end their Orc Battle Rush movement on a empty space.
Mind Link
Instead of taking a turn with Ulginesh, you may take a turn with up to 2 Elf Wizards you control. Ulginesh cannot be one of the 2 Elf Wizards. Any Elf Wizard that is taking a turn instead of Ulginesh must be within 6 clear sight spaces of Ulginesh before moving. Defensive
Tough
When rolling defense dice against a normal attack, Gorillinators always add one automatic shield to whatever is rolled.
Stealth Dodge
When a Krav Maga Agent rolls defense dice against a figure who not adjacent, one shield will block all damage.
Arcane Riposte
When Sharwin Wildborn rolls defense dice against a normal attack, all excess shields count as unblockable hits on the attacking figure.
Evil Eye Defense
When rolling defense dice against a normal attack from a non-adjacent figure, all excess shields count as unblockable hits on the attacking figure.
Evil Eye Protection
When Torin, or any friendly small or medium Utgar figure adjacent to Torin, rolls defense dice against a normal attack from a non-adjacent figure, all excess shields count as unblockable hits inflicted by Torin on the attacking figure.
Melee Defense 1
When rolling defense dice against a normal attack from an adjacent figure, a Gladiatron adds 1 die.
Insubstantial 3
A Phantom Knight adds 3 additional defense dice when rolling defense against a normal attack from a figure who is not adjacent.
Melee Defense 4
When rolling defense dice against a normal attack from an adjacent figure, Major X17 adds 4 dice.
Adjacent Tough 1
When rolling defense dice for Hatamoto Taro, if Hatamoto Taro is adjacent to at least one figure you control who follows Einar, add one automatic shield to the defense roll.
Evasive 8
When an Elite Onyx Viper rolls defense dice against an attacking figure who is not adjacent, add 8 defense dice to the defending Viper.
Shield Wall
When defending with a Roman Legionnaire, add 1 defense die for each adjacent Roman Legionnaire up to a maximum of +2 dice, for the Shield Wall power.
Exoskeleton
At the start of the game, place 1 copper Exoskeleton marker on a Mezzodemon Warmonger Army Card for each Mezzodemon Warmonger figure in your Army. After a Mezzodemon Warmonger defense dice against a normal attack, you may remove 1 Exoskeleton marker from its Army Card to ignore all wounds inflicted by that attack.
Defensive Agility
When a Warrior of Ashra rolls defense dice against a normal attack from an adjacent figure, one shield will block all damage. Enhancements/Auras
Vydar's Range Enhancement Aura
All friendly figures with a range of 4 or more who follow Vydar and are within 4 clear sight spaces of Laglor add 2 to their range number. Vydar's Range Enhancement Aura does not affect Laglor.
Attack Aura 1
All friendly figures adjacent to Finn with a range of 1 add 1 die to their normal attack.
Defensive Aura 1
All friendly figures adjacent to Thorgrim add 1 die to their defense.
Unleashed Fury Enhancement
You may add 1 to your die roll when you roll for the Unleashed Fury power on any Army Card.
Snow and Ice Enhancement
Slippery Ice and Heavy Snow only count as 1 space when moving.
Berserker Charge Enhancement
Add 1 to your die roll when you roll for the Berserker Charge power on any Army Card.
Frenzy Enhancement
Add 1 to your die roll when you roll for the Frenzy power on any Army Card.
Defensive Aura
All figures you control within 4 clear sight spaces of Raelin add 2 to their defense dice. Raelin's Defensive Aura does not affect Raelin.
Extended Defensive Aura
All figures you control within 6 clear sight spaces of Raelin add 1 to their defense dice. Raelin's Extended Defensive Aura does not affect Raelin.
Attack Aura
All figures you control within 4 clear sight spaces of Taelord get +1 to attack. Taelord's Attack Aura does not effect Taelord.
Miscellaneous
Dragon Healing
Before moving, you may choose a wounded Hero within 4 clear sight spaces of Sonlen. Roll the 20-sided die. If you roll a 15 or higher, remove one wound marker from the chosen Hero's Army Card. Sonlen's Dragon can use it Dragon Healing on Sonlen.
Searing Intensity
After moving and before attacking, you must roll the 20-sided die once for each adjacent figure to at least one Fire Elemental you control. If you roll a 14 or higher, that figure receives 1 wound. Figures with the Lava Resistant special power are not affected by Searing Intensity.
Cold Healing
After taking a turn with this Greater Ice Elemental, if it is on at least one snow or ice space, remove 1 wound marker from this Greater Ice Elemental's Army Card.
Soul Devour
Before moving, each Shade of Bleakwoode you control may choose an adjacent unique hero figure. Roll the 20-sided die once for each Shade. If you roll a 19 or 20, destroy the Shade of Bleakwoode figure, then take control of the chosen unique hero and remove any Order Markers on its card. You now control of that Army Card.
Eternal Strength
Anytime you roll the 20-sided die for Cyprien Eswein's Chilling Touch, you may add 2 to your die roll.
Lay on Hands
After moving and before attacking with Rhogar Dragonspine, you may choose a wounded friendly Hero figure adjacent to Rhogar Dragonspine and roll the 20-sided die. If you roll a 6 or higher, remove 1 wound marker from the chosen figure's Army Card.
Healing Touch
After moving and before attacking, ]choose a wounded friendly hero figure adjacent to Kelda. Then roll the 20-sided die to add or remove wound markers from the chosen figure's card.
If you roll a 1, add 2 markers.
If you roll a 2-5, remove 1 marker.
If you roll a 6-17, remove up to 2 markers.
If you roll a 18-20, remove all markers.
Movement
Underground Movement
Instead of moving normally with an Earth Elemental, you may immediately place on any empty non-water space that is within 4 spaces of that Earth Elemental and is no higher than 1 level above of that Earth Elemental's height or 3 levels below that Earth Elemental's base. If an Earth Elemental is engaged when it starts its Underground Movement, it will take any leaving engagement attacks.
Water Tunnel
If a Water Elemental ends its normal movement on a water space, you may immediately place on any empty same-level water space that is within 5 spaces. If a Water Elemental is engaged when it starts its Water Tunnel, it will not take any leaving engagement attacks.
Scale
When moving up or down levels of terrain, Goblin Cutters may add 2 their height.
Climb X2
When moving up or down levels of terrain, Deathreavers may double their height.
Glacier Traverse
If a Dzu-Teh is adjacent to a Glacier Mountain, the Dzu-Teh may Glacier Traverse instead of moving normally. You may do this with any or all Dzu-Teh you control each turn. To Glacier Traverse, move to any unoccupied space adjacent to that Glacier Mountain.
Cyberclaw
All small or medium opponent's figures that enter or occupy a space adjacent to any Gladiatron may not move. Figures affected by the Cyberclaw cannot be moved by any special power on a Army Card or Glyph.
Wild Pack Movement
Before moving, roll the 20-sided die. If you roll a 1-3, add 1 to the move value of this card. If you roll a 4-6, add 3 to the move value of this card. If you roll a 7-20, add 7 to the move value of this card.
Improved Cyberclaw
All small, medium or large opponent's figures that enter or occupy a space adjacent to Major X17 may not move. Figures affected by the Cyberclaw cannot be moved by any special power on a Army Card or Glyph.
Teleportation
Instead of moving Tul-Bak-Ra normally, you may choose any empty space that is on the same level and within 10 clear sight spaces of Tul-Bak-Ra. Place Tul-Bak-Ra on the chosen space. When Tul-Bak-Ra starts to Teleport, if he is engaged he will not take any leaving engagement attacks.
Charging Assault
Any or all Kozuke Samurai may add 3 to their Move number as long as they are unengaged prior to moving. Kozuke Samurai must be able to move adjacent to an opponent's figure in order to use Charging Assault.
Climb X3
When moving up or down levels of terrain, Fyorlag Spiders may triple their height.
Berserker Charge
After moving and before attacking, roll the 20-sided die. If you roll a 15 or higher, you may move all Tarn Viking Warriors again.
Fey Step
Once per game, Erevan Sunshadow may use Fey Step. Before moving normally with Erevan Sunshadow, you may place him on any empty space within 5 spaces of his current location. If Erevan Sunshadow is engaged when he uses Fey Step, he will not take any leaving engagement attacks.
Special Attack
Autoload Special Attack
Range 7. Attack 3.
When attacking with Autoload Special Attack, you may roll may roll Vydar Valkyrie dice. If you roll at least one Vydar symbol, you may attack again using Autoload Special Attack.
Venom Ray Special Attack
Range 5. Attack 3.
If Estivara inflicts at least 1 wound with Venom Ray Special Attack, roll the 20-sided die for Venom Damage. If you roll a 1-9, the defending figure receives no additional wounds for Venom Damage. If you roll a 10-19, add 1 additional wound marker to the defending figure's Army Card, and roll again for Venom Damage. If you roll a 20, destroy the defending figure.
Lolth's Wrath Special Attack
Range Special. Attack 3.
Choose a Drow figure you control that is within 5 clear sight spaces of Pelloth and roll 3 attack dice. One at a time for each skull rolled, you may inflict 1 wound on any small or medium figure that is 2 clear sight spaces of the chosen Drow figure. You may inflict more than 1 wound on a single figure using Lolth's Wrath Special Attack. Figures affected by Lolth's Wrath Special Attack cannot roll any defense dice. After attacking with Lolth's Wrath Special Attack, destroy the chosen Drow figure.
Arrow Volley
Special Attack- Range 6. Attack 6.
Three unengaged adjacent Roman Archers on the same level may combine their attacks and roll their attack dice as one attack. All Roman Archers in the Arrow Volley must have a clear line of sight on the one target.
Arcane Bolt Special Attack
Range 5 + Special. Attack 3.
The first target of Arcane Bolt Special Attack must be within a Range of 5. After attacking with Arcane Bolt Special Attack, if the figure receives at least 1 wound, you may choose a figure adjacent to the defending figure at the beginning of that attack and attack the chosen figure with Arcane Bolt Special Attack. You may continue attacking with Arcane Bolt Special Attack in this manner until you fail to inflict a wound. A figure cannot be attacked more than once in a turn with Arcane Bolt Special Attack.
Fire Line Special Attack
Range Special. Attack 4.
Choose 8 spaces in a straight from Mimring. All figures on those spaces are in line of sight are also affected by Mimring's Fire Line Special Attack. Roll 4 attack dice once for all affected figures. Affected figures roll defense dice separately.
Blind Rage Special Attack
Range 1. Attack 3.
If Sir Hawthorne rolls at least 2 skulls with his Blind Rage Special Attack, Sir Hawthorne may attack again with his Blind Rage Special Attack. Sir Hawthorne may continue attacking with his Blind Rage Special Attack until he rolls fewer than 2 skulls.
Earth Slam Special Attack
Range 1. Attack 3.
Any non-flying adjacent to this Earth Elemental is affected by Earth Slam Special Attack. Roll attack dice once for all affected figures. Each figure rolls defense separately.
Rapid Fire Special Attack
Range 7. Attack 3.
If Deathwalker 8000's Rapid Fire Special Attack inflicts a wound, he may attack again with his Rapid Fire Special Attack. Deathwalker 8000 may continue attacking with his Rapid Fire Special Attack until he does not inflict a wound.
Explosion Special Attack
Range 7. Attack 3.
Choose a figure to attack. Any figures adjacent to the chosen figure are also affected by the Explosion Special Attack. Deathwalker 9000 only needs a clear sight shot at the chosen figure. Roll 3 attack dice once for all adjacent figures. Each figure rolls defense dice separately. Deathwalker 9000 can be affected by his own Explosion Special Attack.
Majestic Fires Special Attack
Range 7. Attack 3.
Choose a figure to attack. Any figures adjacent to the targeted figure are also affected by Majestic Fires Special Attack. Common Squad figures roll 2 less defense dice against Majestic Fires Special Attack. Roll attack dice once for all affected figures. Each figure rolls defense dice separately. Zelrig cannot be affected by his own Majestic Fires Special Attack.
Tetsubo Special Attack
Range 1. Attack 3.
Choose a figure to attack. You may also choose one figure adjacent to the targeted figure to be affected by the Tetsubo Special Attack as well. Roll attack dice once for both figures. Each figure rolls defense separately.
Ice Shard Breath Special Attack
Range 5. Attack 4.
When Nilfheim attacks with his Ice Shard Breath Special Attack, he may attack 2 additional times. He cannot attack the same figure more than once.
Shotgun Blast Special Attack
Range 5. Attack 4.
Choose a figure to attack. Any figures adjacent to the chosen figure are also affected by Shotgun Blast Special Attack. James only needs clear sight shot at the chosen figure. Roll attack dice once for all affected figures. Each figure rolls defense separately. James cannot be affected by his own Shotgun Blast Special Attack.
Quaglix Gun Special Attack
Range 6. Attack 1, 2 or 3.
Major Q9 starts each turn with 9 attack dice. Choose any figure within range and attack by 1, 2 or 3 attack dice. Major Q9 may keep making special attacks with 1, 2 or 3 attack dice until he has rolled all 9 attack dice. Major Q9 may target the same or different figures with each attack.
Machine Pistol Special Attack
Range 7. Attack 2.
Major Q10 may use this special attack 4 times in the same turn. Q10 may target the same figure or a different figure with each attack.
Wrist Rocket Special Attack
Range 4. Attack 4.
Major Q10 may use this special attack 2 times in the same turn. Q10 may target the same figure or a different figure with each attack.
Ninjutsu Barrage Special Attack
Range 1. Attack 3.
Instead of moving and attacking normally with Kumiko, you may move Kumiko up to 3 spaces. Kumiko can attack up to 3 times with Ninjutsu Barrage Special Attack at any point before, during or after this move as long Kumiko on a space where she could end her movement. Kumiko cannot attack the same figure more than once in a single turn.
Saber Storm Special Attack
Range 1. Attack 1, 2 or 3.
Moriko starts each turn with 6 attack dice. Choose any adjacent figure and attack by 1, 2 or 3 attack dice. Moriko may keep making special attacks with 1, 2 or 3 attack dice until she has rolled all 6 attack dice. Moriko may target the same or different figures with each attack.
Shuriken Special Attack
Range 5. Attack Special.
If Shiori is attacking a small or medium figure, roll 3 attack dice for Shuriken Special Attack. If Shiori is attacking a figure of a different size or a destructible object, roll 2 attack dice for Shuriken Special Attack.
Mind Blast Special Attack
Range 3. Attack 3.
Tul-Bak-Ra does not need clear sight to attack with Mind Blast Special Attack.Dragon Breath Special Attack
Range Special. Attack 3.
Choose 3 spaces in a straight line from Rhogar Dragonspine. All figures on those spaces that are affected by Dragon Breath Special Attack. Roll attack dice once for all affected figures. Each figure rolls defense separately.
Fire and Rush Special Attack
Range Special. Attack Special.
If Samuel Brown begins his turn unengaged, instead of moving and attacking normally, he may his Fire and Rush Special Attack. Choose a figure within 5 spaces of Samuel Brown to attack and roll 3 attack dice. If the defending figure receives one or more wounds from that attack, you may move Samuel Brown up to 5 spaces. If Samuel Brown ends that move engaged, he may attack again by rolling 4 attack dice
Poison Sting Special Attack
Range 1. Attack 4.
If Sujoah inflicts at least 1 wound with Poison Sting Special Attack, roll the 20-sided die for Poison Damage. If you roll a 1-9, the defending figure receives no additional wounds for Poison Damage. If you roll a 10-19, add 1 additional wound marker to the defending figure's Army Card, and roll again for Poison Damage. If you roll a 20, destroy the defending figure.
Burning Breath Special Attack
Range 4 + Special. Attack 4.
Choose a figure to attack. You may also choose 4 spaces in a straight line from the targeted figure. All figures on those spaces that are within line of sight of Moltenclaw are affected by Burning Breat Special Attack. Roll attack dice once for all affected figures. Each figure rolls defense dice separately. Moltenclaw is not affected by Burning Breath Special Attack.
Psionic Blast Special Attack
Range 3. Attack 3.
This Mind Flayer Mastermind does not need clear sight to attack with Psionic Blast Special Attack. If a figure receives 1 or more wounds from Psionic Blast Special Attack, remove one order marker at random from that figures Army Card (or cards if your opponent has more than one Common card for that figure).
Quick Release Special Attack
Range 4. Attack 4.
When Kaemon Awa attacks with his Quick Release Special Attack, he may attack one additional time.
Pistol Fire Special Attack
Range 5. Attack 3.
Drake may not use his Pistol Fire Special Attack to attack a figure who follows Jandar.
Thunder Ram Assault Special Attack
Range 1 + Special. Attack 4.
Choose a figure to attack. You may also choose up to two other figures within 2 clear sight spaces of the targeted figure to be affected by Thunder Ram Assault Special Attack. Roll attack dice once for all affected figures. Each figure rolls defense separately. You can only use Thunder Ram Assault Special Attack if Eltahale was not adjacent to the targeted figure at the start of this turn. You cannot use Thunder Ram Assault Special Attack if you used Thunder Step this turn.
Evisceraxe Special Attack
Range 1. Attack 5.
The Evisceraxe Special Attack cannot be used on small figures.
Wild Swing Special Attack
Range 1. Attack 4.
Choose a figure to attack. Any figures adjacent to the chosen figure are also affected by Wild Swing Special Attack. Roll attack dice once for all affected figures. Each figure rolls defense separately. Jotun cannot be affected by his own Wild Swing Special Attack.
Fire Blast Special Attack
Range 5. Attack Special.
Each time you attack with Erevan Sunshadow's Fire Blast Special Attack, you may choose to roll 2, 3 or 4 attack dice. If a skull is rolled on every die, you may attack again with Erevan Sunshadow's Fire Blast Special Attack. You may continue attacking with Erevan Sunshadow's Fire Blast Special Attack until do not roll a skull on every die.
Force Orb Special Attack
Range 5. Attack 3.
Choose an opponent's figure to attack. Each opponent's figure adjacent to the chosen figure is also affected by Force Orb Special Attack. Roll attack dice once for all affected figures. Each figure rolls defense separately.
Rain of Flame Special Attack
Range 7. Attack 1 + Special.
Choose a figure to attack. Any figures adjacent to the chosen figure are also affected by Rain of Flame Special Attack. Add 1 to Jorhdawn's attack dice for every additional Elf Wizard you control within 3 clear sight spaces of Jorhdawn, up to a maximum of +3 dice. Roll attack dice once for all affected figures. Each figure rolls defense separately. Jorhdawn cannot be affected by her own Rain of Flame Special Attack.
Fledging Acid Breath Special Attack
Instead of attacking with a Black Wyrmling, you may choose one small or medium figure within 4 clear sight spaces of it. Roll the 20-sided die. If you roll a 1-10, nothing happens. If you roll an 11-15, the chosen figure receives 1 wound. If you roll a 16 or higher, the chosen figure receives 2 wounds.
Fledging Lightning Breath Special Attack
Range 4 + Special. Attack 2.
Choose a figure to attack. You may also choose one other figure within 3 clear sight spaces of the targeted figure to be affected by Fledgling Lightning Breath Special Attack. Roll attack dice once for both figures. Each figure rolls defense dice separately. Fledgling Lightning Breath Special Attack does not affect destructible objects.
Fledging Fires Special Attack
Range 5. Attack 3.
Common Squad figures roll 2 fewer defense dice against Fledging Fires Special Attack.
Fledging Ice Shards Special Attack
Range 5. Attack 2.
When a White Wyrmling attacks with Fledging Ice Shards Special Attack, it may attack 1 additional time. It cannot attack the same figure more than once this turn.
Acid Spray Special Attack
Range 4. Attack 4.
Choose a figure to attack. You may also choose up to two other figures adjacent to the targeted figure to be affected by Acid Spray Special Attack. Roll attack dice once for all affected figures. Each figure rolls defense separately.
Terrain
Water Suits
Microcorp Agents do not have to stop their movement when entering a water space. Add 2 to a Microcorp Agent's defense while he is on a water space.
Sighting
When a Microcorp Agent is attacking with a height advantage, he rolls an additional attack die.
Lurk in Shadows
If Pelloth is on a shadow space, opponents' must be adjacent to attack him with a normal attack.
Snow Strength
Add 1 die to Nerak's attack and defense while on a snow space.
Negative Element
A Fire Elemental can never roll defense dice while it is on a water space.
Water Mastery
While a Water Elemental is on a water space, add 1 to its Attack and Defense.
Road Strength
Add 1 die to Dumutef Guard's attack and defense while on a road space.
Landslide
A Granite Golem with a height advantage on an adjacent opponent's figure rolls an additional die when attacking that figure.
Gain High Ground
After taking a turn with Granite Guardians, you may move each Granite Guardian up to 1 space. This space may be up to 4 levels higher.
Water Weakness
An Obsidian Guard on a water space rolls 2 fewer defense dice.
Glacier Camouflague
If a Dzu-Teh is adjacent to a Glacier Mountain, opponents' figures must be adjacent to that Dzu-Teh to attack it with a normal attack.
Jungle Tracking
If a Quasatch Hunter begins its turn adjacent to an Evergreen Tree or Jungle Piece, it may move 2 additional spaces.
Utility
Stealth Armor 15
When a Microcorp Agent receives one or more wounds, before removing that agent, roll the 20-sided die. If you roll a 15 or higher, ignore any wounds.
Smoke Powder 13
When any Nakita Agent you control, or any figure adjacent to any Nakita Agent you control, is targeted for a normal attack from a non-adjacent opponent, you may roll the 20-sided die. If you roll a 13 or higher, all Nakita Agents you control, and all figures you control adjacent to those Nakita Agents, no longer have visible hit zones for the duration of the targeting figure's turn.
Engagement Strike 15
If a small or medium figure moves adjacent to a Nakita Agent, roll the 20-sided die. If you roll a 15 or higher, the opponent's figure receives a wound. Figures may be targeted as they move into engagement with a Nakita Agent.
Cloud of Darkness
After taking a turn with Estivara, you may roll the 20-sided die. If you roll a 16 or higher, Estivara has no visible Hit Zone until the next time you reveal an order marker.
Dragon Swoop
After moving and before attacking, you may choose a figure within 4 clear sight spaces of Sonlen. Roll the 20-sided die. If you roll a 15 or higher, the chosen figure receives one wound.
Wait then Fire
If none of the Ashigaru Harquebus move this turn, add 1 die to their attack.
Shocking Grasp
When rolling attack dice for a normal attack. Sharwin Wildborn always adds 1 automatic skull to whatever is rolled.
Wounded Smash
When Krug attacks, he receives one extra attack die for every wound marker he has. Sharwin Wildborn always adds 1 automatic skull to whatever is rolled.
Indomitable
If this Frost Giant of Morh begins his turn unengaged, add 2 to his Move value this turn. If it begins its turn engaged, add 2 to his Attack value this turn.
Battle Frenzy
After attacking with this Frost Giant of Morh, roll the 20-sided die. If you roll a 16 or higher, you may attack again with this Frost Giant of Morh.
Dying Swipe
If this Frost Giant of Morh is attacked with a normal attack by an opponent's figure and receives enough wounds to be destroyed, roll 3 attack dice. One at a time for each skull rolled, you may inflict 1 wound on any figure that is adjacent to this Frost Giant of Morh. Figures affected by Dying Swipe cannot roll any defense dice and can receive more than 1 wound each. After using Dying Swipe, remove this Frost Giant of Morh from the battlefield.
Barge into Battle
After moving and before attacking if a Horned Skull Brute you control ends its movement unengaged, you may choose an engaged small or medium friendly Squad figure within 3 clear sight spaces of that Horned Skull Brute whose base is no more than 2 levels higher or lower than the base of that Horned Skull Brute. You may switch that Horned Skull Brute with the chosen Squad figure. Figures moved with Barge into Battle never take any leaving engagement attacks.
Overextend Attack
After taking a turn with Alastair MacDirk, you may place a wound marker on Alastair MacDirk and take another turn with him. You may only use this power once during a round.
Chomp
Before attacking, choose one medium or small figure adjacent to Grimnak. If the chosen figure is a Squad figure, destroy. If the chosen figure is a Hero figure, roll the 20-sided die. If you roll a 16 or higher, destroy the chosen Hero.
A Coward's Reward
Sir Denrick rolls one additional die against each figure leaving engagement with him.
Jandar's Dispatch
After taking a turn with Sir Gilbert. roll 12 Jandar Valkyrie dice. You may move 4 squad figures you control who follow Jandar up to X spaces. X equals Jandar symbols rolled. Any squad figures moved with Jandar's Dispatch must be within 8 clear sight spaces of Sir Gilbert prior to moving.
Stab in the Back
After you take a turn with Sir Hawthorne, you must roll the 20-sided die. If you roll a 1, choose an opponent. That opponent now controls Sir Hawthorne. Remove any Order Markers on this Army Card, then give the card to that opponent.
Lava Resistant
A Fire Elemental never rolls for molten lava damage and lava field damage, and it does not to stop on molten lava.
Ice Cold
While a Great Ice Elemental is on a water or ice space, that space and all same-level water spaces adjacent to that Greater Ice Elemental are consider ice spaces. Figures do not have to stop their movement on normal ice spaces.
Ice Spikes 15
If an opponent's figure moves adjacent to a Greater Ice Elemental, roll the 20-sided die. If this Greater Ice Elemental is on at least one ice or snow space, add 2 to your die roll. If roll a 15 or higher, the opponent's figure receives 1 wound. Figures can be affected by Ice Spikes only as they move into engagement with this Greater Ice Elemental.
Mob Attack
When attacking with a Goblin Cutter you control, if the defending figure is engaged with at least 2 Goblin Cutters you control, it subtracts 2 from its defense dice.
Scurry
When a Goblin Cutter you control is destroyed by a normal attack from an opponent's figure, you may move 2 Goblin Cutters you control up to 4 spaces each and all Gobling Cutters you control no longer have any visible Hit Zones for the duration of the attacking figure's turn while they remain unengaged. Goblin Cutters will never take any leaving engagement attacks while using Scurry.
Scatter
After a Deathreaver you control rolls defense dice against a normal attack from an opponent's figure, you may move 2 Deathreavers you control up to 4 spaces each.
Maul
When rolling attack dice against a small or medium figure, if a Deathstalker rolls a skull on every die, the defending figure receives a wound for every skull, and cannot roll defense dice.
Self-Destruct
After moving and instead of attacking, Deathwalker 7000 may choose to self-destruct. Roll the 20-sided die to determine if any other figures are wounded. If you roll a 1-3, all adjacent figures are safe. If you roll a 1-3, all adjacent figures are safe. If you roll a 4-15, each adjacent figure receives 2 wounds. If you roll a 16-19, each adjacent figure receives 4 wounds. If you roll a 20, each adjacent figure receives 8 wounds. After using this power, Deathwalker 7000 is always destroyed.
Soul Weapons
Figures attacked by a Death Knight of subtract 2 from their defense dice. Destructible Objects are not affected by Soul Weapons.
Life Drain
Each time Marcu Esenwein destroys a figure, you may remove a wound marker from this Army Card. Marcu Esenwein cannot Life Drain destructible objects.
Lethal Sting
When rolling attack dice against a small or medium figure, if a Rechet of Bogdan rolls a skull on every die, the defending figure cannot roll any defense dice and is immediately destroyed.
+2 Broadsword
If Tandros Kreel is attacking an adjacent figure, add 2 dice to Tandros Kreel's attack.
Cleave
When Tandros Kreel attacks an adjacent figure, you may choose one Squad figure that is also adjacent to Tandros Kreel. If the defending figure receives a wounds from Tandros Kreel's attack, the chosen figure receives 1 wound.
Combat Challenge
If an opponent's figure that is adjacent to Tandros Kreel attacks with a normal or special attack, it must attack Tandros Kreel.
Double Assault
When Evar Scarcarver attacks an adjacent figure or destructible object, he may attack one additional time.
Frost Rage
When revealing a numbered order marker on Evar Scarcarver's Army Card, you may also reveal an "X" order marker that is on Evar Scarcarver's Army Card to activate Frost Rage for the duration of the round. While Frost Rage is activated, add 1 die to Evar Scarcarver's Attack and Defense for each wound marker on his Army Card.
Net Trip 14
After moving and before attacking, roll the 20-sided die. If you roll a 14 or higher, any small or medium figure attacked by Retiarius this turn may roll no more than 1 die for defense.
Chain Grab
After moving and before attacking with a Drow Chainfighter, you may choose opponent's small or medium figure within 3 clear sight spaces whose base is no more than 6 levels above that Drow Chainfighter's height or 6 levels below that Drow Chainfighter's base. Roll the 20-sided die. If you roll a 9 or higher, place the chosen figure on any empty same-level space adjacent to that Drow Chainfighter. If the chosen figure is engaged when it is moved by Chain Grab, it will not take any leaving engagement attacks.
Hide in Darkness
If a Drow Chainfighter is attacked with a normal attack and at least 1 skull is rolled, you may roll the 20-sided die. If that Drow Chainfighter is on a dungeon space, add 3 to your die roll. If he is on a shadow space, add 6 to your die roll. If you roll a 1-15, roll defense dice normally. If you roll a 16 or higher, ignore all damage that would be inflicted by the attack.
Rock Throw
If a Granite Guardian has a height advantage on an opponent's figure, it may add 2 to its range when attacking that figure.
Lava Throw
When an Obsidian Guard is on a molten lava space it may add 2 to its range.
Battleaxe
If Torin is attacking a small or medium figure, add 2 to Torin's attack.
Trample Stomp
At any point while moving, Tor-Kul-Na may choose a small or medium figure that is adjacent, on the same-level, and on a empty space where Tor-Kul-Na may end his movement. Roll the 20-sided die. If you roll a 1-7, the figure is safe and Tor-Kul-Na's movement ends. If you roll a 8-20, the chosen figure receives one wound. If the wound destroys the figure, move Tor-Kul-Na onto the space that figure occupied, and you may continue Tor-Kul-Na's movement. If the chosen figure is not destroyed, Tor-Kul-Na's movement ends. Tor-Kul-Na must be on a space where he can end movement each time he uses this power.
Coil Crush
When attacking a small, medium or large figure, if Wo-So-Ga inflicts at least 2 wounds, roll the 20-sided die. If you roll a 15 or higher, destroy the defending figure.
Crippling Gaze 15
Before moving, you choose a figure within 5 clear sight spaces of Dund. Roll the 20-sided die. If you roll a 15 or higher, remove all order markers on the chosen figure's army card (or cards if your opponent has more than one common card for that figure).
Mortal Wound
After attacking an opponent's Unique Hero with this Master of the Hunt's normal attack, roll 1 attack die for each wound inflicted in that attack. For each additional skull rolled, place 1 additional wound marker on the figur's Army Card.
Feral Rage
When a Quasatch Hunter attacks, it may attack up to 2 additional times. A Quasatch Hunter cannot attack the same figure more than once per turn.
Crag of Steel
When revealing a numbered order marker on Siege's Army Card, you may also reveal an "X" order marker that is on Siege's Army Card to activate Crag of Steel for the duration of the round. While Crag of Steel is active, he may attack any or all figures adjacent to him. Roll each attack separately.
Chalice of Fortitude
If Sir Dupuis has 4 or more wounds on his Army Card, add 1 to his defense dice.
Eternal Heartbreak
If you control Cyprien Esenwein and he is destroyed, Sonya Esenwein immediately receives 2 wounds.
Whip 12
After moving and before attacking, choose a small or medium adjacent to James. Roll the 20-sided die. If you roll a 12 or higher, the chosen figure cannot roll any defense dice if attacked by James this turn.
Hydra Heads
When this Fen Hydra attacks, it may attack up to 4 times. Reduce the number of times this Fen Hydra can attack by 1 for each wound marker on this Army Card.
Master's Assault
Master Woo may attack any or all figures adjacent to him. Roll each attack separately.
Stealth Leap 25
Instead of his normal move, Master Woo may use Stealth Leap 25. Stealth Leap 25 has a move of 3. When counting spaces for Stealth Leap 25, ignore elevations. Master Woo may leap over water without stopping, leap over figures without becoming engaged, and leap over obstacles such as ruins. Master Woo may not leap more than 25 levels up or down in a single leap. If Master Woo is engaged when he starts his Stealth Leap 25, he will not take any leaving engagement attacks.
Shaolin Assault
A Shaolin Monk may attack any or all figures adjacent to him. Roll each attack separately.
Stealth Leap
Instead of their normal move, any or all Shaolin Monks may use Stealth Leap. Stealth Leap has a move of 3. When counting spaces for a Monk's leaping, ignore elevations. A Monk may leap over water without stopping, leap over figures without becoming engaged, and leap over obstacles such as ruins. A Monk may not leap more than 12 levels up or down in a single leap. If a monk is engaged when he starts to leap, he does not take any leaving engagement attacks.
Vanish 9
If Isamu is attacked and at 1 skull is rolled, roll the 20-sided die to vanish. If you roll a 1-8, roll defense dice normally. If you roll a 9 or higher, Isamu takes no damage and may immediately move up to 4 spaces. Isamu can vanish only if he ends his vanishing move not adjacent to any enemy figures.
Dishonorable Attack
When attacking a figure who follows Jandar, Isamu rolls 2 additional attack dice.
Disappearing Ninja
If a Ninja of the Northern Wind is attacked with a normal attack and at least 1 skull is rolled, roll the 20-sided die to disappear. If you roll a 1-11, roll defense dice normally. If you roll a 12 or higher, that Ninja of the Northern Wind takes no damage and may immediately move up to 4 spaces. Ninjas of the Northern Wind can disappear only they end their disappearing move not adjacent to any enemy figures.
Concentrated Will
If Shiori has only one unrevealed order marker on her Army Card, add 1 to her attack and defense.
Combined Arablast
When attacking with a Protector of Ullar, roll 1 additional attack die for every wound that has been inflicted on the defending figure this turn by Protectors of Ullar you control.
Stare of Stone
Instead of attacking, choose any figure within 4 clear sight spaces of Sudema. Roll the 20-sided die. If the chosen figure is a Squad figure and you roll a 7 or higher, destroy it. If the chosen figure is a Hero figure and you roll a 17 or higher, destroy the chose Hero.
Blood Lust
For every opponent's figure a Tagawa Samurai destroys, place a purple Experience Marker on this card. When attacking with Tagawa Samurai, roll one additional attack die for each Experience Marker on this card. A maximum of 3 of Experience Markers can be placed on this card.
Entangling Web
After moving and before attacking, you may choose any one small or medium opponent's figure that is engaged at least three Fyorlag Spiders that you control. Roll the 20-sided die. If you roll a 16 or higher, remove one unrevealed order marker at random from the chosen figure's Army Card (or cards if your opponent has more than one Common Army Card for that figure).
Carry
Before moving Theracus, choose an unengaged friendly small or medium figure adjacent to Theracus. After you move Theracus, place the chosen figure adjacent to Theracus.
Deadly Shot
When attacking with Zetacron, each skull rolled counts for one additional hit.
Shadow Ambush
If Mika Connour starts her turn unengaged and on a shadow space, add 3 dice to her attack this turn.
Shadow Dance
If Mika Connour starts her turn on a shadow space, instead of moving normally, you may place her on any other empty shadow space with 8 spaces of her current location. If Mika Connour is engaged when she starts her Shadow Dance, she will take any leaving engagement attacks.
Blend into Shadow
Mika Connour starts each game with up to 2 shadow tile on her Army Card. If Mika Connour ends her turn on a empty land space, you may place a shadow tile from her Army Card onto the space she occupies if the shadow tile fits normally onto that space.
Thorian Speed
Opponents' figures must be adjacent to Sgt. Drake Alexandar to attack him with a normal attack.
Grapple Gun 25
Instead of Sgt. Drake Alexander's normal move, he may move only one space. This space may be up to 25 levels higher. When using the Grapple Gun, all engagement rules still apply.
Grapple Arm
Instead of Sgt. Drake Alexander's normal move, he may use his Grapple Arm. Grapple Arm has a move of 4. When counting spaces for Grapple Arm ignore elevations. Drake may grapple over water without stopping, over figures without becoming engaged, and over obstacles such as ruins. Drake may not grapple more than 45 levels up or down in a single Grapple Arm move. If Drake is engaged when he starts his Grapple Arm move, he will take any leaving engagement attacks.
Thunder Step
Instead of moving Eltahale normally, you may choose an opponent's figure within 5 clear sight spaces of Eltahale. Place Eltahale on any empty space adjacent to the chosen figure. For the duration of Eltahale's turn, add 1 to her Attack value. At the end of her turn, roll 1 attack die. If a skulled is rolled, place 1 wound marker on Eltahale's Army Card. If Eltahale is engaged when she starts her Thunder Step, she will not take any leaving engagement attacks.
Paralzying Stare 16
After moving and before attacking, choose any small or medium figure within 6 clear sight spaces of Me-Burg-Sa. Roll the 20-sided die. If you roll a 16 or higher, the chosen figure cannot roll any defense dice if attacked by Me-Burq-Sa this turn.
Combat Leader
If at least one order marker is on Morgrimm Forgehammer, you may add 3 to your initiative roll.
Commander's Strike
After moving and before attacking with Morgrimm Forgehammer, you may choose any opponent's figure within 5 clear sight spaces that is engaged with any other figure you control. Roll the 20-sided die. If you roll a 15 or higher, the chosen figure receives 1 wound.
Mind Shackle 20
After moving and before attacking, you may choose any unique figure adjacent to Ne-Gok-Sa. Roll the 20-sided die. If you roll a 20, take control of the chosen figure and that figure's Army Card. You now control that Army Card and all figures on it. Remove any Order Markers on this card. If Ne-Gok-Sa is destroyed, you retain control of any previously Mind Shackle Army Cards.
Sacred Band Defy Death 15
When an adjacent Sacred Band receives one or more wounds, roll the 20-sided die before removing that figure. If you roll a 15 or higher, ignore any wounds.
First Assault 3
When attacking with Valguard, if the defending figure was adjacent to Valguard at the start of this turn, Valguard receives 3 additional attack dice.
Poison Cloud
When a Mezzodemon Warmonger attacks a Common figure, add 1 to its attack value.
Poison Weapons
Each time a Deepwyrm Drow attacks a small, medium, or large Hero with a normal attack or a leaving engagement attack and inflicts at least 1 wound, roll the 20-sided die. If you roll a 1-11, nothing happens. If you roll a 12 or higher, add 1 additional wound to the defending figure.
Throw 14
After moving and before attacking, choose one small or medium non-flying figure adjacent to Jotun. Roll the 20-sided die. If you roll a 14 or higher, you may throw the figure by placing it on any empty space within 4 clear sight spaces of Jotun. The figure must land clear sight of Jotun. After the figure is place, roll the 20-sided die. If you roll an 11 or higher, the thrown figure receives 2 wounds. If the figure is thrown on a level higher than the height of Jotun or onto water, do not roll for throwing damage. The thrown figure does not take any leaving engagement attacks.
Whirlwind Assault
Raelin may attack any or all figures adjacent to him. Roll each attack separately.
Helm of Mitonsoul Aura
After moving and before attacking, Runa may use her Helm of Mitonsoul Aura. When using Helm of Mitonsoul Aura, you must roll the 20-sided die for all figures within 3 clear sight spaces of Runa, one at a time. If you roll a 20, destroy the figure. Runa's Helm of Mitonsoul Aura does not affect Runa.
Spear of Summoning
After moving and before attacking, choose any figure you control on the battlefield, then roll the 20-sided die. If you roll a 1-8, nothing happens. If you roll a 9-20, move the chosen figure to any space adjacent to Saylind. If the summoned figure is engaged, the figure does not receive any leaving engagement attacks.
Mind Shackle 19
After moving and before attacking, you may choose any unique figure adjacent to Kee-Mo-Shi. Roll the 20-sided die. If you roll a 19 or 20, take control of the chosen figure and that figure's Army Card. You now control that Army Card and all figures on it. Remove any Order Markers on this card. If Kee-Mo-Shi is destroyed, you retain control of any previously Mind Shackle Army Cards.
Toxic Skin
After attacking, you must roll the 20-sided die, once for each figure adjacent to Kee-Mo-Shi. If you roll a 17 or higher, that figure receives one wound. Soulborgs are not affected by Toxic Skin.
Mage Hand
After moving and before attacking, you may choose a Treasure Glyph on a unoccupied space within 4 spaces of Heirloom. You may move that Treasure Glyph onto any empty same-level space adjacent to Heirloom. Symbol-side-up Treasure Glyphs cannot be revealed, and power-side-up Treasure Glyphs must be placed power-side up when moved by Mage Hand.
Lurking Ambush
If Othkurik starts his turn unengaged and on at least one shadow or swamp space, for this turn add 1 to Othkurik's movement and add 3 to his Attack value.
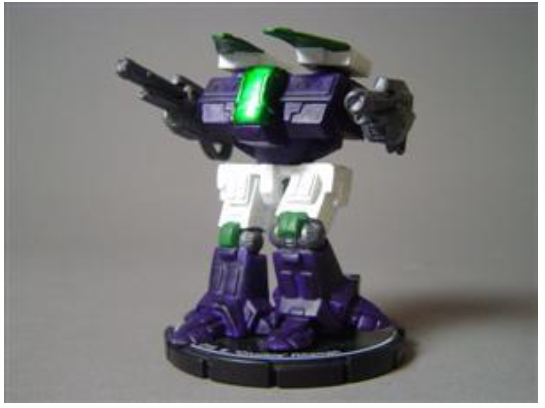
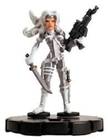
The figure used for this unit is a Mech Warrior figure from Solaris VII Heavy-Class Action Pack set. Its model name is Rifleman. The figure used for this unit is Caravan Guard Angelfire #001 Wizards of the Coast set.
The figure used for this unit is Silver Sable #034 - #036 Mutant Mayhem Heroclix.
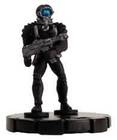
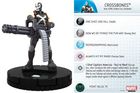
The figure used for this unit is Sakaaran Commander #007 Guardians of the Galaxy Gravity FeedHeroclix. The figure used for this unit is U-Men #001 - #003 Mutant Mayhem Heroclix. The figure used for this unit is HDC Trooper #004 - #006 Unleashed DC Heroclix. The figure used for this unit is Nova Corpsman #003 Guardians of the Galaxy MovieHeroclix. The figure used for this unit is Kobra Fanatic #014 - #015 Unleashed DC Heroclix. The figure used for this unit is Crossbone #009 & #206 Invincible Iron Man and Invincible Iron Man Gravity Feed Marvel Heroclix.
The figure used for this unit is Amphibian Beast #001 Yugioh! Heroclix Series One. The figure used for this unit is Dragon Piper #024 Yugioh! Heroclix Series One.
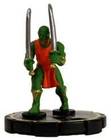
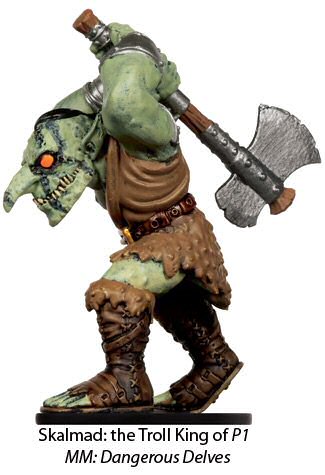
The figure used for this unit is a Troll from the D&D set. The name and model number is Skalmad, the Troll King Dangerous Delve #34.
The figure used for this unit is a Bladerager Troll from the D&D set. The name and model number is Bladerager Troll Dangerous Delves #7.
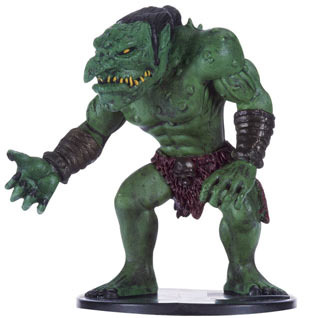
The figure used for this unit is Feral Troll from Auggies D&D Set. The name and model number is Feral TrollTyranny of Goblins #2/12.
The figure used for this unit is Arclight figure from Uncanny X-men : Marvel set. Its model name is Arclight.
Deadly Strike
When attacking with Skalmad, each skull rolled counts as one additional hit.
Regenerate
After taking a turn with Skalmad remove 1 wound marker from Skalmad's Army Card.
Paralyzed by Fear
If Skalmad is attacking an opponent's figures that is adjacent to a Troll figure, subtract 2 to the defending figure.
Number of Figures = 1
Targeting Point = Head
Grey Area = Weapon
Hero Spotlight:
Spoiler Alert!
This Troll Lord is bigger than your average Troll. Skalmad mini is a huge figure, hope his Special Powers are to everyone liking. Troll Dynasty allows you to take a turn with 1 unique Troll or 2 uncommon Trolls. Auto-Regenerate is like Cold Regenerate, but you don't have to be on a ice or snow tile to remove an additional wound.
_________________________________________________________________ -Rulings and Clarifications-
Troll Dynasty : Adjusting Figures Before ActivationBefore taking a turn on Skalmad's Order Marker, may I reposition figures so that they are within line of sight of Skalmad, and then take a turn with them?
Yes. Hasbro's Advanced FAQ article states that on a player's turn, the player may adjust
the positions of friendly figures.
- ORNAK : Red Flag of Fury
As a Unique Hero that follows Utgar, Skalmad may benefit from Ornak’s RED FLAG OF FURY activation synergy.
Synergy Benefits Offered
Paralyzed by Fear
An opponent's figure subtracts 2 to defense if adjacent to another Troll you control. Current Trolls include: Feral Troll Ice Troll Berserker Krug - WARRIOR’S ARMOR SPIRIT 1 : Any Unique Army Card
* WARRIOR’S ARMOR SPIRIT 1 may benefit any unique army card still in play.
WARRIOR’S ATTACK SPIRIT 1 : Any Unique Army Card
* WARRIOR’S ATTACK SPIRIT 1 may benefit any unique army card still in play.
- WARRIOR’S SWIFTNESS SPIRIT : Any Unique Army Card
* WARRIOR’S SWIFTNESS SPIRIT may benefit any unique army card still in play.
C3V and SoV Custom Synergies
Spoiler Alert!
Synergy Benefits Offered
WARRIOR'S CHARGING SPIRIT: Manauvi's spirit can be placed on any Unique Army Card with a range of 1. Manauvi's spirit adds 2 to the Move value of that card. WARRIOR'S MELEE ATTACK SPIRIT: Bahadur's spirit can be placed on any Unique Army Card with a range of 1. Bahadur's spirit adds 1 to the Attack value of that card.
Synergy Benefits Received
N/A
Synergy Imposed
N/A
The figure used for this unit is a Troll from the D&D set. The name and model number is Skalmad, the Troll King Dangerous Delve #34.
Xin Shao
Way of the Fist 1/1
Bio:
Spoiler Alert!
TBD.
CARD TEXT:
Spoiler Alert!
Name = Xin Zhao General = Einar Planet = Earth Species = Troll Uniquity = Unique Type = Hero Class = Pugilist Personality = Abrasive Size = Medium Height = 5
Master Stats Life = 5 Move = 6 Range = 1 Attack = 3 Defense = 3
Indomitable
If Xin Shao begins its turn unengaged, add 2 to Xin Shao Move value.If Xin Shao begins its turn engaged, add 2 to Xin Shao Attack value.
Battle Frenzy
After attacking with Xin Shao, roll the 20-sided die. If you roll a 16 or higher, you may attack again with Xin Shao.
Battle Rage
Add 1 to your D20 for each wound marker on Xin Shao.
Number of Figures = 1
Targeting Point = Head
Grey Area = Weapon
Hero Spotlight:
Spoiler Alert!
This brawler is tougher for a fighter. Xin Shao mini is a medium figure, hope the Special Powers are to everyone liking. Indomitable adds 2 to your Move value if unengaged & adds 2 to your Attack value if engaged. Battle Frenzy allows you to attack again if you roll a 16 or higher on the D20. Battle Rage enhances your D20 roll by 1 for every wound marker on Xin Shao Army Card.
_________________________________________________________________ -Rulings and Clarifications-
N/A
- WARRIOR’S SWIFTNESS SPIRIT : Any Unique Army Card
* WARRIOR’S SWIFTNESS SPIRIT may benefit any unique army card still in play.
C3V and SoV Custom Synergies
Spoiler Alert!
Synergy Benefits Offered
WARRIOR'S CHARGING SPIRIT: Manauvi's spirit can be placed on any Unique Army Card with a range of 1. Manauvi's spirit adds 2 to the Move value of that card.
Synergy Benefits Received
N/A
Synergy Imposed
N/A
The figure used for this unit is Arclight figure from Uncanny X-men : Marvel set. Its model name is Arclight.


 May 19th, 2018, 12:19 PM


 Similar Threads


 Linear Mode
