Rowboats
2 man cheap rowboats for heroscape! Another 20 minute project ( or an hour if you do the full planked deck!!)
There are actualy a few cool rowboats out there, they can be found in :
Pirate battles board game ( Brings 2)
Lego Row Boats ( kinda small )
Mega Bloks ( 2 types, the one that comes with pirate sets and ships and the one from set 1012 Dead mans chest, its kind of a flat board with railings)
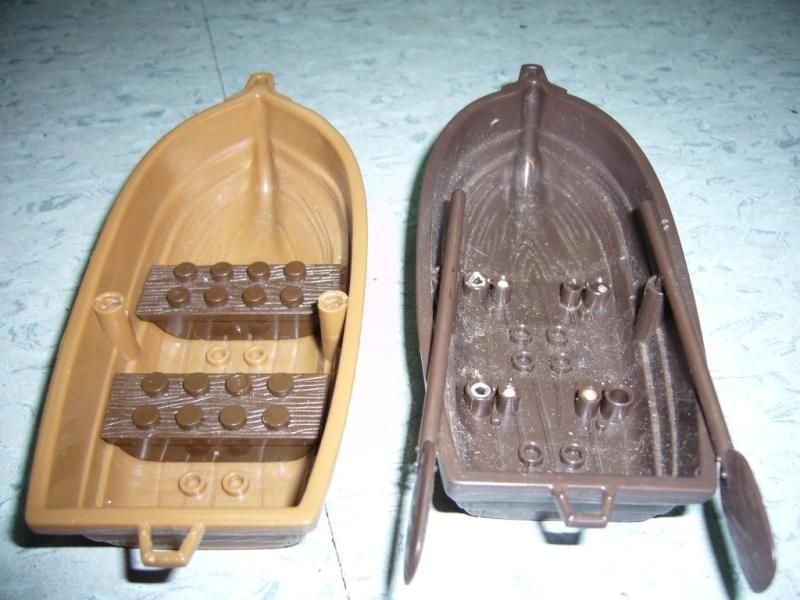
The hulls I used for this custom was the Mega Bloks rowboat that comes with a bunch of different pirate sets or with the mega bloks ships. They are pretty cheap and can be found often on ebay for around $4-$6 each but normaly as part of a larger lot of loose mega bloks. Some times you will see them posted as lego because most people do not know the difference. They come in a several shades of brown.
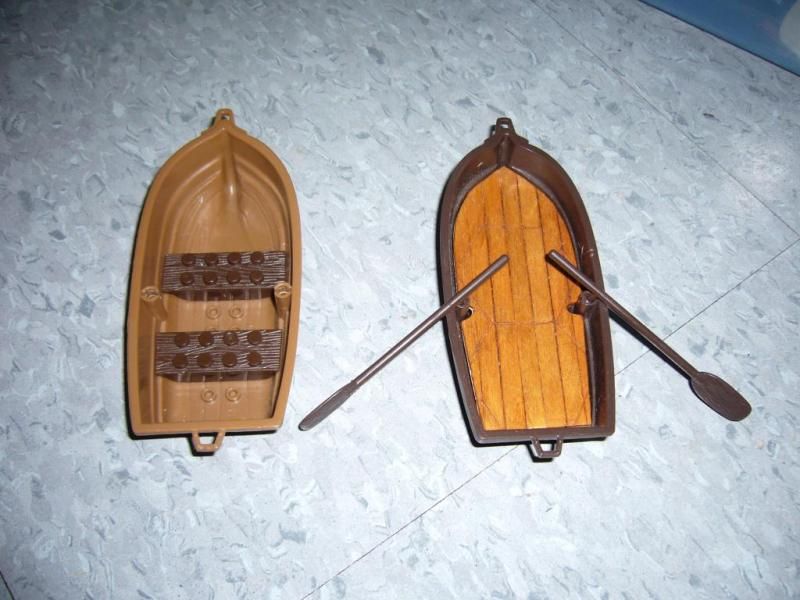
This is my before and after picture. This project should not take more than half an hour if you print out the deck and a half hour more if you build the deck from scratch.
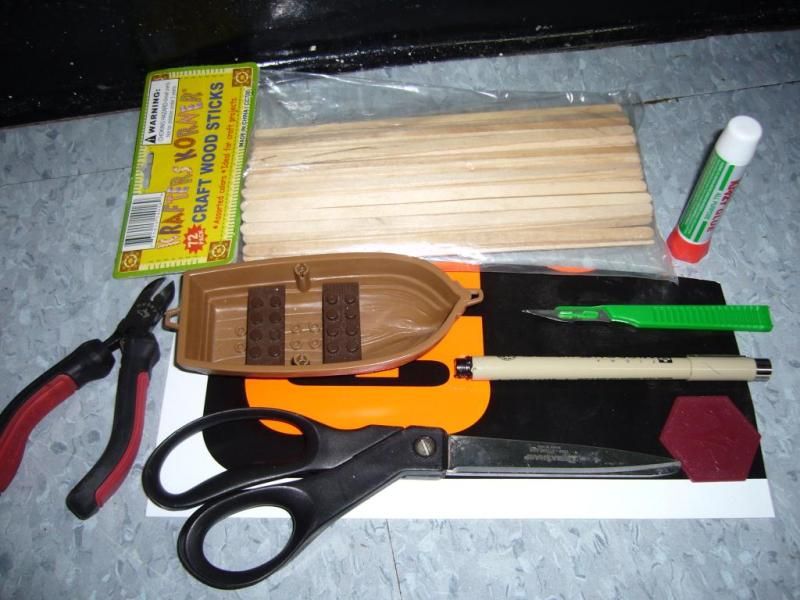
Here are the materials used. If you decide to print out the deck then you will need some simple white glue and a printer instead of the popsicle sticks.
Here I used
Clippers or Needle Nose Pliers
Sharp Scissors
Peice of thin plastic for the deck ( very expensive plasticard or really cheap * For sale signs* from Kmart / Walmart )
Thin magic marker to draw the hexes or a pencil
Popsicle sticks ( either buy a small pack or just raid your local coffee shop)
Crazy glue or another strong quick setting glue
Xacto Knife or hobby knife ( or in my case a scalpel )
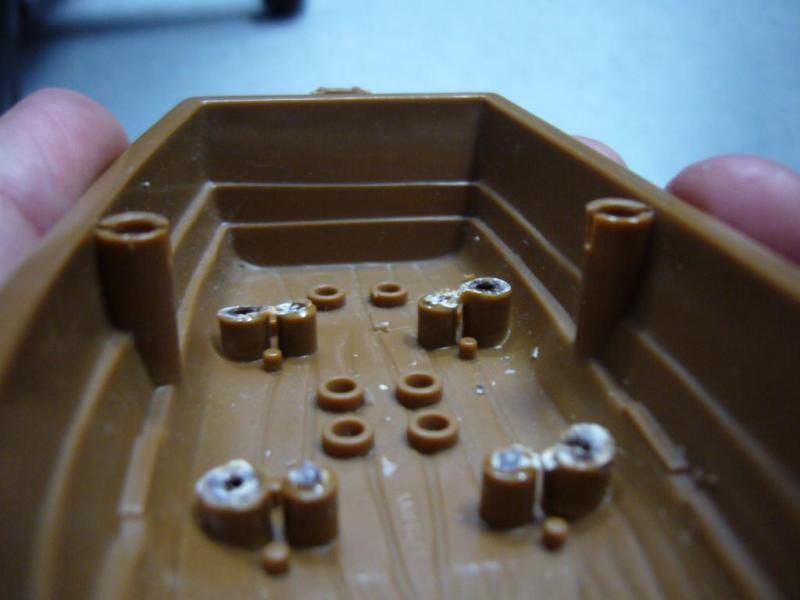
First thing I did was just to rip out the two little benches. Dont worry about being gentle as they can be pried off pretty easy with your pliers or just stick a screw driver under them just carefull not to damage the upper edges of your rowboat.
Once you remove the bench, you may have to clean up the pegs. They have to be flush with your lower edge or your deck will teater-toter back and forth. The lower edge of the hull is where you will "sit" your deck.
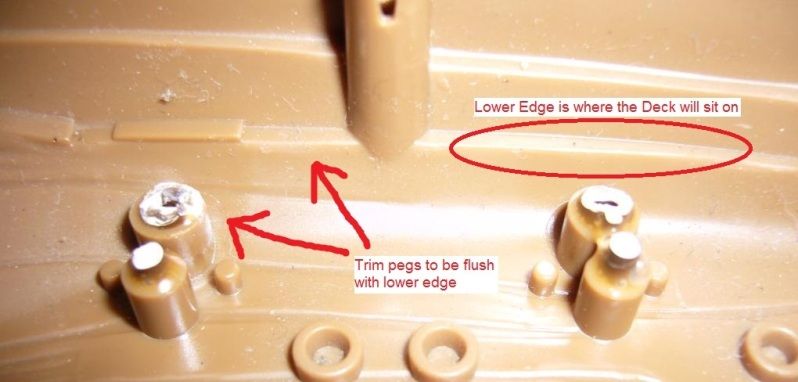
Nothing fancy, just clip or cut away those messy tops. Make sure they end up flush.
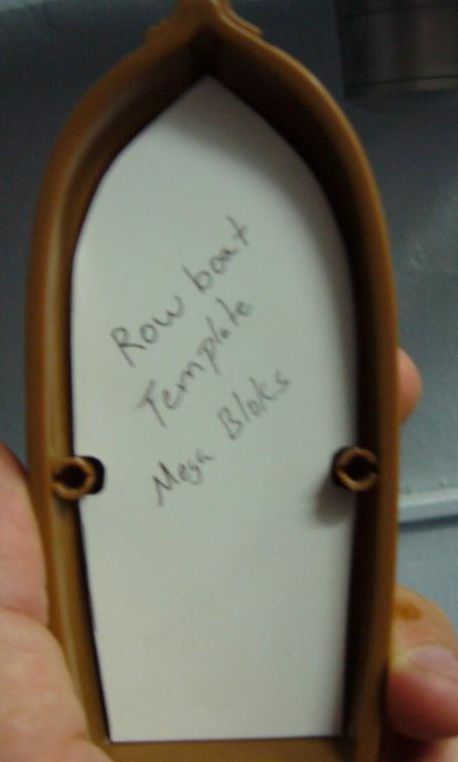
Now this is what takes the most time when building any ship, its the template. Some people like to plank directly to the hull, I suggest making a template, stick your deck onto the template then glue it on the deck. Easier to build, and easier to paint. I will demostrate two different decks you can use but they will both use this template to save you time of having to carve and test fit your deck untill it fits your hull.

I will need help with this. I am not sure how to scan and post a template so that every time you print it, it comes out the right size. As I am limited on my computer skills I will ask for help later making a better template. For now, when you print this one make sure you do it the normal size and not FIT TO PAGE.
For me, I just open it on PAINT, and click on PAGE SET UP, then turn off the option FIT TO PAGE, so that it prints out the normal size. I am sure there is a better way, if any one knows how please let me know

Once you have your template printed out, either cut out the paper template and trace it on your plastic sheet of paper ( Seriously these cheap signs from walmart are pretty much the same thing as plasti-card) For my decks I choose the much larger 2 foot signs ( HOUSE FOR SALE) because they are much thicker and only cost $4. They are great for making solid decks easy to trim with scissors.
Any how, once you trace and cut out your plastic deck, test fit it inside your rowboat, trim as needed but try not to cut out too much as then it will look sloppy or just not sit right. Its better to trim very little at a time then having to start over.
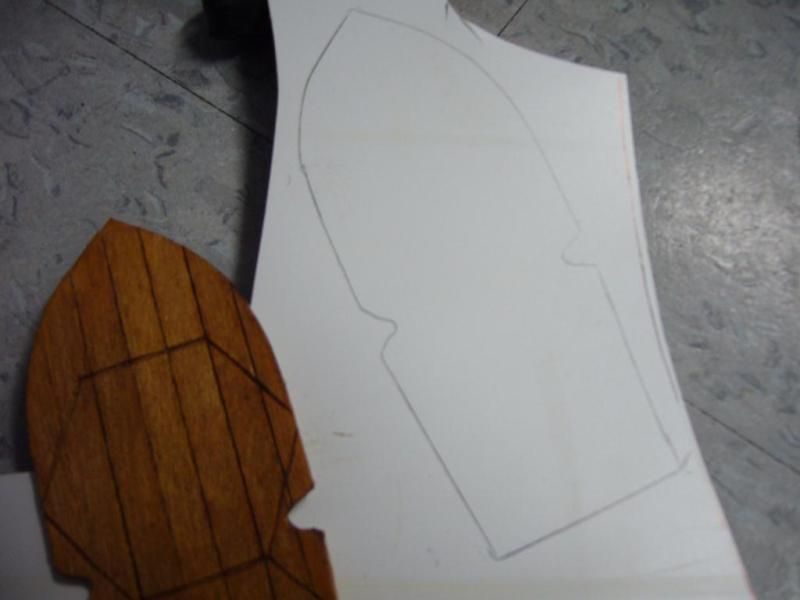
Since I know I am going to be making about a dozen of these rowboats I take my best plastic deck and scribble TEMPLATE over it to avoid me using it and instead use it as a master template to make more copies with. Try using a sharp pencil or very thin marker as this is thicker material when you trace it will make the copy larger then it should be unless you get very close in to the edge when tracing.
Now comes the fun part.
You can either Deck your ship with Option A or B
Option A , print out a deck pattern and glue it on your plastic deck, trim it again, draw your hexes on it and your done in 10 minutes OOOOOORRR
My favorite,
Option B actualy plank the deck!!
Option A - Printed deck
Spoiler Alert!
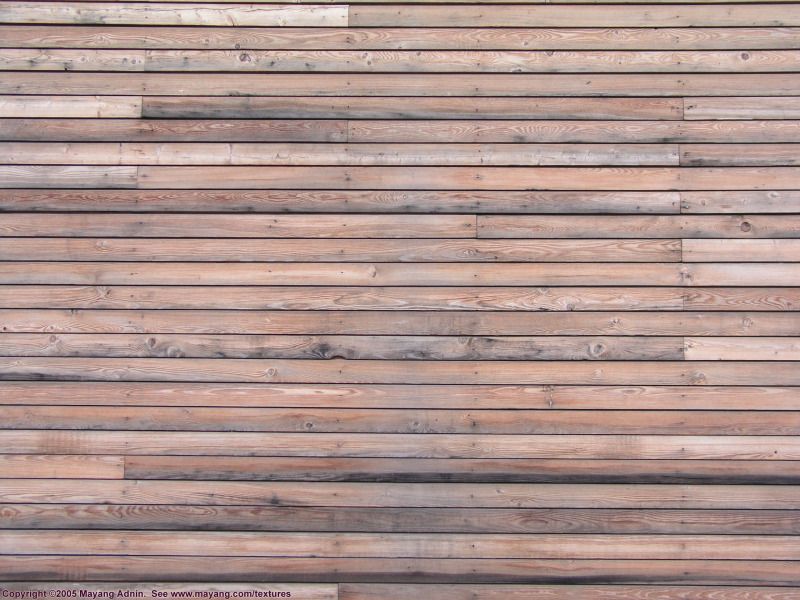
There are a lot of wooden plank templates you can find online, all sorts of wood colors, I found this one I liked and had the right size.
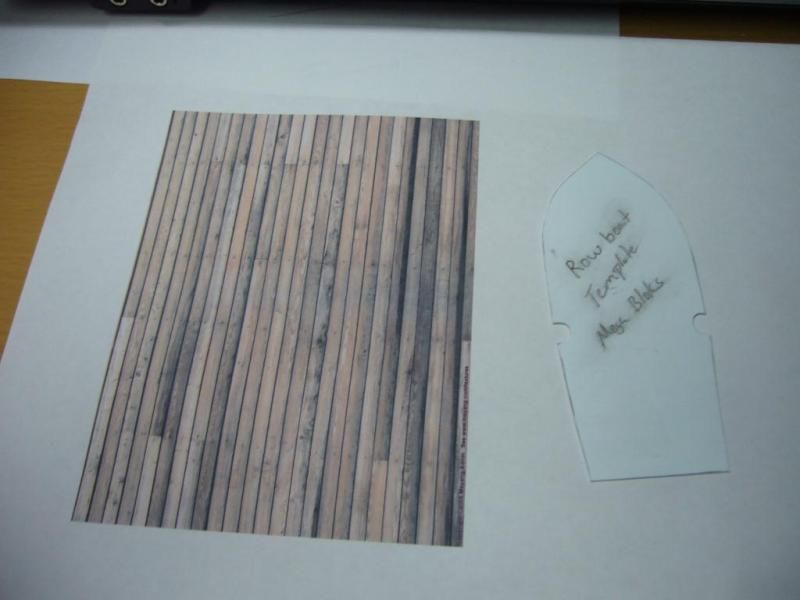
Here is the original picture, make sure to print out in the best quality to make the colors stand out.
Now remember that I mentioned not being really good with computers? I still use Paint to edit my pictures since I have never tried to learn Photoshop. ( I really should too)
This is how I managed to print this picture to get it the right size. I am sure some one else can explain it in a better way.
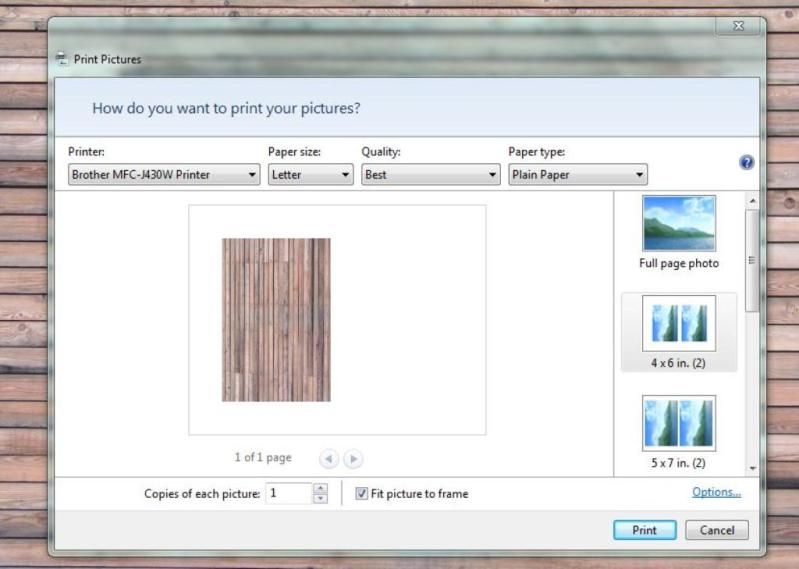
I choose the 4X6 setting to get it to print the right size.
Once printed I just glued the paper right on my template waited till it was dry and trimmed it out.
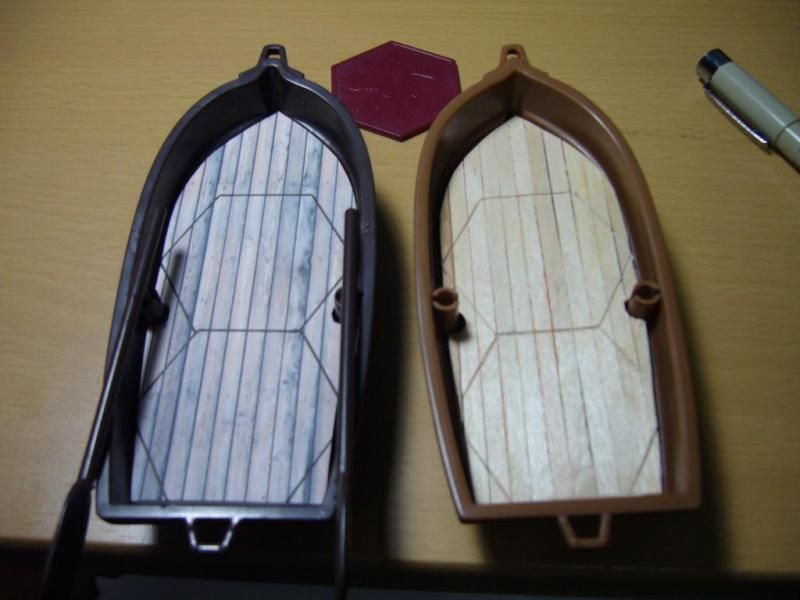
Ill post the finished effect in the bottom of this guide. No painting needed and super easy to do. I Like keeping the original colored plastic hull of the rowboat since it makes it match the rest of the board better.
I was surprised on how well this looked and will try this method on a much larger ship next time.
Option B WALK THE PLANK!! I mean plank the decks!
Spoiler Alert!
This is really not needed but its a lot of fun to do. I had no idea the printed version would look that good but I still prefer making my own decks as it gives it a realistic grainy look I enjoy. This will add another 30 minutes to your build time.
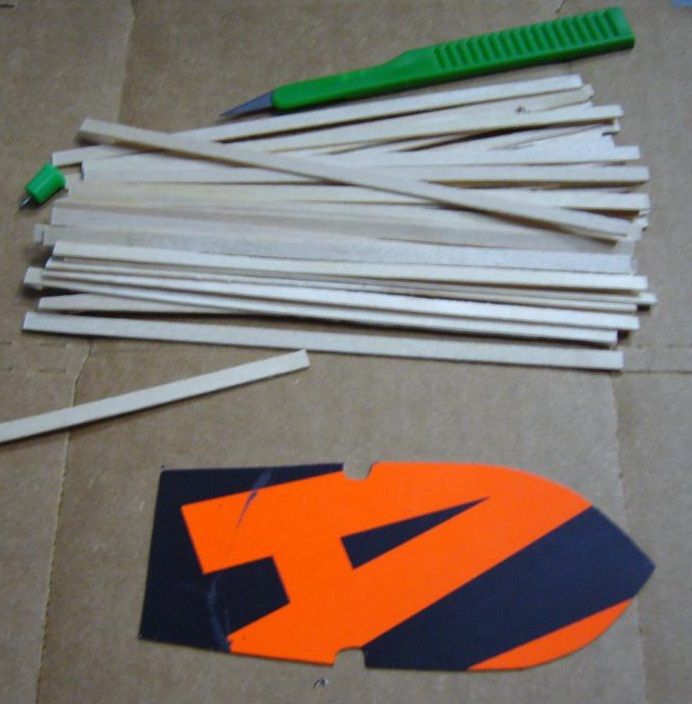
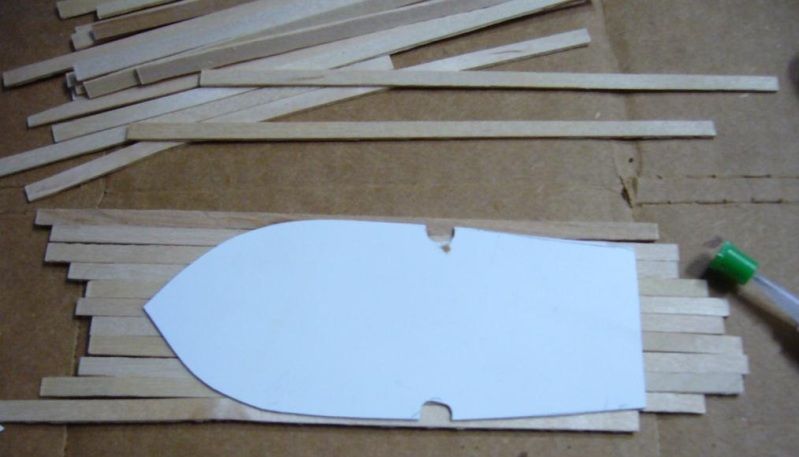
First measure up about 10-15 popsicle sticks to choose the straight ones and avoid setting down some messed up crooked ones into your crazy glue.
Also glue them on to the dark side of your template or paint your black to avoid white cracks in between your planks in case they dont all line up pretty.
I make a line of crazy glue down the middle to serve as a guide to line up all my other "planks". Crazy glue might squeeze through your planks and dry on the top if you use to much, this only affects you if you wanted to stain the wood with varnish and will change the effect. You will have to lightly sand your plank to give it a smooth soft finish and this will help get rid of the excess glue if it does happen to stick out. You can use slower drying glue but this drives me crazy and makes planking so much harder for me. Must be lack of skill but I am working on it.
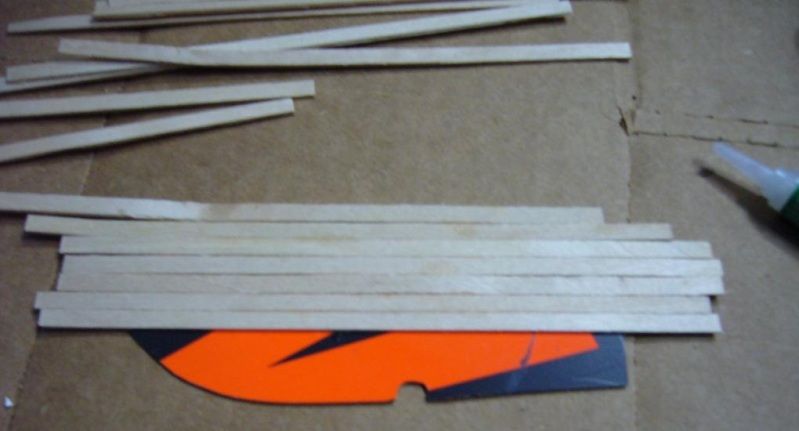
Once I have pressed the planks one at a time together and lost my figureprints along the way and spilled glue on the Paramedics work table or glued little bits of wood to my work uniform. I finished the deck in just a few minutes. I let it dry for about 5 minutes while pressing it down flat on the table to make sure everything is flat and straight.
Now just use your scissors and trim it, the scalpel works great for the little corners.
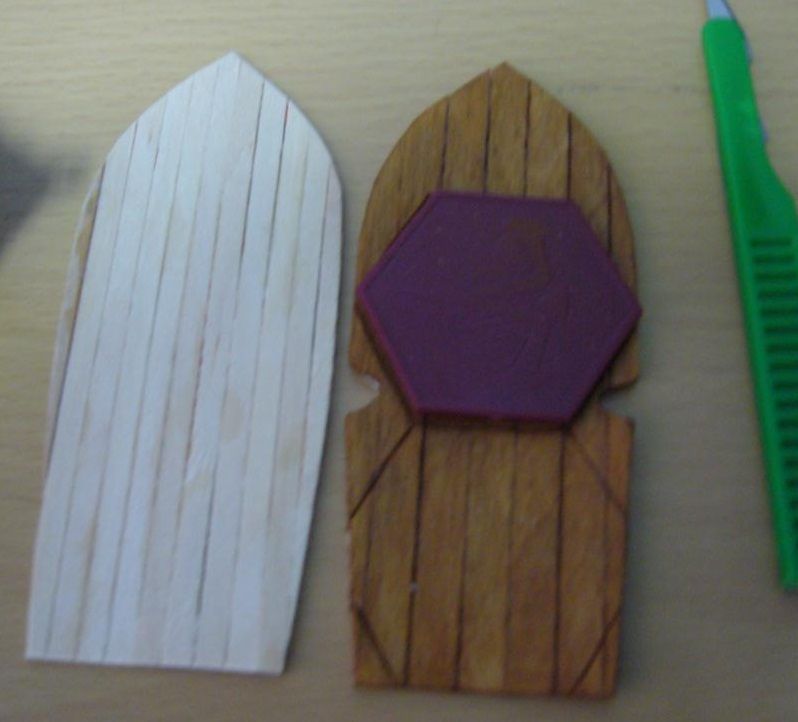
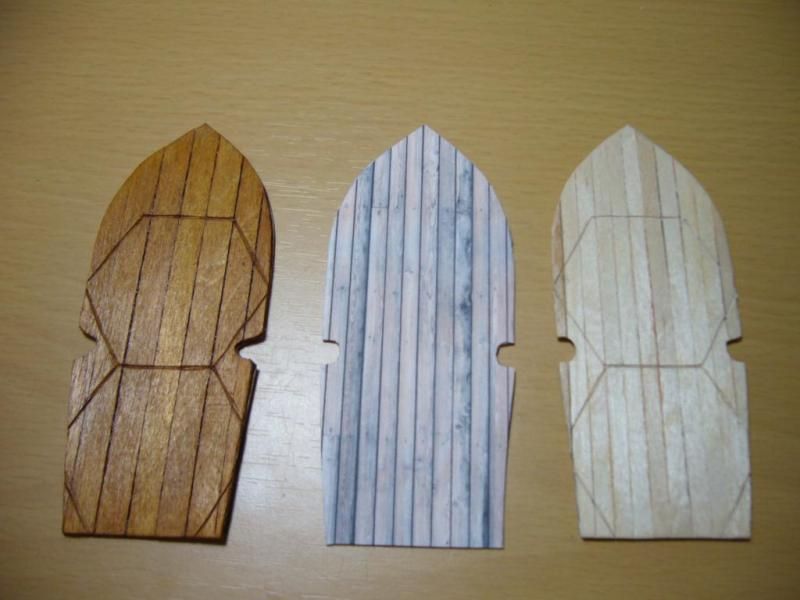
Once your deck has been made you can either leave it like that, or you can paint it or stain it with wood varnish. The one on the left is the normal color the one on the right is cherry wood stain I think.
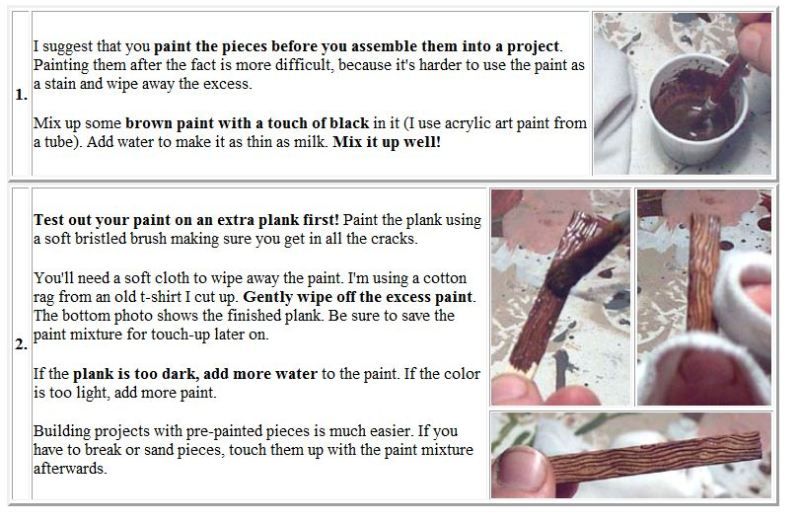
Here is a simple wood painting guide I found from hirst arts.
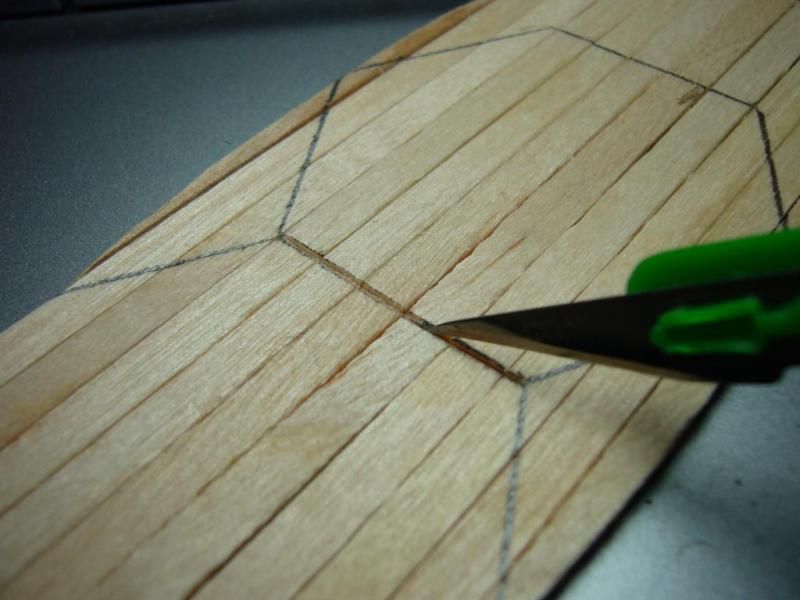
I like putting hexes on all my terrain to make it look official. Here I traced 2 hexes using a glyp. I started from the bottom and traced upwards. Once I had my pencil lines I carved them out with my scalpel. I did 2 cuts on each line, each one diagonaly to carve out a little
V where the line was. When painted or stained it really stands out. You could always just draw your hexes with a thin marker, most of these details will not be noticed from tabletop distance anyway.
Here is a completed unpainted planked deck. Took me about 15 minutes start to finish with crazy glue.

Here are the two versions of the decks I showed you, I must say although I am a fan of the planked deck, the second easier to do deck the printed out one, looks really neat and even better then mine. I really must give this a try on my larger ships. After I took this picture I drew Hexes on the printed deck.
Here are my two decks, one took less then 20 minutes and the second a little over half an hour, both easy to do.
Now I need to look up several rules I saw posted on the boat thread.
Go check out the
BOATS thread on these same forums, there are several cards made and on
Page 7 there are a lot of great ideas on how to use rules for these boats, I hope they get updated!