
|
|
|||||||
| C3G Legacy Archive of all the original discussions and workshops from the first stage of C3G. |
 |
|
|
Thread Tools | Search this Thread | Display Modes |
|
|
|
#1
 February 1st, 2012, 04:20 PM
|
||||
|
||||
|
Custom Sentinel Figure Tutorial
Sentinel Tutorial: How I made my C3G Sentinels
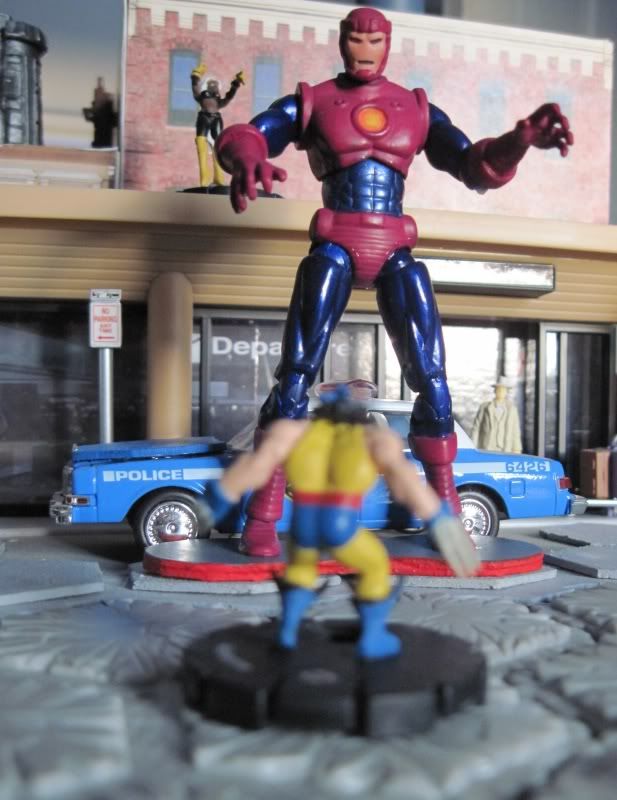 I started out by hitting up the Iron Man action figure aisle of the local Toys R’ Us. When I arrived I wasn’t exactly sure what I was looking for and found a ton of options, more then I was expecting. Since I knew I needed 4 Sentinel figures just to maximize their abilities, I started by picking through the rows of figures to see which ones they had 4 of in stock. That left me with 4 choices, one of which had a triangle on its chest instead of a circle. In the comics the Sentinels have been redesigned and rebuilt many different times, with each one looking slightly different, so in the end you can choose whichever one you like best. The process I used should transfer easily to any of the different figures. I ended up going with the one below, the reason I picked that one was simply because it already had nice metallic blue armor which I figured would save me some painting time. 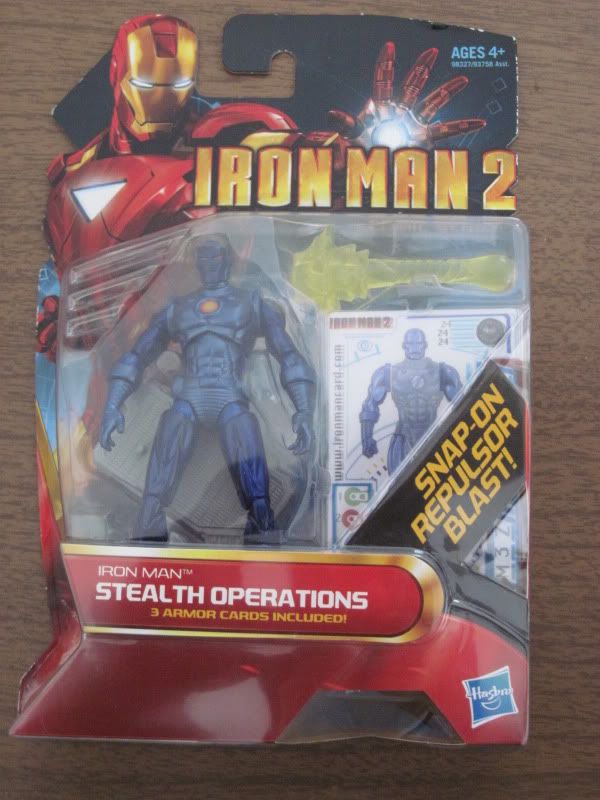 After getting home and opening the packages I found that my choice had some good and bad consequences. The good news was that when I stood the figure up on its base, it leaned forward slightly with its head angled so that it looked downward. Not really sure why the toy designers made this it’s natural pose, but it works out perfectly for us as the Sentinels should tower over their foes, looking down at them. You can see what I mean in the photo below. Not sure if the other Iron Man figures I passed on have a similar pose but I was happy to discover that this one did. 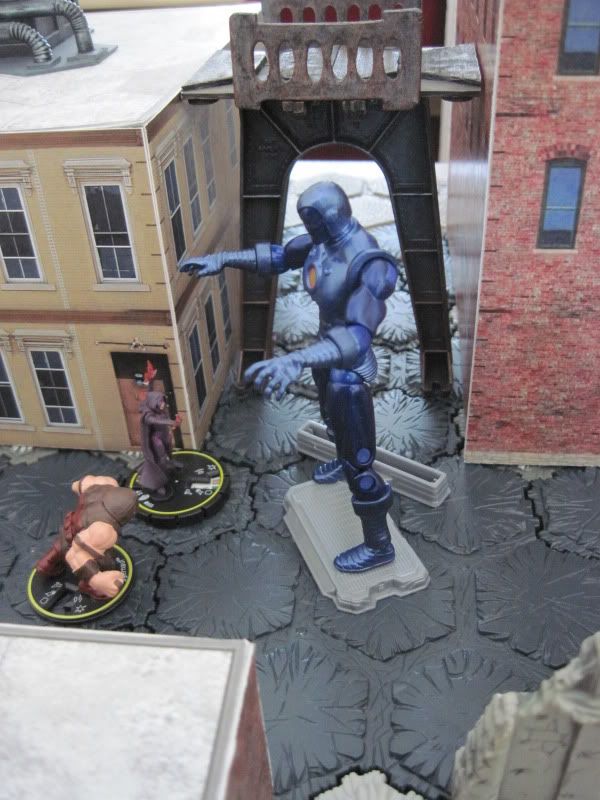 The bad news was the toy designers also decided to give this Iron Man suit a widow’s peak. This particular feature does not mesh well with the classic Sentinel look. So I began researching how the head should look and thinking about how to change my figure to better represents a Sentinel. The thing that really gives a Sentinel its distinctive look is the skull cap type helmet and chinstrap, so this is what I set out to recreate. 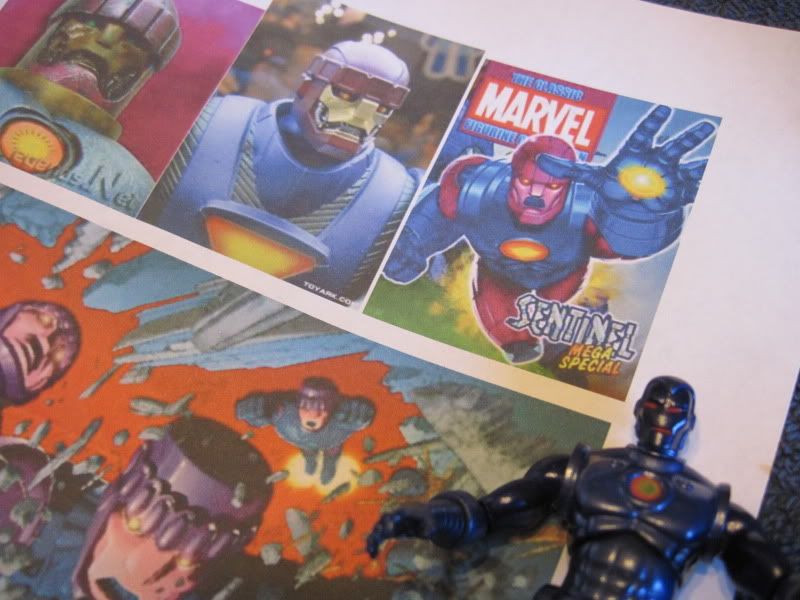 I already owned some of the sculpting putty sold by Games Workshop and this looked like a perfect time to put it to use. They also make some ‘green stuff’ that comes in a tube, so you don’t have to buy the product Games Workshop puts out, it is just what I had on hand. I had actually never used sculpting putty before this project, so I consulted with a friend who had used it quite a bit. So I’m not an expert in its use but I will pass on what I learned from this experience. 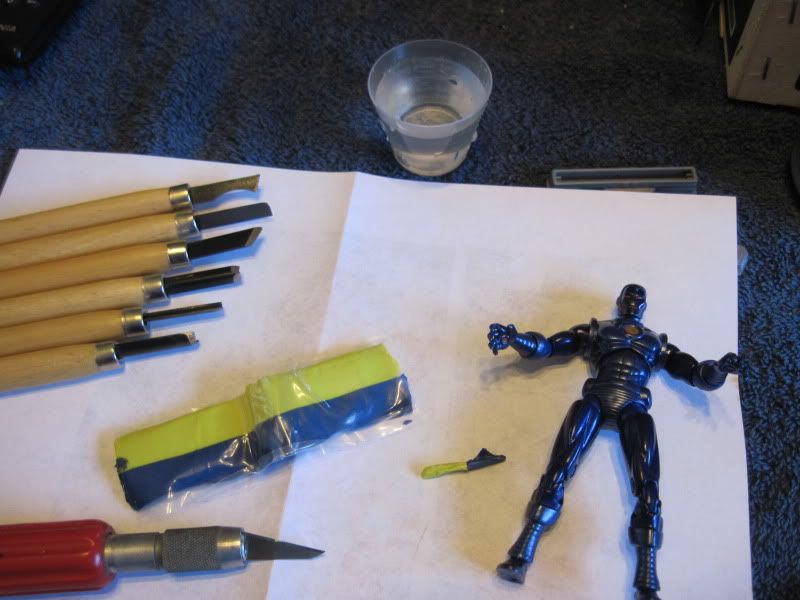 Begin by collecting some tools that may come in handy when sculpting and a small cup/dish of water. Wet the tips of your fingers and any tools you are about to use before working with the sculpting putty, this will make it easier to work with. If using the GW stuff, cut a thin slice off one end and fold the two colors (blue & yellow) together. Continue mashing the stuff together until it turns a uniformly green color. Roll it between your fingers into a ball, then into a string. At this point I pressed the string flat using the sides of two of my tools so that it became a thin flat strip. Now just wrap this flat strip around the top of the figures head to form a crown. Cut off or add extra as needed to complete the circle while keeping the thickness of the crown uniform. 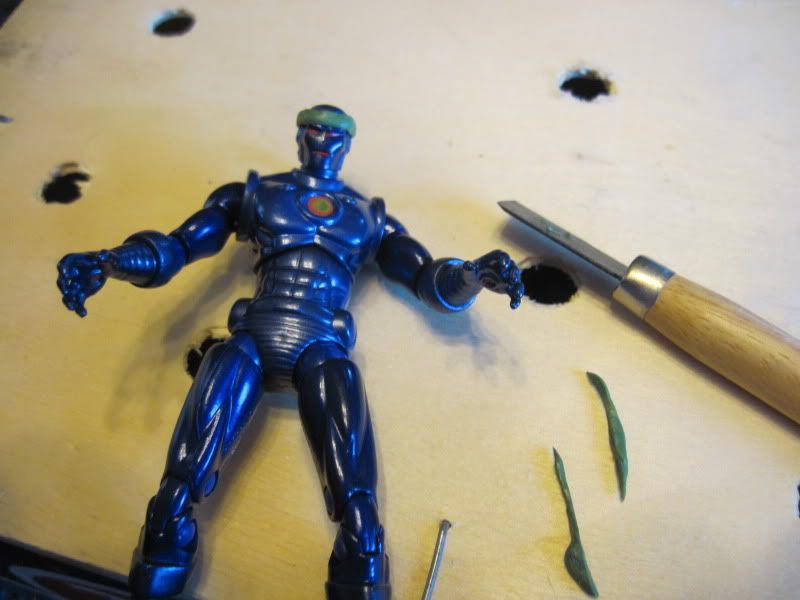 Now use the excess to roll out another strip and wrap that down around the figures jawline to form the chin strap. The green stuff will be a bit lumpy and bloated looking in some spots as the flat strips will not hold their shape during the application process. You can click on these pics to make them larger and get a better look at what I’m talking about. You will need to smooth the green stuff out and reshape it, my friend recommended I use a tool with a rounded edge for this process. He let me use the tools he had found to work the best for him and he said they came from a little fingernail care set. 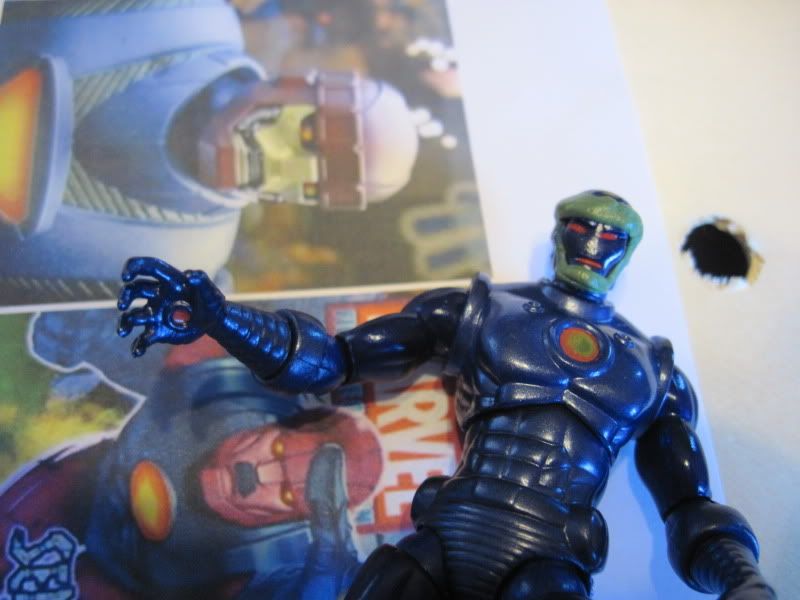 During this process you will want to make sure to dip the tools into the water again and again. The water will help keep the green stuff malleable. You are best off trying to smooth out the top surface first. It will bulge out on either side as you do this. Once uniformly flat and smooth you will want to reshape the sides so that they follow straight lines. It takes a little bit to get the hang of the first time you try it but soon you will see that you can work the green stuff along the edges from where there is too much to where more is needed. Pulling the pushing the green stuff into position. Hopefully you can see the difference in the pics above and below. 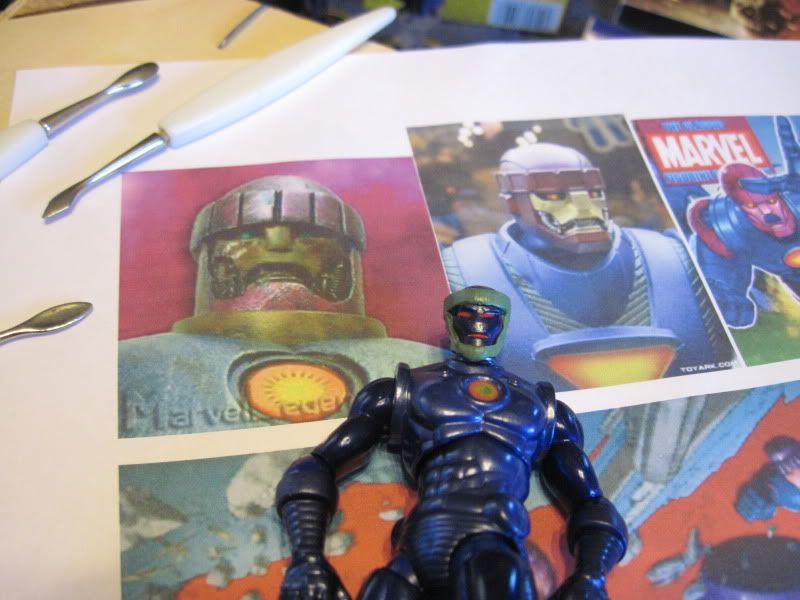 Once you are fairly happy with how it looks, you will then want to lay out where the crown will be sectioned off. As you can see from the pics I found, the crown comes in many different styles. Since I was new to working with this medium, I went with the most simple and straight forward looking one. I had considered using one of the wood working tools I had with a rounded edge to try and recreate the oval bubble style crown but ended up not attempting it. You can try to recreate whatever look you want here, the green stuff will easy to work and rework for 6+ hours so if you don’t like how something turns out it is easy to just restart the process. For me I started out by using a flat straight edged tool to mark a line between the figures eyes. Then looking down at the top of the crown, I marked off a line along the top edge directly opposite from that first mark, cutting the circle into two halves. I then subdivided the circle into quarters by marking off lines directly opposite each other half way along the side of the head. Now divide each quarter in half with another mark, leaving you with 8 sections. One more subdivision and you are done. With the lines planned out and evenly space, next up is just extending those lines down through the whole strip. 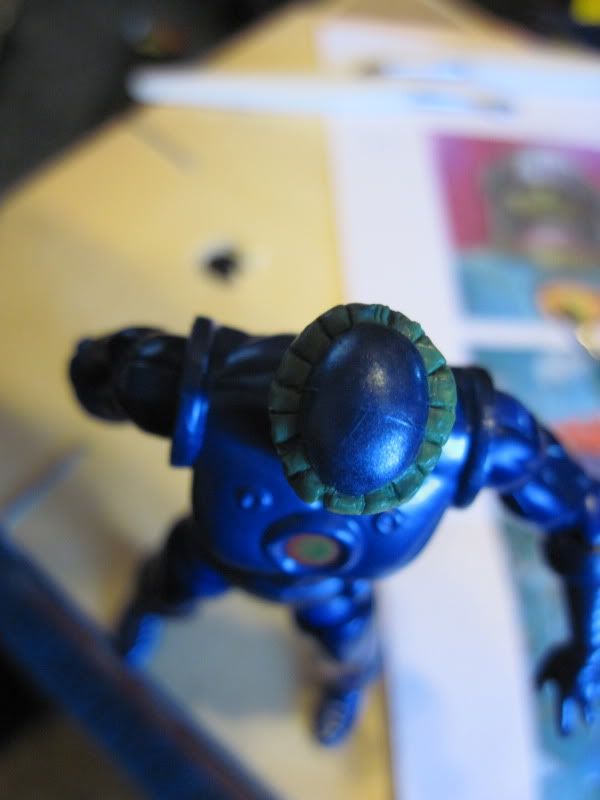 When you press down to form the lines on the smooth surface, green stuff will be pushed out the ends and your smooth surface might bulge up some. Wet your bladed tool and trim off this excess green stuff that pushed out the ends. Now you will have to go through the process of smoothing and shaping again (make sure to wet you tools again), this time careful to leave the horizontal lines you just added intact. Other than the first line you put in between the figures eyes, the only other lines I lined up with anything were the two directly above where the chinstrap meets the crown. Following the two edges of the chinstrap, I made sure one line was directly above each side. If one line is not exactly how/where you want it, it is easy to just fill it in and try again. I also added a vertical line separating the chin strap from the crown now and spent a little more time working the bottom of the chin strap, using some of the cut off excess green stuff to beef up the bottom most part. While the figures jaw line is a bit rounded in shape, you actually want your green stuff to follow more rigid straight lines in order to give it that mechanical/robotic look so really try to give it a hard industrial looking edge now as this is the final step of the sculpting process. 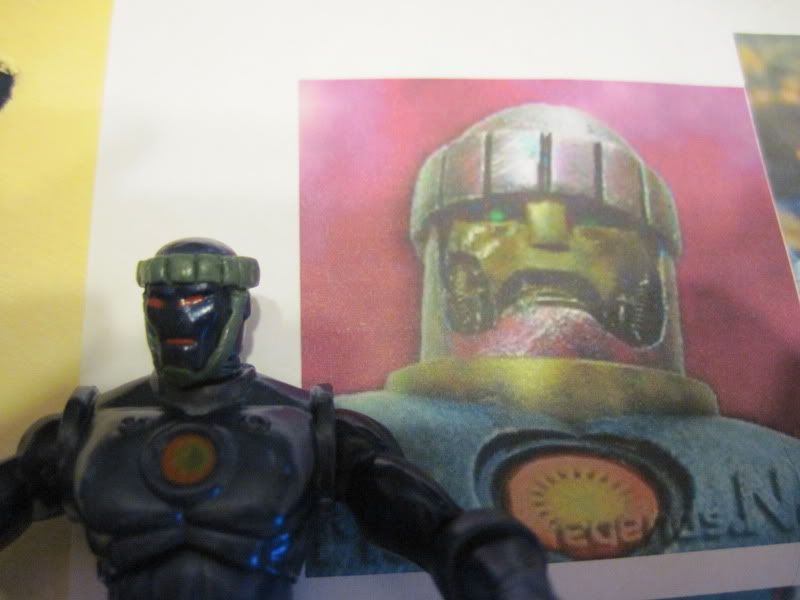 I thought it best to repeat the sculpting process for all four of my figures instead of trying to complete one Sentinel at a time. I did not want to risk getting distracted and trying to recreate what I did on one 6+ months later just to keep getting different results. I thought by doing all the sculpt work in a short period of time I could maintain the uniform look you would expect to find from an industrial process. I was wrong though as I found it quite difficult to make all four of them exactly the same, I suppose that is why sculptors made molds. Under close inspection you will see the four crowns and chinstraps vary in thickness and shape somewhat. I also caution that you may only want to limit yourself to one per day. After finishing the first one, I was quite happy with how it looked so I dived right into a second one. The tedious nature of the working and reworking of the putty can tire you out mentally though. By the time I was half way down with the second one I wanted to quit for the day but could not as the green stuff would harden over time, which led to a bit of a rushed job. By the time I was working on my 4th one a few days later I was similarly burned out on sculpting and rushed it a bit so you may have better results breaking up monotony of repeatedly sculpting the same thing by painting each one as you finish the sculpting process instead of doing them all as a group. 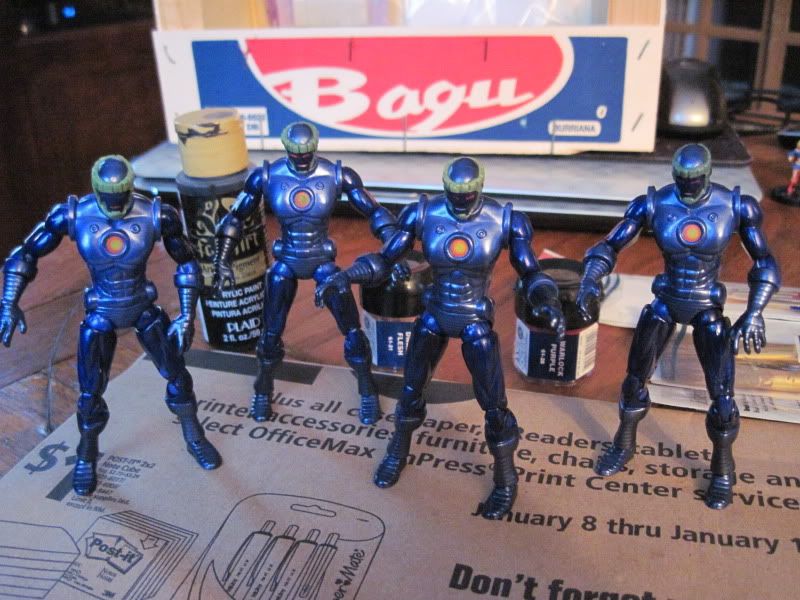 After letting all the green stuff 24 hours to dry and harden, you are ready to start painting. Begin by applying a base coat to all the parts you intend to paint. The base coat helps the later layers of paint to stick to the figure better and will have an effect on the next layers color hue. A black base coat will give you a darker shade, and a white base coat will make the colors appear a bit brighter. For this step I just use some cheap black craft glue as I wanted a darker shade from my next layer of paint. Just make sure to add some water to the paint as you only want a thin coat of paint for the base coat. During this step I was careful to not paint over the red lines already present to represent the figures eyes and mouth, as I intended to leave those as is and not try to repaint them. 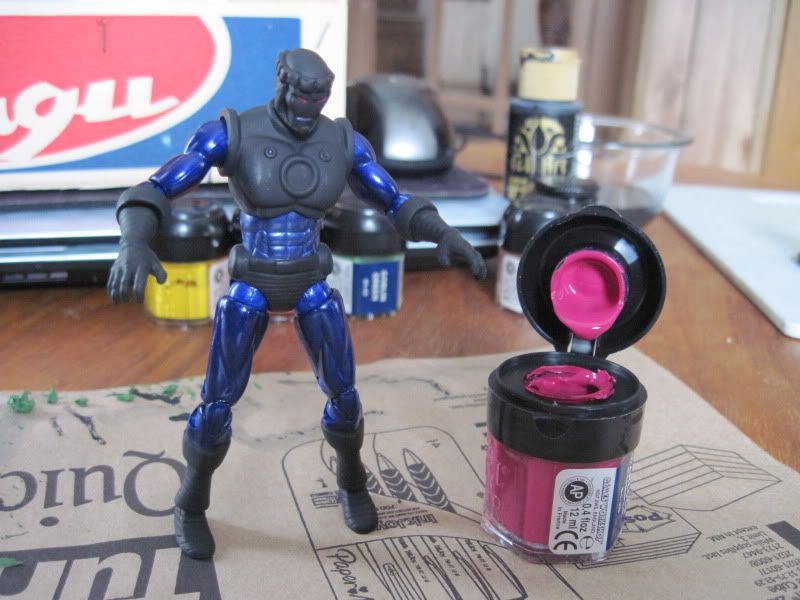 For the purple parts I used the GW paint color ‘warlock purple’ as it seemed to be a close match to the shade used in the comic books. The GW paints can be a bit thick so you will want to add some water to them as well when painting large areas. I usually just add a few drops of water to the paint caught up (from shaking the paint jar) in that little lid section. The black undercoat will show through on your first coat of paint, so you will actually need 2 to 3 thin layers of paint on this step. It will give you a nice smooth coat though so it is worth the extra steps. You really only need to give the first coat about 7 minutes to dry before applying the next one, so if you start by painting the chest section, then move on to the head and hands, you can start right in on the chests second coat without ever putting the figure down. Once you are happy with the amount of paint on the chest, helmet, and gloves, let the pain full dry before going after the boots and waist section. 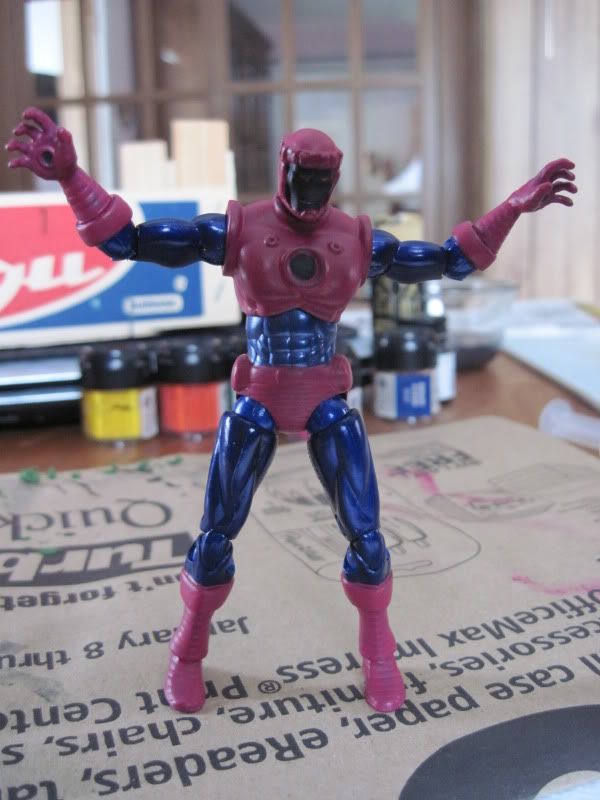 Once I was done getting all the purple sections painted, I gave them all a wash using a darker purple paint. I created my wash using GW paint color ‘liche purple’ but really any darker purple shade will do. To create my wash I took one drop of the paint and started by adding 10 drops of water to it. After mixing that up I decided it was still to paint heavy and added 2 more drops. I made this wash 4 different times for the 4 Sentinels and each time it took between 12-15 drops of water to one part paint. When stirring it up the wash should run pretty quickly and leave very little color behind. Apply the wash to all the parts you just painted purple, making sure to hit up all the cracks and crevices. Keep a napkin or paper towel close by for this step and right after applying the wash to one section immediately start patting it down with the napkin to draw all the excess wash off before moving on to the next section. The purpose of the wash is just to run into some of the corners and crevices and darken them up just a bit so all the lines you sculpted stand out. 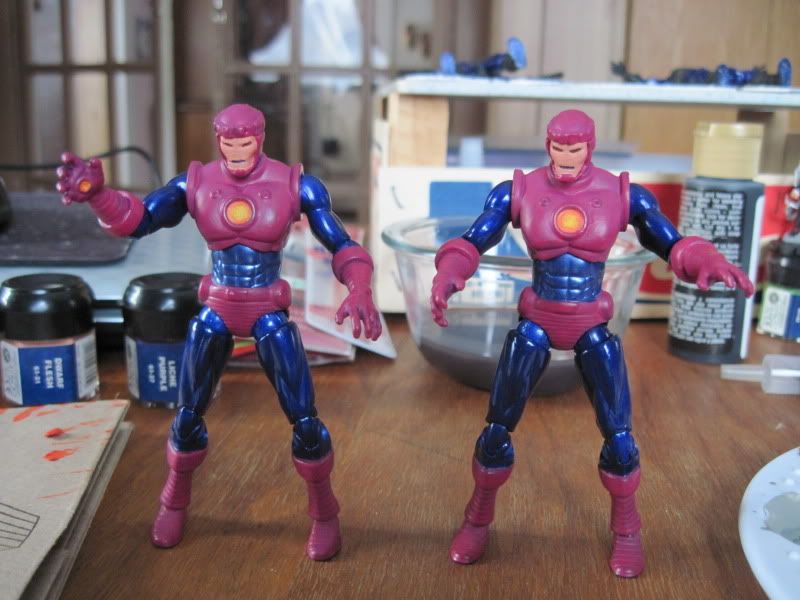 The next four steps are pretty quick and simple. Use a smaller paint brush for these next two steps though as now you will be getting into some detail work and you want to avoid having to go back over it as much as possible. I used GW ‘dwarf flesh’ paint for the face. While you will still need to add a bit of water to insure a smoother application of paint, you will want to add less water than before. Too much water and the flesh paint will get away from your brush and start going places where you don’t want it. Again I left the figures original red markings for its eyes and mouth alone so be careful when painting around those parts. You may have to touch up the chin strap and crown a few times with more ‘warlock purple’ paint depending on how skilled you are with a paint brush. The circle on the chest and palms of the hands was painted first using GW ‘blaze orange’ paint. Once that paint dried I used an old small brush to dry brush on some GW ‘sunburst yellow’ paint. For the big circle on its chest start in the very center of the circle and slowly work your way out towards to edge in a circular pattern. This will insure the heavy concentration of yellow paint will be right in the center with less and less paint as you move out towards the edges. The fourth and final step was to take the tool I earlier used when shaping the putty and rubbing off all the excess purple paint that ran over the edges onto blue sections. Be careful not to rub or scrape too hard, you just want to get rid of any paint you don’t want without damaging the blue plastic below. I did manage to scrape too hard along one glove edge and some white plastic then shown through. If this happens to you just a thin brush with some black paint will cover it up nicely. 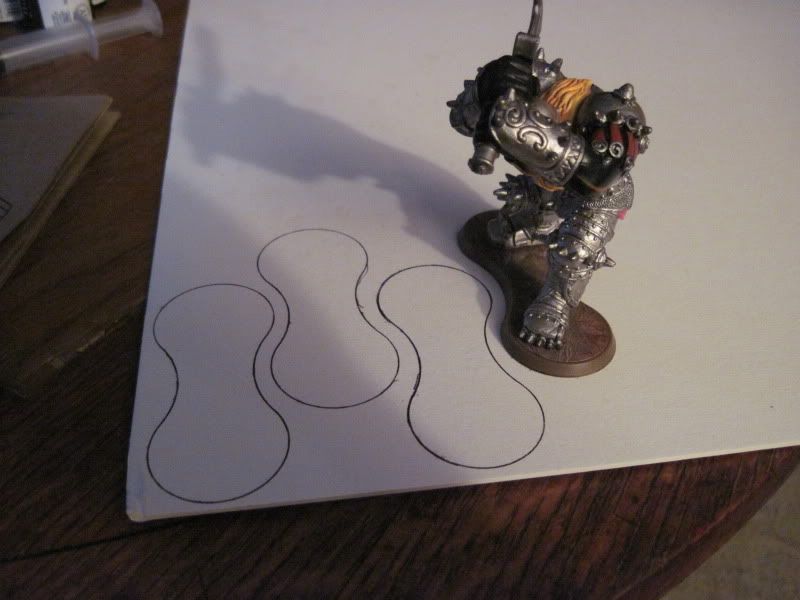 While waiting for paint to dry, or if you just get burnt out on painting, you can start working on making some bases for your Sentinels. If you have extra peanut shaped Heroscape bases, or some other idea on how to make bases then you can ignore these steps. For those of you that want to see what I did, continue reading. I began by tracing out four times the peanut shape of a Heroscape base onto some stiff white board I picked up at Micheal's Craft store and already had at the house. 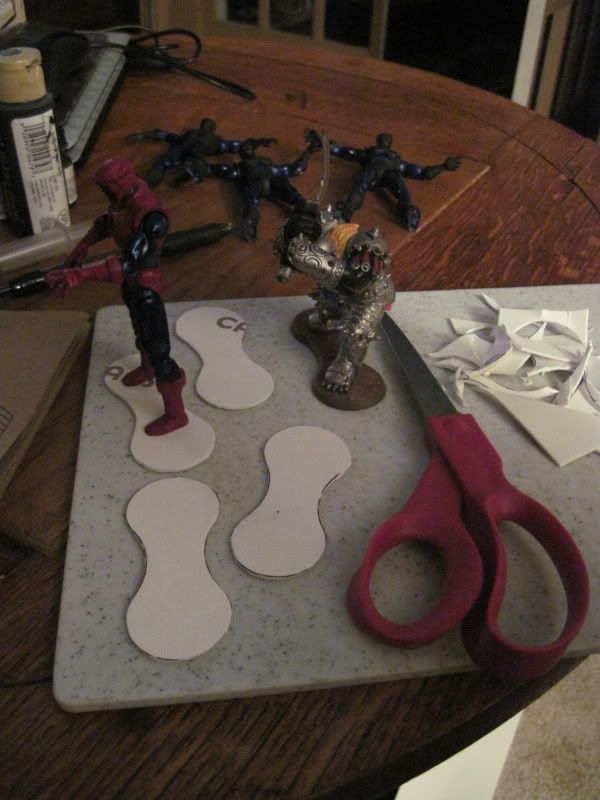 Next I cut them out with a good pair of scissors. I tested the bases out to see how they would work for me and soon discovered that they were too thin as is. They were about half as thick as a traditional Heroscape base and since Sentinels are supposed to be towering figures, I did not want to short change them on any height. So I ended up cutting out four more of them.  I glued two of the bases together (x4) using some craft glue. Then I piled a few large books on them to sandwich them together and make sure that they would dry flat. Once the glue was dry I ended up having to trim the edges down into a smooth consistent shape as they did not all line up perfectly. I then applied some contour putty to the edge of the bases and smooth them out using my finger. All that was left at that point was to paint them up. I went with grey for the top of the base, and then painted each edge a different color so that I could easily track wound and order markers when in play. 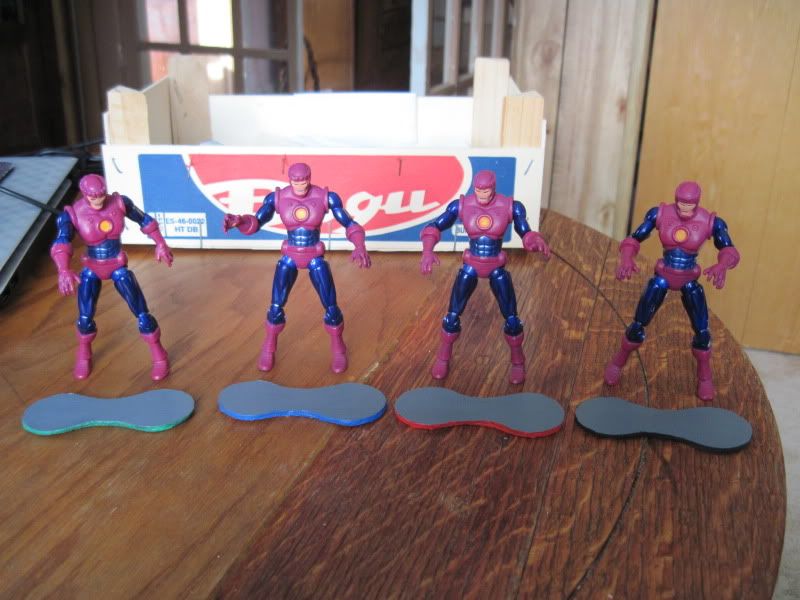 Once all four were painted with their bases done, it was time to glue them. Put them into whatever poses you like the best, just make sure any pose you chose is balanced so that the figure can stand up without glue and not tip over. You can make them all have the same exact pose if that is what you want to do. I decided I wanted each on to have a different pose, three of which were pretty basic and one where I turned the chest piece slightly sideways to create a reaching type of look. Once I was happy with the poses, I just applied some liquid super glue to each joint, letting the glue run down into the cracks. I also applied glue along the edge of the chest section where it separated from the abs and along the shoulder ball and socket. The knees really got the most glue from me though. Then the final step was to apply the super glue to the bottom of the feet and attach each figure to its base. Push down on the top of the feet for a few seconds to make sure you get a good bond here. 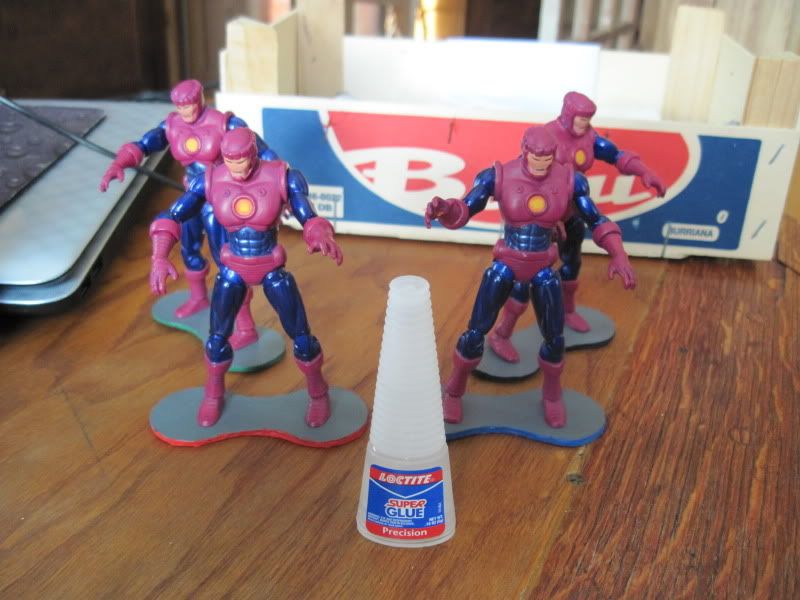 The whole process for four of them took me about 10 days to complete. Now they are ready to do some mutant hunting and my next project will be to get a Master Mold figure done up. 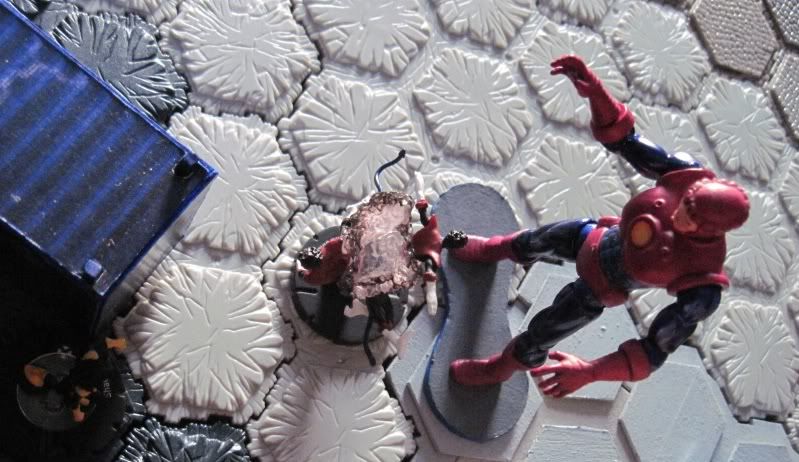 If anyone with more experience working with 'green stuff' has some tips or advice to share, please do. Also if any of you try this yourself with a different Iron Man figure or attempt a more complicated crown design please do take some pics and share your results. Last edited by Yodaking; February 2nd, 2012 at 02:36 PM. 
|
|
#2
February 1st, 2012, 04:33 PM
|
||||
|
||||
|
Re: Custom Sentinel Figure Tutorial
That is an amazing tutorial! Thank you so much!
Quote:
Quote:
|
|
#3
February 1st, 2012, 05:03 PM
|
||||
|
||||
|
Re: Custom Sentinel Figure Tutorial
Great work Yodaking

My Maps: Classic; Marvel My Customs: Dr Who | Terrain | Star Wars Card Template | Repaint & Mods | Playing Card sized Cards Helmaverse | Helmaverse League International C3G Links: C3G Super Hero Draft cards | TableTop Simulator C3G Map additions | Heroscape Dice Roller
|
|
#4
February 1st, 2012, 05:10 PM
|
||||
|
||||
|
Re: Custom Sentinel Figure Tutorial
Yes, awesome! I have my Iron Men sitting on the table in the mancave with a bunch of comic pictures too, getting mentally psyched up to do the exact same thing. Thanks!
Heroes of Star Wars Scape (HoSS) My Custom Repaint Figures / My Custom Terrain / My Maps & Scenarios / My Trade List Red 6 standing by!
|
|
#5
February 1st, 2012, 05:14 PM
|
||||
|
||||
|
Re: Custom Sentinel Figure Tutorial
Cool stuff! And you even made your own bases!
C3G can be played with official Heroscape, but it's not recommended.
DISCLAIMER: C3G claims no ownership of the characters or artwork used for C3G customs. All rights for the characters belong to their respective publishers/creators. C3G cards are not intended for sale, and C3G does not authorize any party to profit from C3G cards. 
|
|
#6
February 1st, 2012, 05:22 PM
|
||||
|
||||
|
Re: Custom Sentinel Figure Tutorial
Lookin´ GOOD!
|
|
#7
February 1st, 2012, 05:27 PM
|
||||
|
||||
|
Re: Custom Sentinel Figure Tutorial
Those looks amazing, Yodaking! Thanks for sharing and +rep!
|
|
#8
February 1st, 2012, 05:55 PM
|
||||
|
||||
|
Re: Custom Sentinel Figure Tutorial
Great job on these!
As a side note not many people realize this but you can use sandpaper on the edges of matt board. I too cut my peanut bases out of matt board, trying to be as careful as I can, and then just lightly sand the edges so they are smooth. If it's a large figure I'll do what you did and glue two together. After they've dried I just sand them smooth. Beats trying to putty them. My Custom Terrain Thread: http://www.heroscapers.com/community...read.php?t=448
|
|
#9
February 1st, 2012, 07:48 PM
|
||||
|
||||
|
Re: Custom Sentinel Figure Tutorial
Thanks for the tip Grishnakh! Those were the first bases I had ever made like that so it was a learning process. I was just looking for something I could make the bases out of that I already had in the house.
|
|
#10
February 2nd, 2012, 10:19 AM
|
||||
|
||||
|
Re: Custom Sentinel Figure Tutorial
So, I was looking at this great thread again, and I noticed some stuff that I really like:
 You have an airport! With no parking signs! And suitcases! It looks like you've made your own hexes too, out of foam, maybe? Are those hexes part of the airport setup? Heroes of Star Wars Scape (HoSS) My Custom Repaint Figures / My Custom Terrain / My Maps & Scenarios / My Trade List Red 6 standing by!
|
|
#11
February 2nd, 2012, 02:10 PM
|
||||
|
||||
|
Re: Custom Sentinel Figure Tutorial
The hexes are made out of Balsa Wood. It was part of the larger airport project.
Where it came from: http://www.heroscapers.com/community...41&postcount=3 Finished Product: http://www.heroscapers.com/community...8&postcount=27 As you can see from those pics and the new ones in the Sentinel thread, Grishnakhs' buildings let me move the airport off of the edge of the map and into the center. Although their is a small gap now between the airport facade and the foam core buildings right now due to how the hexes were set up. I'm thinking about returning to that project and modifying it a bit more to better mesh with the foam core buildings behind it. The hotel one I made though (http://www.heroscapers.com/community...6&postcount=10) lines up flush, but slightly off center, with a foam core building due to the different base set-up on that one. I wanted to use the airport one for that map so I could work in my new shipping containers. Not sure if you can still find those sets online anywhere.
|
|
#12
February 2nd, 2012, 02:15 PM
|
||||
|
||||
|
Re: Custom Sentinel Figure Tutorial
Very awesome.
C3V Current Broadcast C3V Testimonial from  " Easily the best quality classic customs I have ever seen" " Easily the best quality classic customs I have ever seen"MY MINIATURE COLLECTION -- NEW VALHALLA
|
|
|
|||||||
|
|
 Similar Threads
|
||||
| Thread | Thread Starter | Forum | Replies | Last Post |
| Leifkickers custom Tutorial | Leif Kicker | Custom Terrain & Obstacles | 28 | April 5th, 2011 02:39 PM |
| DrRansom Tutorial -=Wyvern Custom=- | DrRansom | Custom Units & Army Cards | 46 | December 13th, 2010 06:55 PM |
| The Trial of Sentinel Mark 1 (Custom by Greyowl) | Boromir_and_kermit | Comic Hero Custom Creations | 159 | February 20th, 2008 02:04 AM |
| Whitefishes FIRST Custom Tutorial - Archer Tower | whitefish | Custom Terrain & Obstacles | 13 | February 8th, 2008 04:29 AM |
| Ghost's Custom Sentinel | GhostWalker107 | Comic Hero Custom Creations | 1 | August 28th, 2007 12:33 AM |


 Hybrid Mode