
|
|
|||||||
| Battle Reports Reports of your Heroscape Battles |
 |
|
|
Thread Tools | Search this Thread | Display Modes |
|
#13
 November 7th, 2013, 02:47 PM
|
||||
|
||||
|
Re: Kolakoski's Battle Reports - New Hills Are Alive!
Well met!
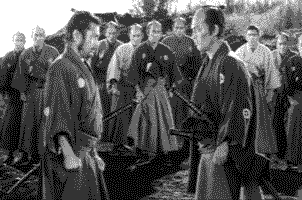
The Gang of Four met, in its entirety 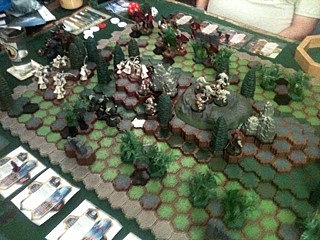 The Map  As you can see, it was Confrontation terrain. There were little white dots to show which sections are "hexes," and little red ones to show which partial hexes were impassable (none visible here). I was never certain of what was adjacent to what, or how high it was. It was also quite amusing to place multiple figures up there that kept sliding off into each other and all the units below them in mini avalanches. My units were getting in each others' way in all 3 games up there. This was, theoretically, to be a Halloween themed game. The forces of Good against the Evil Undead Horde. I included Van Nessing, for that very reason, in each of the 3 armies I built for this game day - and let it be known that this would be a good chance for him to shine in the perfect scenario for him. Such was not to be.  His one moment - killing Brutes in melee. In all the games, chas and Taeblewalker set up across the entire width of the map, while Sherman and I set up on one flank.  The "Good Head Start" ensured our possession of the high ground. In all the games, Sherman played the same army 360 Templars x 3 120 Eomir (Sherman's LotR Custom) 70 Martial La Hire 550, 12 spaces. In the first game, I chose to field 210 KoW x 3 105 Sir Gilbert 105 Van Nessing 100 Sir Denrick 30 Eldgrim 550  Taeblewalker had a Heavy Grut army, while chas fielded Brutes, Moltenclaw, and Augamo.No Undead at all.   The TPK trophy  ), Sherman's aggressive play, Taeblewalker's extreme Skull rolling in a devastating series of Attacks, etc., but we were pretty much in agreement that it was mostly this rule ), Sherman's aggressive play, Taeblewalker's extreme Skull rolling in a devastating series of Attacks, etc., but we were pretty much in agreement that it was mostly this ruleEvil Bonus Oh yeah. During Rounds One to Three at night, all Evil Army figures are +1 to Attack and Defense, and +1 (or 1 if they prefer) to all D20 rolls. This Evil Bonus will stack with any others. During Rounds Two to Seven, Evil players may choose any one cards worth of figure(s) each to receive the Evil Bonus once per round. Because were evil! Mwahaha! The bonus ends during daylightRounds Eight through Ten. which was modified for games 2 and 3 to give Evil only the one card Bonus, and only during the first 3 Rounds.  Here, you can see the red and white dots. In the second game, I played 200 Romans x 4 145 Azurite Warlord 105 Van Nessing 100 Marcus 550, 19 spaces Taeblewalker fielded his same army, but with a Hydra in for Grimnak.  An epic duel, that lasted the whole game. I think chas played his same army again. The Azurite Warlord was a champ - beating up on the Grut heroes and squaddies alike - but Sherman took the TPK.  On the Templars' first charge, Sharwin counterstruck a Templar. In the third game, I played 120 Bahadur 120 Darkclaws 110 Greyspears 105 Van Nessing 95 Artos 550 Taeblewalker played his game 2 army again, subbing in a Frost Giant for [???},  while chas fielded Minions and Shurrak and the only Undead of the day - 1 pitiful squad of Deathknights.   This time, the Templars took the high ground, momentarily, before charging.  I didn't really handle the Frost Giant very well, being so afraid of dying swipe that I allowed the Frost Giant to kill off a number of Varkanaans piecemeal.  Sherman charged Shurrak . . .  . . . and Minions, attacking chas initially, for the first time. chas played his Minions well, with Bonus-boosted ones in front on height, but had an early run of extremely bad luck - enabling me to change up in mid-stream, and veer off to attack Taeblewalker. As a result, our forces were victorious, and I actually won the TPK. In all 3 games, I was often at a loss as to the best thing to do, but Sherman always had the answer.   This was my time fielding my new Knights, but the Evil Bonus (and my hill traffic jams) made their initial outting difficult, to say the least. The Romans did much better in the second game, and, as I said, the Azurite Warlord lived up to my expectations. His ability to choose when to hit with 7 (at the cost of a Life) or a normal 4, along with having 8 Life to begin with, makes him wonderfully versatile, and I'm looking forward to playing him when I have Ne-Gok-Sa and, especially, Me-Burq-Sa back in the Warlord stable to field with him. Sherman informed me that the Varkanaans took 2 years to play test, and that their learning curve is high. I'm still in the infant stages of figuring them out, but they are infinitely challenging and fun, and, I am convinced, are one of the most powerful armies in the game - in the right hands. I really expect good things down the road for them in tournament play. In any event, they'll see a lot of time on my table. There you have it - what little I remember - and I'm sure the Gang will chime in with their comments. Last edited by kolakoski; November 7th, 2013 at 04:26 PM. 
|
|
#14
November 7th, 2013, 03:46 PM
|
||||
|
||||
|
Re: Kolakoski's Battle Reports - New Game of Thrones 'Scape!
All three games were so much fun with melee armies fighting each other, that I didn't much care who won! The Taeblewalker/Chas team won the first game, the second game was very close but we lost, and the third game was a clear victory for Kolakoski/Sherman Davies. it was a fun nine hours of gaming, and good to have everyone together again for the first time in a while! When K. used the new Azurite Warlord, he voluntarily took two hits over successive turns to activate his power. Nevertheless, he remained a dangerous figure that we couldn't deal with at all. There are only about 5 of the (newer) VC Customs that I've never seen used. TW gave me some Beakfaced Sneaks and brought his Warwitch figure for me (who bonds with them), but I couldn't fit them into an army this time. Last edited by chas; November 8th, 2013 at 07:25 AM.
|
|
#15
January 12th, 2014, 09:06 PM
|
||||
|
||||
|
Re: Kolakoski's Battle Reports - New GoF Returns!
Well met!
Yesterday, the Gang of Four played a couple of games at chas' gaming palace, gamemastered by Sherman Davies. (See The Gang of Four Returns! ) From a comment by chas: NYCG4: They're ba-ack! I'm up early, so I'll just mention that we played two great games, varying the scenario quite a bit the second play. We kept the same teams but switched sides for the second battle. We had a great time, and finished up unusually early, so we went out for dinner together afterwards, here in Brooklyn Heights. My teams: Game One (Evil) Major Q9 Rachiem Agent Carr Siege Black Wyrmlings x2 Game Two (Good) Quicksilver Thunderbird Captain America Sentinels of Jandar Raelin Guilty McCreach For the second game, we removed the civilians, and moved the Good Guy Supers' start zone up to their side of the river. Victory was to have at least one Good figure (including the supers) on a hill rock space at the end of the ten turns. K. took photos, which I'm sure he'll have up soon. This was an interesting experiment in using both Classic/VC and Supers in the same game. Sherman Davies preselected the supers from among his own customs, two of whom (Thunderbird and Valkyrie) bonded with Classic characters. My partner Sherman Davies and Taeblewalker armies included: Game 1 Taeblewalker (Good) Captain America Quicksilver Thunderbird (Tribesman) Mohican River Tribes x3 Sherman Davies (Evil) Cyprien Esenwein Ornak Brunak Heavy Gruts x2 Game 2 Sherman Davies (Good) Warmachine Falcon Valkyrie (Double Spirit) Finn the Viking Champion Knights of Weston x2 Taeblewalker (Evil) Molten Claw Fen Hydra x2 Ornak Heavy Gruts Marcu Esenwein K. will want to mention his teams along with his own commentary, probably not noting out of modesty ( For more general info on what we're doing recently, see my thread: General Section/The New York City Gang of Four. My teams were: 1st game: Warmachine, Valkyrie, Falcon, Bahadur, Greyspears 2nd game: Q9, Krav, Braxas, Phantom Knights x 3  As you can see, the stronger Supers were a non factor in rescuing civilians or, initially, their Classic allies.    A majority of civilians were rescued on the first turn. The Varkanaans sensibly fled towards their powerful allies in the rear, while the Mohicans and Thunderbird fought a valiant, and pointless, holding action.  Q9 clanked after the retreating Wolves . . .  until they found him. He resisted mightily, but inevitably fell.  Cyprien was Evil's last hope, but was destroyed by Valkyrie's double-Spirit enhanced attacks before he could reach Good's last Classic (as opposed to Super) unit. In the second game, after some early carnage featuring Taeblewalker's double Hydra attack, the game came down to Taeblewalker's Orcs pinning down Good's Supers, while Braxas melted them.       At the end, the desperate forces of Good had a 2-life Valkyrie take 2 leaving engagement attacks to get to Braxas, and was struck both times, sealing the win. P.S.: Q9 and the Krav never got an OM. 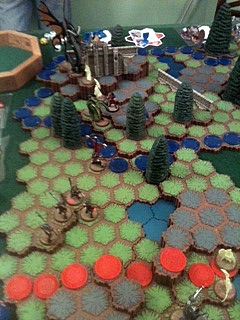
|
|
#16
February 6th, 2014, 01:44 AM
|
||||
|
||||
|
Re: Kolakoski's Battle Reports - New Hell or High Water!
|
|
#17
May 24th, 2014, 12:57 PM
|
||||
|
||||
|
Re: Kolakoski's Battle Reports - New Game of Thrones 'Scape!
Well met!
Last night, the Gang of Four played Sherman Davies' When Worlds Collide! (Part 2) on Nadi's Mandalian's Fortress map.  We played 2 games, the first with armies we'd been preparing for weeks, and the second, after switching sides (but with the same team mates) made up from scratch in a few minutes, after the first game. Both games went to the defenders.  The Scarlet Witch one-shots a Hydra.  Luke Cage takes an early Acid bath.  Kaemon was the real super hero, here giving Cyprien his Release at last.  Minions infest the Fortress.  Going after Big Sarge.  Killing Bahadur.  Meeting their match in - the Wasp.  Sergeant Drake slays the Dragon.  The Warforged got this far, and no further, leaving a pile of bodies on the courtyard floor.  A view from above.  This set up, late in the first game, doomed the invaders in the end.  In the second game, Cyprien and some Phantom Knights throw a scare into the Good Guys.  Brimstone (proxied with Moltenclaw) attacks.  Here, he unleashes his Heat Blast, wounding all, and killing every squad figure within 2 hexes. In spite of valiant efforts by the attackers in both games, the defenders' initial positional advantage, and the attackers' relative lack of superiority in number, was too much for the attackers to overcome.
P.S.: My army for the first game: 180 Luke Cage 130 Union Jack 130 Tagawa Samurai Archers x 2 120 Kaemon Awa 120 Bahadur 110 Greyspears 800, 13 spaces The Archers needed the +1 Attack/Defense from Union Jack far more than did the 4th Mass, and the Varkanaans' size led me to place them in the courtyard, for a possible sally, which they sadly made after Bahadur was killed. I put them on height, but conceded equal ground next to me, in fear of the Warforgeds' Tactical Switch, not realizing it wouldn't work on Large units, and they were quickly wiped out. [I did express my misgivings to all and sundry before doing it, but we could all see the handwriting on the wall (the game was ours), so I threw caution (and the Greyspears) to the wind.] For the second: Brimstone, DW9000, Agent Skahen, Laglor, Othkurik, Brunak, Scarcarver, and the Nakitas. DW9000 and Agent Skahen were each one-shotted in the first Round or two, and the Nakitas failed all their Smoke Powder rolls. (See chas' comment below as to how it went for him, and you'll understand why the first game took roughly 3 hours before Taeblewalker/Sherman resigned, and the second less than one before chas and I did.) chas' comment: My First Game Good army was Scarlet Witch, Wasp, 10th Mass x3, Drake II, Raelin, and Guilty, a pretty traditional Classic force to go with my pair of 'radical' Supers. They did pretty well. After taking out Braxas and fighting Minions, Drake even got to leave the castle to take out the Krav on the ground below, which was VERY satisfying, after they had been out ranging me at start! The wounded Drake sat behind a ruin for a while and went back up the walls into the castle for the final defense. Scarlet Witch got some good blasts in from height, and Wasp got to attack the Minions, although she only got one. Her one die would have been unblockable and defeated their great defense, but she rolled two blanks in three attacks, and only got to take out one. She kept a whole squad of them busy for a while, surviving with her flutter defense, while K.s Samurai archers and Kaemon fired down at them from a high tower. Guilty got taken out before I could get an OM on him, while guarding a ladder space on the lower parapet. I called my second game (Evil) army "The Chas Air Force," as it was made up of all fliers: Mimring, Moltenclaw, Phantom Knights x3, Cyprien, Sonya, Iskra, Rechts, and even a single Black Wyrmling! Seeing the problems the Evils were having in the first game (not being able to fire up from the ground at the high towers and taking fire from extra height, etc.), We both thought we'd combine our two armies against one side by sallying out of the castle early, as the castle had two halves that were only connected through the courtyard, even though this strategy was later deemed a failure, the Goods did decide to concede when Sherman Davis' army took disproportionate casualties, so the game would eventually have been our two sets of order markers on one (Taeblewalker). This Evil strategy was a version of our Good strategy of trying to combine our two armies against one, since the Evils had to come in far apart from each other on opposite sides of a very large board. However, in the second game, it proved too difficult to get my army around on one side to meet K.'s, and the defenders got in some lucky shots from height that blew my army apart early on as I first started to attack! Meanwhile K.'s army had taken serious casualties when attacking by itself. We did eventually get pieces inside the castle, and do some damage, but by then the handwriting was on the wall! My conclusion was that the map chosen was an 'art' map, not a game map. This was mentioned by the original designer, who noted the lack of start zones, etc. However, as the host, it was a fun map to build, and I learned a few things about how normal hexes can be connected to the sides of castle walls, and how bridges can be used to make advanced castle bastions, etc. Last edited by kolakoski; May 25th, 2014 at 11:47 AM.
|
|
#18
May 25th, 2014, 11:48 AM
|
||||
|
||||
|
Re: Kolakoski's Battle Reports - When Worlds Collide! (Part
Well met!
Added the following: P.S.: My army for the first game: 180 Luke Cage 130 Union Jack 130 Tagawa Samurai Archers x 2 120 Kaemon Awa 120 Bahadur 110 Greyspears 800, 13 spaces The Archers needed the +1 Attack/Defense from Union Jack far more than did the 4th Mass, and the Varkanaans' size led me to place them in the courtyard, for a possible sally, which they sadly made after Bahadur was killed. I put them on height, but conceded equal ground next to me, in fear of the Warforgeds' Tactical Switch, not realizing it wouldn't work on Large units, and they were quickly wiped out. [I did express my misgivings to all and sundry before doing it, but we could all see the handwriting on the wall (the game was ours), so I threw caution (and the Greyspears) to the wind.] For the second: Brimstone, DW9000, Agent Skahen, Laglor, Othkurik, Brunak, Scarcarver, and the Nakitas. DW9000 and Agent Skahen were each one-shotted in the first Round or two, and the Nakitas failed all their Smoke Powder rolls. (See chas' comment below as to how it went for him, and you'll understand why the first game took roughly 3 hours before Taeblewalker/Sherman resigned, and the second less than one before chas and I did.) chas' comment: My First Game Good army was Scarlet Witch, Wasp, 10th Mass x3, Drake II, Raelin, and Guilty, a pretty traditional Classic force to go with my pair of 'radical' Supers. They did pretty well. After taking out Braxas and fighting Minions, Drake even got to leave the castle to take out the Krav on the ground below, which was VERY satisfying, after they had been out ranging me at start! The wounded Drake sat behind a ruin for a while and went back up the walls into the castle for the final defense. Scarlet Witch got some good blasts in from height, and Wasp got to attack the Minions, although she only got one. Her one die would have been unblockable and defeated their great defense, but she rolled two blanks in three attacks, and only got to take out one. She kept a whole squad of them busy for a while, surviving with her flutter defense, while K.s Samurai archers and Kaemon fired down at them from a high tower. Guilty got taken out before I could get an OM on him, while guarding a ladder space on the lower parapet. I called my second game (Evil) army "The Chas Air Force," as it was made up of all fliers: Mimring, Moltenclaw, Phantom Knights x3, Cyprien, Sonya, Iskra, Rechts, and even a single Black Wyrmling! Seeing the problems the Evils were having in the first game (not being able to fire up from the ground at the high towers and taking fire from extra height, etc.), We both thought we'd combine our two armies against one side by sallying out of the castle early, as the castle had two halves that were only connected through the courtyard, even though this strategy was later deemed a failure, the Goods did decide to concede when Sherman Davis' army took disproportionate casualties, so the game would eventually have been our two sets of order markers on one (Taeblewalker). This Evil strategy was a version of our Good strategy of trying to combine our two armies against one, since the Evils had to come in far apart from each other on opposite sides of a very large board. However, in the second game, it proved too difficult to get my army around on one side to meet K.'s, and the defenders got in some lucky shots from height that blew my army apart early on as I first started to attack! Meanwhile K.'s army had taken serious casualties when attacking by itself. We did eventually get pieces inside the castle, and do some damage, but by then the handwriting was on the wall! My conclusion was that the map chosen was an 'art' map, not a game map. This was mentioned by the original designer, who noted the lack of start zones, etc. However, as the host, it was a fun map to build, and I learned a few things about how normal hexes can be connected to the sides of castle walls, and how bridges can be used to make advanced castle bastions, etc.
|
|
#19
August 6th, 2014, 11:37 AM
|
||||
|
||||
|
Re: Kolakoski's Battle Reports - Lost City of Dragoncourt!
Well met!
The Battle Report for The Lost City of Dragoncourt! will be in the next issue of the Codex.
|
|
#20
September 9th, 2014, 11:36 AM
|
||||
|
||||
|
Re: Kolakoski's Battle Reports - Lost City of Dragoncourt!
Well met!
This is the original article I submitted for Codex #5, including the scenario upon which it was based.  The Lost City of Dragoncourt! After Action Report  by kolakoski featuring The New York City Gang of Four (chas, kolakoski, Sherman Davies, and Taeblewalker)  On Wednesday, July 30, 2014, I hosted a gathering of the Gang of Four, at which we played The Lost City of Dragoncourt! scenario, presented in full below.  Spoiler Alert! "The Treasures are here, here, here, here, and here," the Ninja said. All are closely guarded by Warriors." Spoiler Alert! The Captain thought a moment. "We need to divert their attention. Ideas?" The Ninja spoke again. "They value their Sacred Outcrops above all else, save, perhaps their Great Dragon, Moltenclaw. A threat to either or both should do the trick." "Not everyone will like the idea of destroying religious artifacts," the Captain said. "But they'll get over it somehow. Being filthy rich will help." Four groups of Explorers have joined forces to find the Lost City of Dragoncourt, and are about to enter it. Inevitably, they will form secret alliances, and then . . . The Lost City of Dragoncourt!  The Map.  The Lava Field hexes at the bottom of the map serve as the Zap Zone (name contributed by Shedim Kabal) where the Treasure Glyphs are "zapped" out of existence (awarding Victory Points ("VPs")).  Zap Zone Players will still have to roll for Lava Field (and Molten Lava) damage normally. 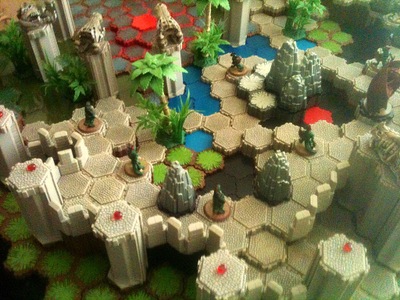 The Explorers. 4 players (the Gang of Four, naturally Autonomous Allies. In addition to the units available for drafting above, each player may draft (and spend a portion of his/her 600 points for) one, and only one, of the C3G units listed below. (150 points) The Book of Black Knight (Dane Whitman) (150 points) The Book of Venom (150 points)The Book of Vixen (150 points) The Book of Green Arrow (Oliver Queen) (150 points) The Book of Hawkeye (Clint Barton) (150 points) The Book of Moon Knight (Marc Spector) (160 points) The Book of Spider-Man (160 points) The Book of Swordsman (Jacques Duquesne) (160 points) The Book of Wasp (Janet Van Dyne) (II) (165 points) The Book of Poison Ivy (Pamela Isley) (170 points) The Book of Beast (Hank McCoy) (170 points) The Book of Elektra (Elektra Natchios) (170 points) The Book of Huntress (Helena Bertinelli) (170 points) The Book of Tigra (Greer Nelson) (175 points) The Book of Kirigi (180 points) The Book of Daredevil (Matt Murdock) (180 points) The Book of Gypsy (Cindy Reynolds) (190 points) The Book of Scarlet Spider (Ben Reilly) (190 points) The Book of Yellowjacket (Hank Pym) (II) (200 points) The Book of Black Panther(T'Challa) (200 points) The Book of Grey Gargoyle (Paul Pierre Duval) (200 points) The Book of Kraven (Sergei Kravinoff) (200 points) The Book of Lizard (Curtis Connors) (200 points) The Book of Scorpion (Mac Gargan) (200 points) The Book of Conan Note: An Autonomous Ally may not Bond with any other units, nor bestow or receive any other Class or Personality related extra turns, regardless of what their cards may otherwise allow. For example, Kirigi, although a Ninja, may not take a turn by means of Kantono Daishi's Dishonorable Leadership.  The 4 armies will be formed into two teams, teammates being determined at random after the third round. Teams may have two of the same unique hero or squad. No Explorer's army may contain Moltenclaw or any Greenscale Warriors (Moltenclaw and the Greenscale Warriors, together, the "Dragonfolk").  Scouting Party. During HoB placement, each Player may place 2 squads, or 2 heroes, or 1 squad and 1 hero, on any Grass hex outside the City.  The Explorers may then (after HoB placement) move anywhere on the Map, including into the City, but may not attack any units (other Explorers' or the Dragonfolk's), nor place any OMs on the Dragonfolk, until the beginning of round 4.  Prior to round 4, all Explorer units are considered "friendly" to each other, and may move through each other if not engaged (to any Dragonfolk), etc., while the Dragonfolk are always treated as "enemies" to all Explorers, that is, even prior to round 4, Explorers will be subject to leaving engagement strikes from the Dragonfolk.  At the beginning of Round 4, the teams of Explorers are considered, of course, "enemies" to each other. Each turn, as usual for Gang of Four team games, each team rolls for initiative, and then each team decides for itself (based on the situation) which member goes first.  Thus, the order of play is: Initiative winning team - player 1, other team - player 2, Initiative winning team - player 3, and other team - player 4.  Dragonfolk.  Dragonfolk cannot be moved in such a way that they would risk falling damage, nor may Dragonfolk attack Dragonfolk. Dragonfolk may not risk Leaving Engagement Attacks, for which purpose all Explorers are considered "enemies," even those Explorers on the team of the player controlling them (which otherwise would be considered "friendly").  Thus, you may not move Dragonfolk out of engagement with any Explorer's units, even your own. Dragonfolk may not target Outcrops for attacks.  The Greenscale Warriors. Each player will have a card for the Greenscale Warriors ("Greenscales") in front of him (teammates can share a card), in addition to his own army cards, and may place one, and only one, of his Order Markers upon it each Round, beginning with the third. Note: The Greenscales add 1 to both their Attack and Defense as long as Moltenclaw is alive, regardless of their distance from him.  The Greenscales Have Bows. The range for the Greenscales is increased to 3 for this scenario.  Moltenclaw. Moltenclaw is an idol. It may not move. No OMs may be placed upon it. It may attack as part of a Bonded turn with the Greenscales.  Outcrops. The 3-hex Great Outcrop has 3 Life and 7 Defense, and each single hex Outcrop has 1 Life and 7 Defense.  Victory Conditions. The team with the most Victory Points (out of 13 total) after 12 rounds wins. VPs are awarded to each team as follows: 2 VP for killing Moltenclaw. 2 VP for destroying the Great Outcrop. 1 VP for destroying each of the 4 Outcrops (other than the Great Outcrop). 1 VP for the each of the 5 Treasure Glyphs carried back onto any Zap Zone hex.  The Treasure Glyphs (face down, normally trapped) are the Cloak of Invisibility, Bracers of Teleportation, Heroic Rune, Ring of Protection, and Belt of Giant Strength. When used, the Temporary Treasure Glyphs are transforned/converted to Brandar's Chests, rather than destroyed, and may still be carried to the Zap Zone for VPs. Note: A Treasure Glyph is automatically zapped out of existence when the unit carrying it enters the Zap Zone.   As is usual when hosting these affairs, I had built a map and written a scenario weeks in advance. I agonized over my armies over most of that time. chas started much later, while Taeblewalker and Sherman settled on their armies seemingly at the last minute. A Note about the scenario. This scenario is notable for allowing C3G, Classic, C3V and SoV (the latter 2, collectively, VC) units to be drafted in the same game, with the latter two, Classic and VC, having their units priced according to the Delta+ system, which was designed to be a fluid pricing system, roughly based on the Power Rankings. Things to remember. There are 5 Treasure Glyphs, one under each Outcrop. The 3-hex Great Outcrop has 3 Life and 7 Defense, and each single hex Outcrop has 1 Life and 7 Defense. The Victory Conditions: The team with the most Victory Points (out of 13 total) after 12 rounds wins. VPs are awarded to each team as follows: 2 VP for killing Moltenclaw. 2 VP for destroying the Great Outcrop. 1 VP for destroying each of the 4 Outcrops (other than the Great Outcrop). 1 VP for the each of the 5 Treasure Glyphs carried back onto any Zap Zone hex. In a nutshell, play consists of destroying Outcrops/Moltenclaw, picking up the Treasure Glyphs lying beneath them, and carrying them to the Zap Zone - and placing occasional OMs on the Dragonfolk to annoy their opponents.  A Note about preparation. Have all the materials for the game, such as Treasure Glyphs, set aside - and segregated - from the rest of your materials before the game, so it is not needlessly delayed and distorted by the discovery that the wrong Treasure Glyphs were initially placed on the map. And create and distribute a "cheat sheet" containing the Victory Conditions and any special rules.  As I did in the original The Lost City of Ashra!, upon which this scenario is based, I decided to field 2 squads of Commons plus Heroes. I started by building a Roman army, the best in terms of variety of Bonded Heroes, balance and fun.  In the first game, I played, choosing Poison Ivy so as to fit in the Azurite Warlord, Fatal Attraction 165 Poison Ivy 145 Azurite Warlord 110 Romans x 2 110 Marcus 70 Kumiko 600, 12 spaces,  and that's what was for me - fatal.  From Taeblewalker: In the first game I used 190 Jotun 160 Spiderman 95 Heirloom 80 Moriko 70 Shades x 1 595, 8 spaces 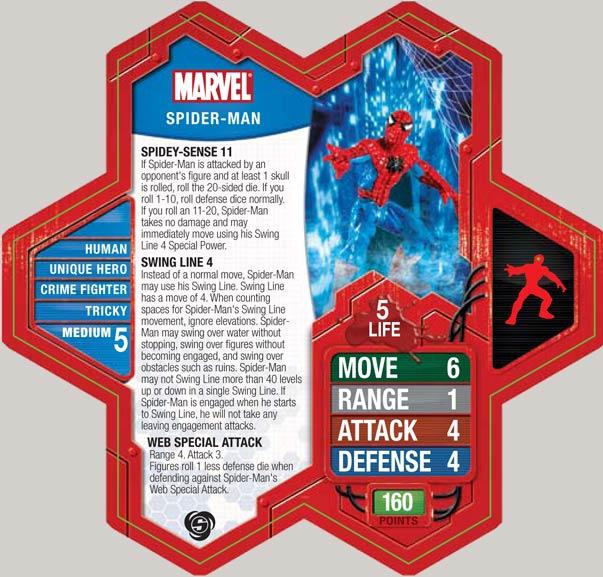 I liked the rule about rolling for allies on the third round. We needed to move into position to be able to attack anybody during those first few rounds, so we'd be ready for whatever alliance the dice dictated.  It wasn't so pleasant for me, when I found myself allied with chas - against him. Taeblewalker sums it up: Jotun had a grand old time throwing heroes into the one lava hex. I forget which two figures he did it to, but I'm pretty sure one of them was a superhero.  Jotun survived the battle with two life left. The "superhero" was my Poison Ivy. chas remembered he also threw Marcus into the Molten Lava.  She Pheremone Seduced Sherman's Venom, but was sizzled herself before she could either make use of him or send him into the Molten Lava. The Azurite Warlord may or may not have met the same fate as I can't remember what happened to him. From Sherman: My army was: 210 Quahon 200 Iron Golem x 2 150 Venom 20 Isamu 580, 8 spaces 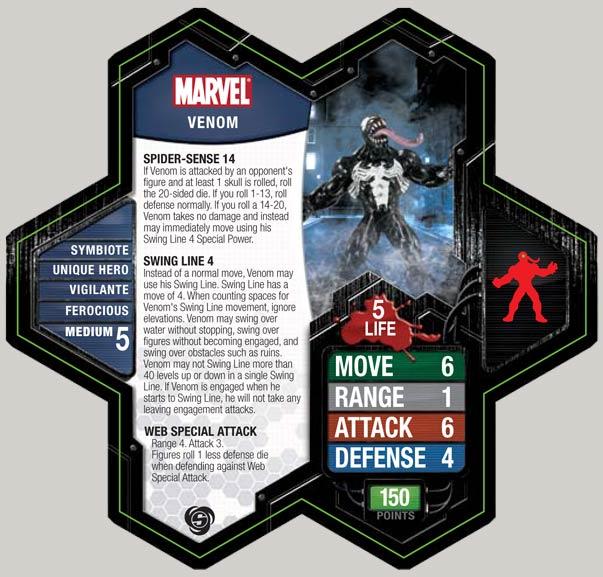 My general gameplan was to use the Iron Golems to destroy the pillars, reveal glyphs and take out Moltenclaw, as they would be virtually immune to the dragon's special attack. Quahon was there to handle squads while Venom provided a potential hero-killer/glyph-grabber.  In actual play the Golems performed pretty much as expected, but Quahon proved too vulnerable without protection to do as well as I would've liked. Venom in both games stayed in the start zone too long and did not contribute much except for drawing fire and threatening opposing heroes. Quahon, as advertised, had a field day frying Romans. chas and Taeblewalker went at it early on. From chas (his armies, and how he created them): The Gypsy Band 180 Gypsy 190 Sgt. Drake II 210 (35 x 6) Pathfinders 20 Isamu 600, 9 spaces Scouts: Gypsy, Isamu  The brand newest C3V wave just coming out included several cards I wanted to use, most notably the Pathfinders and the Crypt Guardians. Kolakoski’s list of medium weight Supers included one in my next tier of “just got it want to play it” which was Gypsy, for whom I had both a neat figure and card. Although the Crypt Guardians were meant for Sudema and I could hardly wait to use her with them, this particular scenario didn’t favor that combo I felt, so I used them in my Team Three, which never got used, as we only played two games. For the Pathfinders I proxied Heroclix Sgt Rocks and US Army WWII soldiers. I could have easily used my many Airborne Elite instead. For although the Pathfinders may have been actually named for that game, a historical “Pathfinder” was a paratroop scout dropped ahead of the main body to mark their drop zones. But the less used figures were more fun, and would differentiate mine if someone else used the Airborne Elite figures. For the Crypt Guardians I used skeletons by Reaper that I had painted up; they were undead, and with their weapons looked like royal retainers to bond with a Queen and an Undead. From Taeblewalker (describing the action on his end of the map): The Shades had less success despite having height advantage on Drake.  Moriko didn't fare any better and Heirloom never made it into the battle before the opposing side conceded. Spiderman was not terribly effective this first game - all the glory went to Jotun. From chas: I hate Heat Of Battle starts, but whatcha gonna do? I don’t want my opponents to be able to decide who they will be adjacent to of mine before I can set up any kind of screen! At least we had three turns to disengage and open up our tactical options this time. This was a very weird game, as Kolakoski, my team mate, played far away on the other half of the board. While my own army only took two wounds and slaughtered my enemies satisfactorily in furious combat, I looked up to see my partner devastated. Since the enemies would now have us two order marker sets to one, there was little point to continuing past that point, which was after Round Six. Gypsy did well killing Shades, likewise the Pathfinders hosing down Quahoon (some from height), in a replay of any old Japanese monster movie you choose.  Blam, blam; rat-a-tat-tat! Partner K. was able to finish off the dragon after I got 5 wounds in one round of massive modern small arms fire! The Pathfinders had moved quickly after Sgt. Drake from the start zone. The Sarge himself had moved a space slower so they could catch up (all but one), and then he helped Gypsy against the Shades and Greenscales on the stairs. None of my Ninjas on either team ever did anything, but Isamu did go up the back way to the parapets with Gypsy as the advanced Scouts. These two of my groups met on the stairway finishing off all the Greenscales and Shades in sight, although Gypsy was unable to knock down a small Outcrop in her first ever round, and was then beset by the flying Shades. Luckily, neither of my two big heroes were taken over by the ghostly enemies! So we had dealt great damage to our foes, but earned no Victory Points. I hardly felt defeated when our side surrendered however! I liked my team and how it had performed, including my first outing of C3V Pathfinders. Join the Army and See Valhalla! I feared going in that Poison Ivy might not be the best choice, and she certainly wasn't in my hands. Why do I build armies with Commons to screen, and then not do any screening?  In the second game, I fielded  150 Moon Knight 135 Mogrimm 110 Marcus 110 Romans x 2 95 Major J15 600, 12 spaces.  Major J15 was a last minute replacement for Ne-Gok-Sa (95 points in Delta+), and he more than earned his points pounding away at Sherman's Iron Golems, and the Great Outcrop, softening it up for Mogrimm's later coup de grace.  From Taeblewalker: In the second game I used 175 Major Q10 160 Spiderman 130 Deathwalker 9000 70 Deathwalker 7000 65 Zetacron 600, 7 spaces In the second game it was Spiderman who did most of the work, gaining several victory points by himself. Deathwalker 7000 also gained a victory by destroying himself and blowing up a rock outcrop.  Zetacron did minimal damage before he was destroyed and the other Soulborgs didn't do too much - although they did put a few wounds on Quahon. The second game was a closer contest that could have gone either way right up until the end.  From chas: With Team Two above, Braxas sat outside the castle, as one Crypt Guardian climbed the stairs from behind the castle, and another simultaneously advanced from the start zone.  Then the other two bonded with each other to move to the staircase on the same side of the board. I had suggested to my partner, (Sherman Davies this time around, based on a random roll) that this time we considered combining against one of our enemies, and that happened..Cyprien flew from the start zone far to the side until he was outside the castle also, away from any early melee. When the gang was all together (except for Otonoshi) and one CG adjacent to a Greenscale, Braxes appeared in a space on the ramparts where she could Acid Breath three of the neutral Greenscales, which she did with some help from Cyprien.  He attacked an Outcrop and got a glyph. Other glyphs were being uncovered as more outcrops were falling. Cyprien got the Belt of Giant Strength glyph, but failed in his attack on K.’s Moon Knight!  The vampire had, attacked from height and used up the glyph for naught. So Cyprien few back to the Zap Zone to deliver one used glyph, and we had our first VP. Queen Braxas finally took a shot at Moon Knight with her Acid Breath and took him out.  Braxas attacked the large Outcrop as did some enemy figures, but none of us could put the final wound on it! For the first time I put some order markers on Greenscales, and ‘my’ Moltenclaw took down Jandar’s big shooting robot, and the GS womped on other enemies. But the opposing team had gotten far ahead in VPs, and when their Spiderman got one, I saw no way clear. However, Cyprien waded in at my team mates suggestion and did hurt him.  Later on were able to finish off Moltenclaw for another 2 VPs. Once again my team had taken little damage, but been outstrategized and outpointed. This time we put up a much longer fight, but were defeated in the end. But I gotten the opportunity to play yet another C3V newbie, the Crypt Guardians, which was lots of fun. I felt pretty good about my team building, which used a fun Super and two new C3V cards! The second game was essentially won when Moon Knight used Crescent Darts to take out 2 or 3 Outcrops, and inflict numerous Wounds on Braxas and others (and on the Great Outcrop, I believe), before finally succumbing to Acid Breath.  Lessons learned. In hindsight, I'd be more patient in general, setting up a screen, especially for Poison Ivy, and keeping my army cohesive. Moon Knight was phenomenal, with his Crescent Darts piercing defenses seemingly at will.. And Major J15 is just the cheap, tough Large unit to counter Braxas and her ilk in a myriad of armies. Also, for some reason, I completely ignored the Dragonfolk with my Order Markers.  I liked the map, with its overhang area and stepped road area. ~ Sherman Davies Overall, it was a fun scenario that would be enjoyable to repeat. ~ Taeblewalker From chas: The map and the scenario by K. were great, although we kept ‘rediscovering’ some of the scenario rules during the games—this with a cheat sheet I’d made up for myself. I suggested conceding Game Two when it looked very bad for us so we could get in a third game, but the others wanted to play the second one out, and so we did—it was exciting, although we had little chance and did lose. I’m not one for throwing in the towel early in general, unless it seems close to hopeless, which it was. Its not an emotional thing for me—just a question of whether or not we can still win at all. So poor Sudema, for whom the Crypt Guardians were designed --both Sherman Davies and Tablewalker are part of the Inner Sanctum or their dependents, but you probably figured that out on your own—so I’m looking forward to getting her on the table in the future with them!
|
|
#21
September 9th, 2014, 11:46 AM
|
||||
|
||||
|
Re: Kolakoski's Battle Reports - Lost City of Dragoncourt!
That last sentence should read: "--never made it into a battle, so I'm looking forward to getting her on the table with them."
|
|
#22
September 16th, 2014, 04:38 PM
|
||||
|
||||
|
Re: Kolakoski's Battle Reports - Lost City of Dragoncourt!
 When Worlds Collide #3 Battle Report Well met! The Gang of Four met on 9/10/14 to play WWC #3. The stranded supers and their allies once again fight the forces of Evil. The Good Guys, played by Sherman and Taeblewalker (all supers but Cap are Sherman Davies' customs):  AVENGERS SQUAD #1 - 800 points Captain America - 220 Quicksilver - 235 Scarlet Witch - 195 Remaining points - 150 10th x 2  AVENGERS SQUAD #2 - 800 points Luke Cage - 180 Valkyrie - 220 War Machine - 250 Remaining points - 150 KoW x 1 & Finn  We that remained (chas and I) were Evil, each with 800 points of Classic Utgar. chas fielded 330 Minions x 3 180 Taelord 170 Moltenclaw 120 Stingers x 2 800, 17 spaces, while I went with an Ornak Orc army (brought Blades by mistake - proxied Heavy Gruts with them): 280 Heavy Gruts x 4 150 Mimring 150 Cyprien 120 Grimnak 100 Ornak 800, 22 spaces.  The Horde We also held the high ground from the start. A pity those "super" heroes will never return to their universe.  Warmachine has his moment  Before being Chilled by the vampire.  Who goes on to wreak havoc elsewhere.  Grimnak Chomped though Cage's "Impenetrable Skin."  Grimnak fell, after Chomping 2 supers.  Moltenclaw falls.to Quicksilver.  A flaming fart fells a hero.  And the Scarlet Witch.  Captain America is overwhelmed.  As is Quicksilver. 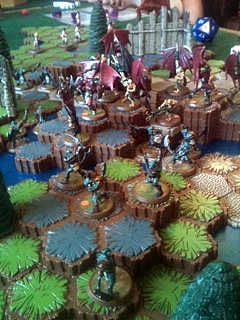 Horde reserves.  Redcoats' last stand.  Doom with a view.  Redcoats among us.  The last one.  Taelord's command.  Knight Errant.  Last of the Knights.  Valkyrie throws herself into the fray.  It looks hopeless.  Valkyrie falls. In the second game, we switched sides, and started from opposite edges of the map, but, according to Sherman (on the winning side), it was over almost as quickly. Plenty of pics in the Gallery of the carnage therein. Cyprien was the "super" hero of the second game.  First the Scarlet Witch.  The Protectors arrived - to late.  Then Luke Cage succumbed.  Eltahale had her moment.  But she, too, was taken.After that, it's all a blur. After all this, we played our first game of Quartermaster General - one of the finest card games I have ever played - I highly recommend it, and look forward to playing it again soon!
|
|
#23
September 16th, 2014, 06:48 PM
|
||||
|
||||
|
Re: Kolakoski's Battle Reports - New! - When Worlds Collide
Notes:
1. The Captain America used was that of C3G. 2. The general conclusion was that too many heroes, even if super, can still be overwhelmed by squadscape. 3. The map used forced the forces of Good to be split into three different and widely spread start zones, while Evil stood on the high ground in the middle of the board. This allowed us to rush one isolated group of the Goods while standing on perfect defensive terrain while awaiting attacks from the others.
|
|
#24
November 7th, 2014, 08:08 PM
|
||||
|
||||
|
Re: Kolakoski's Battle Reports - New - Moonscape Castle!
Well met!
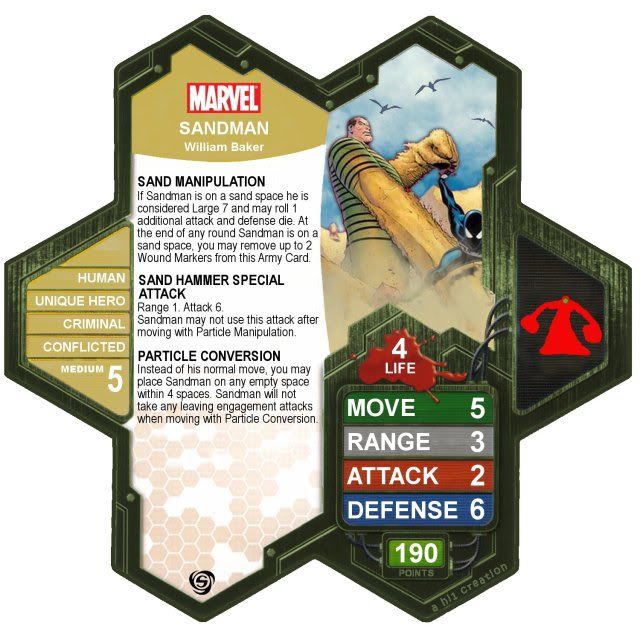
The Gang of Four met Sunday, and played 2 games of Moonscape Castle! Game 1 Villains:  chas played C3G's Kirigi.  Taeblewalker played C3G's Scorpion. 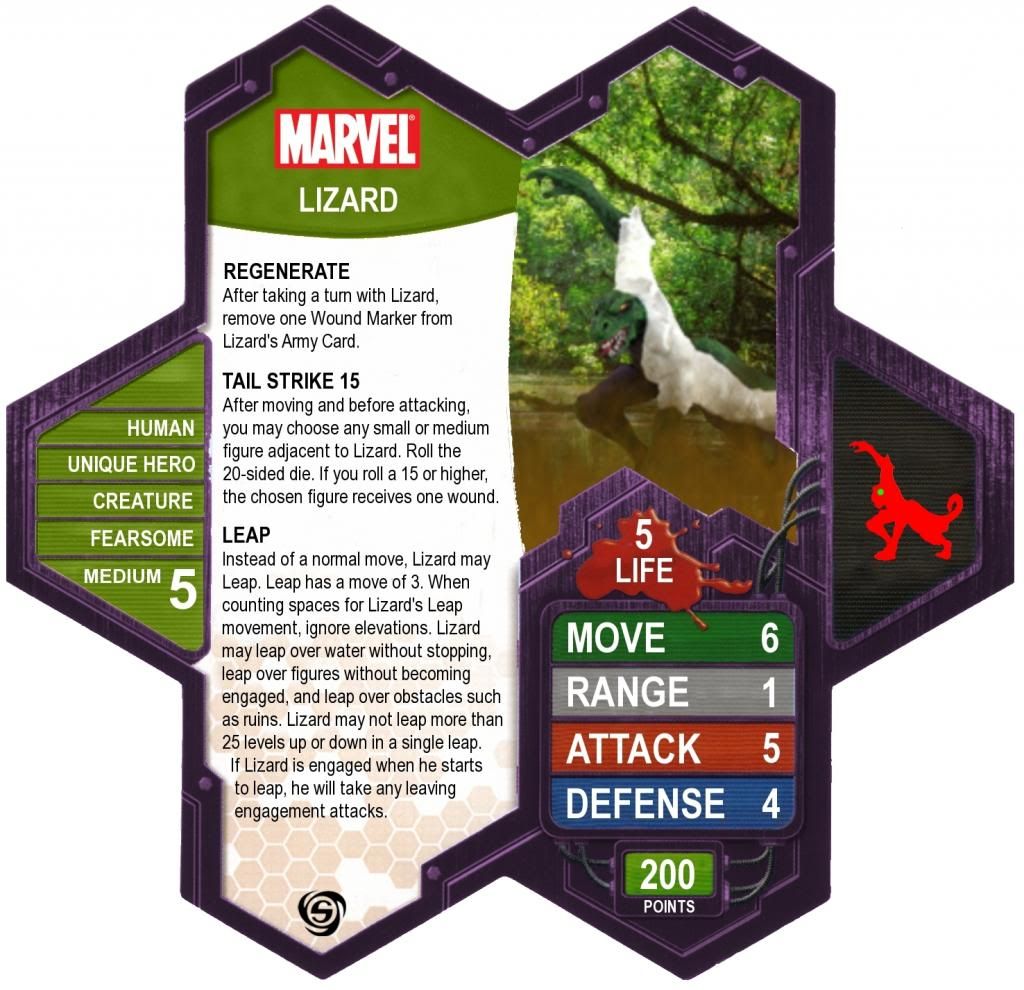  In Game 1, Sherman's Scout army . . .  . . . occupied the Gallery during the 3-Round Expedient Alliance, and, there being no significant shooters present, had the game sown up such that the rest of us resigned soon after.  Sujoah and the Zombie Hulk (proxied by a Feral Troll) were impressive only in size.     Sandman was invincible - for all the good it did.  The packed gallery, to the left, spelled our collective doom.   A dramatic confrontation - signifying nothing. The game was over before a single Villain died.  chas' Thrall army.  Taeblewalker's Predator army.  My Roman army.  Estivara and her Spiders were no match for Roman steel. After a brief discussion, for Game 2, we removed the Lamp Posts, and their Deep Shadow rules, made the Sand hexes the area for garnering Victory Points, and increased the prize for killing a Villain from 1 to 5. Game 2 Villains:  chas played Sherman's (and chas')Lashina.  Sherman played his own version of Doctor Octopus.  Taeblewalker played C3G's Kraven.  kolakoski played C3G's Baron Zemo.    Taeblewalker's Thrall army.  Sherman's Heavy Grut army.  chas' Drones/Gnids/Zelrig/Me-Burq-Sa army. 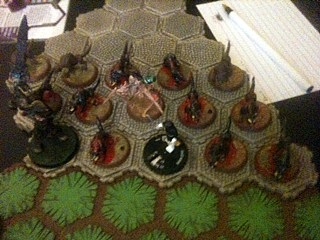 My Wolves of Badru army. While there was some more spilt blood outside, . . .      . . . the Villains were contributing their fair share in the Courtyard.  Kraven chose, and pursued, Baron Zemo as his Prey.  Doctor Octopus lashes out at Lashina.  Morgoloth makes Kraven . . . well, . . . craven.   The She-Witch survived several Rounds, with Baron Zemo's Master of Deception Special Power allowing her to attack, despite her precarious health, without wasting Order Markers. This time, the Villains actually died once in a while.  All the Regeneration Stations are occupied by recently destroyed Villains. We all had more fun this time around, as the game played out more as I had envisioned. I was fortunate enough to win, Baron Zemo being the best shooter in the game might have helped, with 26 Victory Points, managing to kill a Villain 5 times. Lessons: Most of the action again took place on the Gallery, which was too narrow for combined (squad) attacks. The Regenerating Station/Assassin game was fun for all of us, and I will reintroduce it the next time I host. Last edited by kolakoski; November 8th, 2014 at 06:11 PM.
|
|
|
|||||||
| Thread Tools | Search this Thread |
| Display Modes | |
|
|
 Similar Threads
|
||||
| Thread | Thread Starter | Forum | Replies | Last Post |
| Kolakoski's Scenarios | kolakoski | Maps & Scenarios | 28 | January 26th, 2024 11:19 AM |
| Mossman's Pictured Battle Reports- Epic 4-Army Battle! 3/27 | Mossman | Battle Reports | 22 | January 22nd, 2013 05:28 PM |
| Battle at the Border II - Battle Reports | nyys | Battle Reports | 27 | April 25th, 2009 10:52 AM |
| Battle at the Border (4/19/08) Battle Reports | nyys | Battle Reports | 27 | May 10th, 2008 10:27 AM |
| Battle for the Castle (and other battle reports by menchy) | Menchy | Battle Reports | 2 | February 5th, 2007 06:45 PM |


 Linear Mode
