
|
|
|||||||
| Custom Terrain & Obstacles For Custom terrain, buildings, and other misc. obstacles |
 |
|
|
Thread Tools | Search this Thread | Display Modes |
|
#1
 December 1st, 2007, 11:38 AM
|
||||
|
||||
|
DrRansom Tutorial - Lava Rock with magma (added pics)
Hey all, here's a quick tutorial for making a lava rock. I would rate this at a medium easy difficulty.
Step 1, Choose your base. You can use a double hex piece, or for added versatillity build a sled base <- clckit for details  Step 2, using elmer's glue, affix a large single piece of styrophoam to the base (multiple pieces glued together will com undone when melting). Experiment with various angles and shapes. Step 3, After the glue dies, spray paint the entire base black; lightly for light melting and heavy for more chemical reaction. (lava looks realstic with some ammount of heavily melted materials.. melt too much and you've got nothing left standing.  Step 4, After you've got the basic shape of the Lava Rock, it's time to work on the base. Open your paper clay (keep your fingers and tools wet for ease of scuplting) and fill in the entire space between the rock and the base, covering the whole visible base with a thin layer of paper clay (9so there's no more popsicle stick texture left visible). Smooth the clay into the rocks and press down all around the edges to make little valleys of lava flowing off of the rock.  Step 5, cover the entire thing in thick black acryllic paint. If the paint drips it wil look like hardened lava. Step 6, Paint your lava cracks in the base a Deep magentish red. Then paint in closer to the crack bright red, after drying paint even closer in orange and finally highlight with some yellow. I got sloppy on this step but I liked the results.  Step 7, Drybrush! Get a nice stony gray. Get your brush wet with it and then wipe most of it off in a rag. Lightly whisk all the stony parts with your brush. This will leave a nice highlight on the raised parts really bringing out the detail. 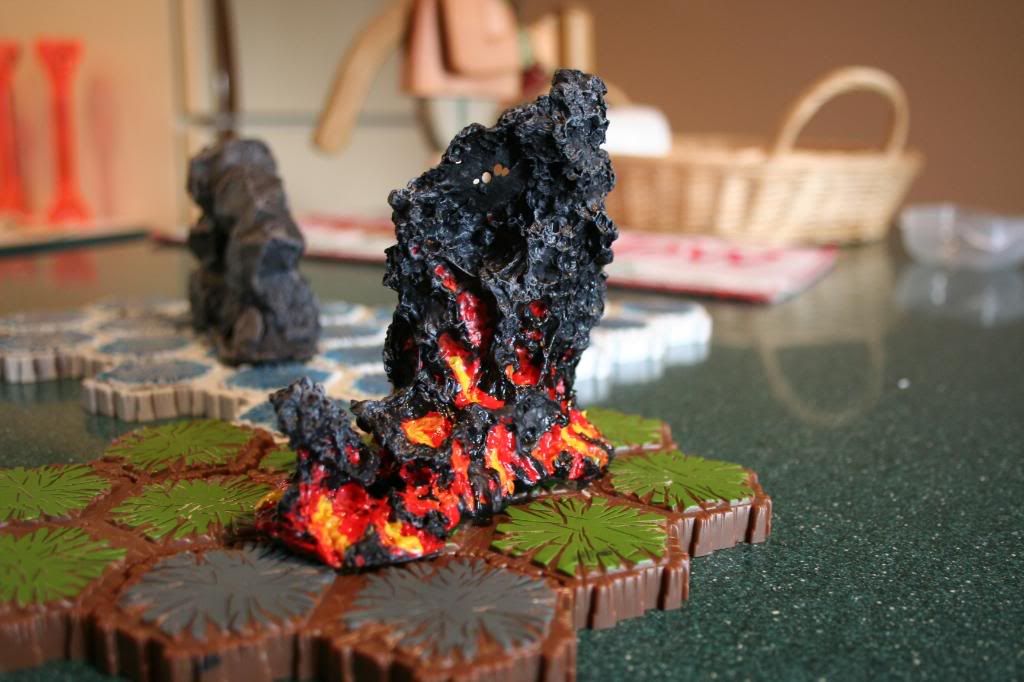 Step 8, Get a glossy finish. I suggest not using the spray variety as you could accidentally melt more of your styrophoam. Instead use an accrylic liquid variety. Apply it thick on the lava and randomly over bits of the rock, leaing some rock un-glossed. You can also drybrush the rock again for some more stoney apperance. Enjoy!  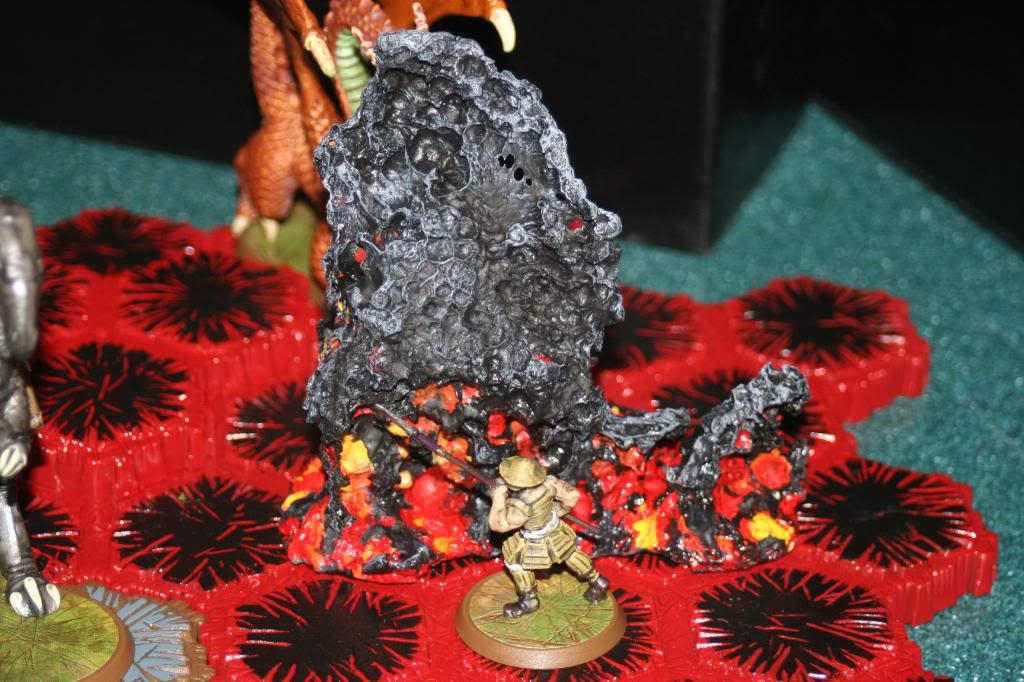
Last edited by DrRansom; March 23rd, 2009 at 10:00 PM. 
|
|
#2
December 1st, 2007, 07:55 PM
|
||||
|
||||
|
That looks pretty cool. Nice to see someone working with the spray paint/styrofoam destruction in a useful way.
|
|
#3
December 1st, 2007, 08:26 PM
|
|||
|
|||
|
Thanks
My minicity: http://secret-redx.myminicity.com/ind http://secret-redx.myminicity.com My custom terrain: http://www.heroscapers.com/community...ic.php?t=16821
|
|
#7
December 4th, 2007, 06:09 PM
|
||||
|
||||
|
Thanks guys! Glad you like it.
Quote:
|
|
#8
December 10th, 2007, 08:48 PM
|
||||
|
||||
|
Im working on a large rock arch at the moment, and i was wondering if you could explain how you painted the other rock. I was planning on using two shades of gray with a black base. What is your oppinion.
|
|
#9
December 11th, 2007, 07:27 PM
|
||||
|
||||
|
Yeah, that's basically it.
I'll do a stone dry-brush technique tutorial eventually. For now, paint the whole thing black, I mean in every crack. Allow to dry completely in between each step. Next take your paint brush and cover it in a darkish gray, not sloppy wet but full, brush the whole rock in gray leaving allot of the cracks black. Allow to dry. Next get a light gray. Get your brush that light gray cover and brush it on paper or a cloth.. it's that color now but dry, and whisk it briskly over the whole rock. All of the edges and bumps will now be highlighted. Allow to dry. Next get a light color.. offwhite or pink depending upon the rock (bone color works well). Get your brush that color, whipe it off till the brush is relatively dry and lightly whisk just the edges to give it a weathered finish. I did all of that to the following hunks of foam: http://www.heroscapers.com/community...350&highlight= Enjoy!
|
|
#10
December 11th, 2007, 09:40 PM
|
||||
|
||||
|
Thanks. I just got the casting to dry and i should be painting by tomorrow if not tonight. Ill post some pics in my thread when its all done. Thanks again.
|
|
#11
March 18th, 2009, 02:05 AM
|
||||
|
||||
|
Re: DrRansom Tutorial - Lava Rock with magma base.
I want!!!!! ty for the tutorial help!
|
|
|
|||||||
|
|


 report!


 Linear Mode
