
|
|
|||||||
| Battle Reports Reports of your Heroscape Battles |
 |
|
|
Thread Tools | Search this Thread | Display Modes |
|
#1
 November 14th, 2007, 12:46 PM
|
||||
|
||||
|
Massive Heroscape Battle Report Nearly 4,000 pts! With Pics!
Hello all, and welcome to a battle report of apocalyptic proportions. After [img]reading the new Designer's Corner section from the main website a while back (http://www.hasbro.com/games/kid-game...nity/Designers) as well as the release of the new way to play Warhammer 40k called Apocalypse (copyright infringement? Probably), I decided that a massive game of heroscape was due. In the past I have participated in some larger games, such as 2v2 with everyone having 500 pt armies and such, but nothing on the scale that I wanted. Creating two themed armies on such a massive scale used up almost all of my figures from the respective generals and took a handy calculator to make sure I had the right numbers. All that was needed was a huge map and an opponent. My opponent turned out to be happyjosiah (who knew?) and the map was a relatively short, but very wide map filled with a giant bridge, castle walls on one side, a river, swamp, ruins, and lots of trees. Soon we had the order markers placed and the battle was set to begin.
I would love to post some pictures that I took of the battle but am not sure how to do that here. If anyone could help that would be most appreciated! Here are the armies used: Valient Jandar Army Gilbert - 105 Eldgrim - 30 Finn - 80 Thorgrim - 80 Denrick - 100 Alastair - 110 Drake (SOTM) - 170 4th Mass Line x6 - 420 Knights Templar x3 - 360 Knights of Weston x6 - 420 Total: 1875 Marro Utgar Army Su-Bak-Na - 160 Marro Hive - 160 Tor-Kul-Na - 220 Kee-Mo-Shi - 130 Hounds x2 - 180 Drones x4 - 200 Stingers x6 - 360 Drudge x6 - 300 Nagrubs x6 - 180 Total: 1890 I would have had more but alas this is what I have. I decided not to put Negoksa and Meburksa in the army as I wanted the Marro to have that "swarm" effect rather than be focused on a lot of heroes, and I didn't put sentinels in the Jandar army simply because I only have 1 squad of them. After a long time decided how to deploy our forces we were ready to go, with happyjosiah commanding the Marro, and me leading the forces of Jandar. There were 2 glyphs on the map: the wound glyph (in the swamp) and the movement glyph (in the water under the bridge). And onto the battle report! Right in the beginning I felt good about the game as I was obviously the good guys and therefore had to win for the fabric of fantasy to continue (cant have the good guys lose right?) Plus I had 6 squads of the 4th Mass which is a ridiculous amount of figures and attacks each turn, especially since my entire army is valiant. I won initiative and started the game off using Gilbert to move up a lot of my knights of Weston. The first couple of order markers were spent just moving around trying to get a good position, and getting the movement glyph (kinda important for my movement 4 knights). Happyjosiah started out sending the hounds towards my position attempting to plague my large force, a clever tactic if pulled off. Luckily I had my Knights there and they started hacking away at the hounds. The dice gods smiled down upon me as I consistently rolled 2-3 skulls every time and Happy rolled 0-1 shield, rewarding me with a bunch of dead hounds, and no loses of knights. The next round had me moving out Denrick in the attempt to take out some of those huge heroes the Marro had. Great movement on Happys part saw the remaining 2 hounds blocking my path to the Hive. I spent the remaining round trying to kill the hounds. Happy got a few good rolls of the plague and moved a little closer to my forces and was able to kill a bunch of my units. The next round I got tired of failing to kill the hound so I broke engagement with Denrick and strolled over to the Hive. I knew I wouldnt have long to kill the Hive with the entire Marro force around it (Subakna and the stingers especially caught my eye), but I got height on the Hive and thought a healthy 7 attacks would put a dent in the gross egg-hatcher. I put a bunch of wounds into the thing and simply had to survive a turn of attacks and then I could probably take it out. Denrick survived the Subakna/nagrub attack but failed to kill the Hive! 7 attacks, 3 skulls, only one more lifepoint on the Hive. Curses. Denrick died shortly thereafter. It was now up to my knights, who just finished up killing the last hound, after a ridiculous amount of attacks (I suppose the dice gods were evening things up a bit). My remaining 1st wave of knights managed to clamber up on height on the hive and took it out, then was quickly dispatched by the grubs and Subakna. I decided that combo had to go. I cant have Subakna helping out all the marro any longer, so I sent in the Templar knights. This would be my christening of my Templar knights as I have not had the chance to use them yet. They charged up the battlefield with their 10 movement. Happy sent Subakna up on height deep in his deployment zone in order to heal a bit so I decided to go after Keemoshi. Only a single knight could reach her, but I got a total of 6 attack dice on her since I charged her and she follows Utgar. 5 skulls and a DW defense roll later, Keemoshi was dead, go Templar Knights! Obviously their valiant personalities and their faith in an ideal that their religion is correct and must be enforced upon everyone paid off! (Side note: I am a Christian, but I find it sad how the Church has acted in the past) The Templar knights then set their sights on Subakna, who came down freshly healed and ready to kill. It was a close battle with the Templar killing off Subakna thanks to getting height but the nagrubs proved their worth and smote the entire squad (this would happen all game with the nagrubs). Happy then sent out the big guy, Torkulna towards my forces. I definitely didnt want this big guy to stomp around on all my nice squishy 4th mass, so I decided to go up and try to tango with him from height. Unfortunately Happy won initiative and got on height before I could get there. As Tor maneuvered down the mountainside towards my force shrugging off shot after shot I attempted to move my remaining Templar within charge range. After a crucial miscalculation on my part I only had 1 Templar in range when their turn came up. Tor went after Alastair, not stomping as I had thankfully surrounded Tor and Happy would have taken a bunch of disengagement attacks if he would attempt to stomp anyone. As Tor made powerful, but only single attacks against my hero, my 4th Mass got height and started reigning terror upon him. Thankfully without the nagrubs to heal him every turn Tor fell fairly quickly, even though it took a full 3 order markers to do it. By this time, I was pushed back to my starting area and it was Happys turn to go on the offensive. He began to send out his drones en masse. I say en masse although he always managed to a 1-10 when rolling to see how many drones he could move. The poor pitiful creatures would get close to my army and then get crushed in a volley of lead. Occasionally though a freak nagrub attack or lucky drone would attack a Knight or 4th Mass and kill them, slowly dwindling my army. Meanwhile it looked as though I hardly made a dent in Happys army considering he still had 6 squads of stingers, 6 squads of drudges, and a bunch of nagrubs left. I managed to get onto the wound glyph at the end of the turn and upon reading the rulebook again, found out I only needed to roll a 2+ with a d20 to make Happy kill a figure. Naturally I rolled a 1 and lost my knight (odd how that happens a lot). On some high number turn, 10 or so, Happy finally started to move his stingers. He has never seen the value in the stingers before, and this probably has to do with his inability to roll well with them, so naturally the first time he tried to juice to take out Gilbert he rolls a 1 and loses a stinger. I then go ahead and destroy the 3 stingers he sent out. This continues with him either rolling a 1, not juicing, or just rolling poorly for the remainder of his stingers. He does manage to drive Gilbert down to 1 life and kill a few 4th mass and knights. He sends out the drudges through the swamp but I think you can guess how that turned out since we all know the drudges are horrible, even if they have swamp (and I gave them a generous amount of swamp to traverse in on the map. They just dont cut it, and were wrecked all over the place. Although the game took 16 full turns (thats 48 order markers people, not including the X) to complete, the game was over when Tor died. I ended up losing only a third of my army, while completely destroying the Marro army. Again this battle proves how a marro army looks good but never performs well. Happy just had a lot of bad luck with his hounds, then stingers, and pretty much everything but the nagrubs. We found out that the nagrubs are amazing. I always liked the little blithers but they did so much in this game. Healing Subakna, moving around grabbing glyphs, becoming adjacent to figures so that I couldnt target larger bad guys, and killing more than their points worth of my figures. The cute little guys were the players of the game in my opinion. This battle report also again shows how powerful the 4th Mass is. They are just ridiculous, 6 squads is insane, and having the rest of the army bond with each other and having a bunch of attacks just makes Jandars army rule in very large games. Ill have to see some of the other armies to see if they perform well or not. It was a lot of fun to play, and it looked amazing, seeing so many figures on the table at once. Our next massive battle report will pit a gigantic Samurai/ashigaru army vs either an orc army or an undead army, not sure yet. Although it wont be as massive as this one I think, it will still be exciting. We also put in some special rules I have been playing around with in light of the Apocalypse release for Warhammer 40k (which I dont even know how to play, although I collect the figures). The new rules have to do with objectives. On the same map that we used for the Jandar/Marro battle report, I placed a bunch of terrain that could be used as objectives including a 7 hex space in between ruins, the large hill in the middle, the bridge, and the hex on the castle wall with the flag on it. Other objectives would include destroying the castle door and holding onto the body of the general of the army. Objectives would have the following rules: If you have a non-engaged (to an enemy) figure in the designated objective zone (such as a figure in the 7 hex zone in between the ruins), and there are none of the opponents figures in the zone, then you would score the amount of points equal to that objectives worth (not sure on the point values yet). This rule obviously is enforced at the end of the game after a set amount of turns. The general recovery objective rules are that before the game, each player nominates a single hero to be the general, when/if that general dies the body becomes an objective and any non-engaged figure that is adjacent to the general figure at the end of the game (that is placed on its side or just standing but everyone knows that the figure is dead) receives the point value equal to the generals pt value. If the general survives the battle the player would receive the pts left as well as a bonus for having their general survive. I think this would make a really fun way of playing heroscape, and when combined with the heroscape quest cards it could be awesome. I hope everyone enjoyed the battle report. Hopefully Happyjosiah will also put his view down or just make comments on my battle report which I know isnt probably completely accurate as its all from memory and 16 turns worth of heroscape can be hard to remember. Also I would really like to put some pictures of the game on this post so if anyone could help me please PM me with the information needed so I can share the huge battle report with everyone! Thanks! Alright here are the pics. I am sorry for quality as I am still new to this, plus I don't know how to make the pics bigger for this. But enjoy!           Here is the link to look at the larger versions: http://s238.photobucket.com/albums/f...afilter=images AoCS Comic,AoCS: Finding of Steve, AoCS Holiday '08, AoCS: Holiday '09, AoCS: Conflict Brewing, Chedwick and Sven Comic Blog 
|
|
#2
November 14th, 2007, 01:45 PM
|
||||
|
||||
|
Re: Massive Apocalypse Heroscape Battle Report Nearly 4,000
Wow! Great game and report Gamjuven!
Quote:
Aranas Things you might have missed in the rulebook: Figures can't pass through friendly engaged figures. Figures can't attack themselves. SITE D'HEROSCAPE FRANCOPHONE, C'EST PAR ICI
|
|
#3
November 14th, 2007, 04:38 PM
|
||||
|
||||
|
Now that's how Heroscape was meant to be played!
Also, I wonder how that battle would have turned out with the inclusion of 8 and 8.5 figures. (Marrow Cavalry and Wu-Sa-Ga) Quote:
 B.U.D. B.U.D.
|
|
#4
November 14th, 2007, 05:47 PM
|
||||
|
||||
|
Awesome battle report, gamjuven!
I love well written battle reports. Thanks! But  I have one word for you: Photobucket
|
|
#5
November 14th, 2007, 06:13 PM
|
||||
|
||||
|
Quote:
AoCS Comic,AoCS: Finding of Steve, AoCS Holiday '08, AoCS: Holiday '09, AoCS: Conflict Brewing, Chedwick and Sven Comic Blog
|
|
#6
November 14th, 2007, 10:03 PM
|
||||
|
||||
|
Sweet Map! Love it!
These really makes the battle report come alive! Thanks G  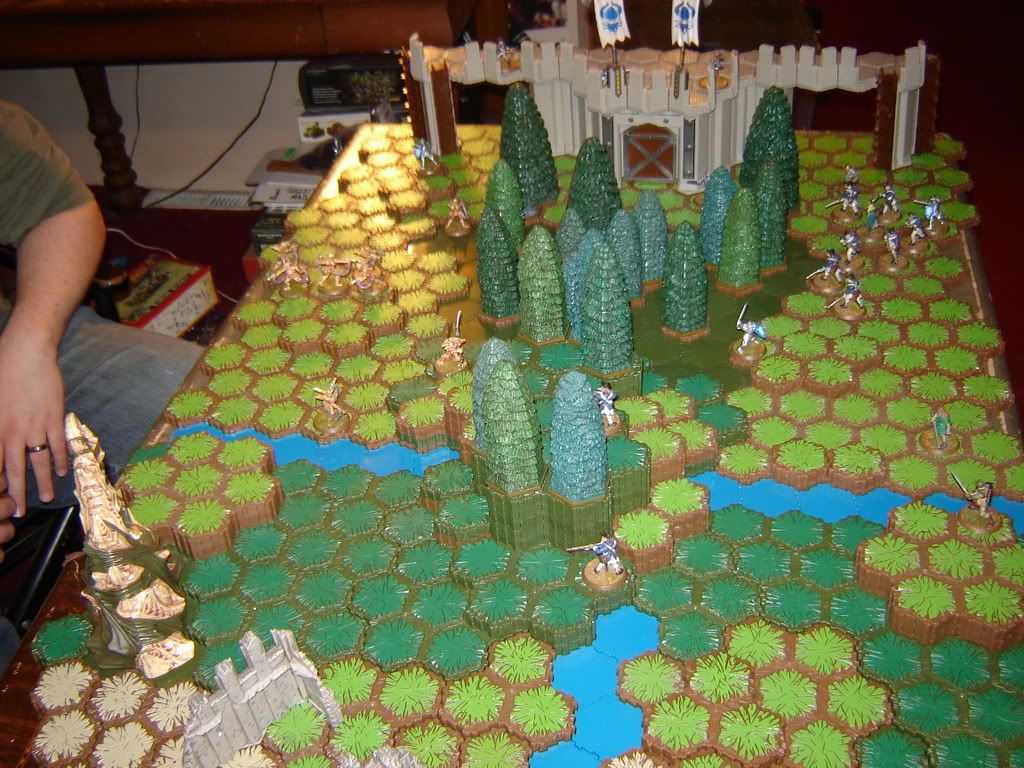 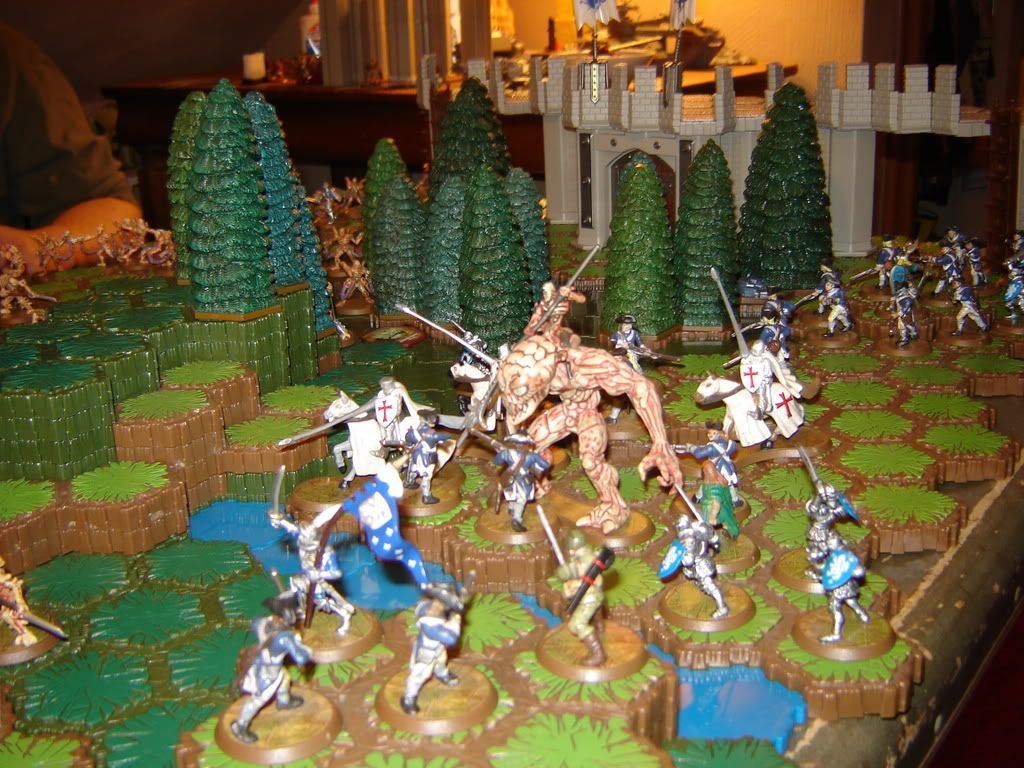 Egads! What manner of freakish Marro beast is that? 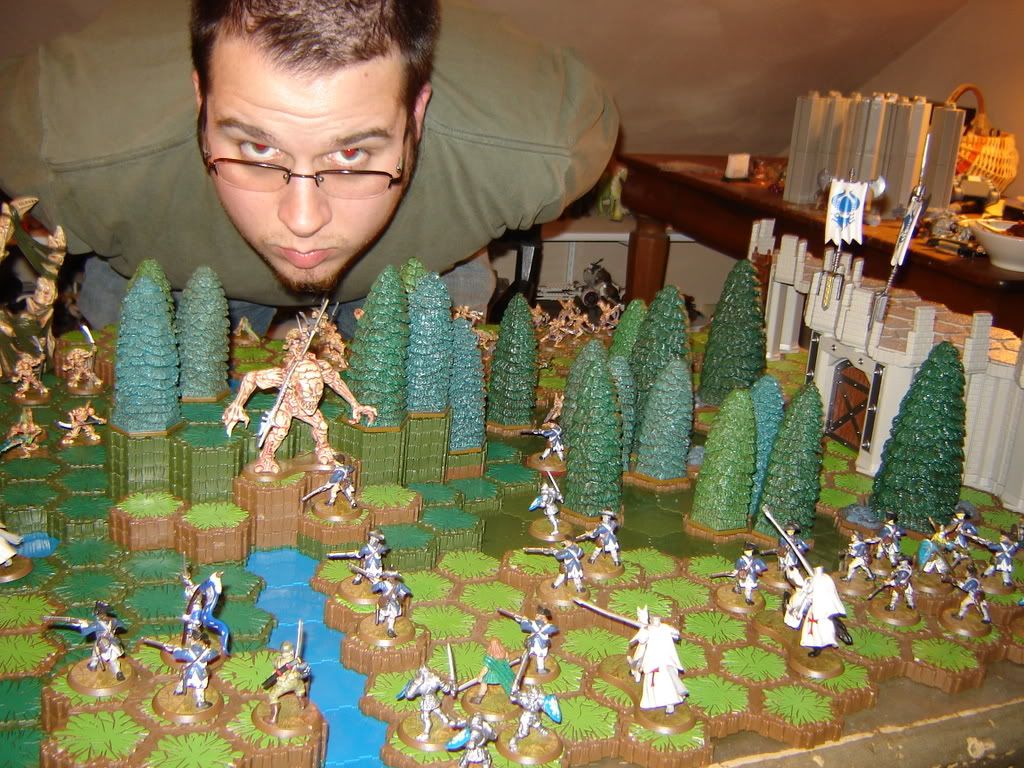 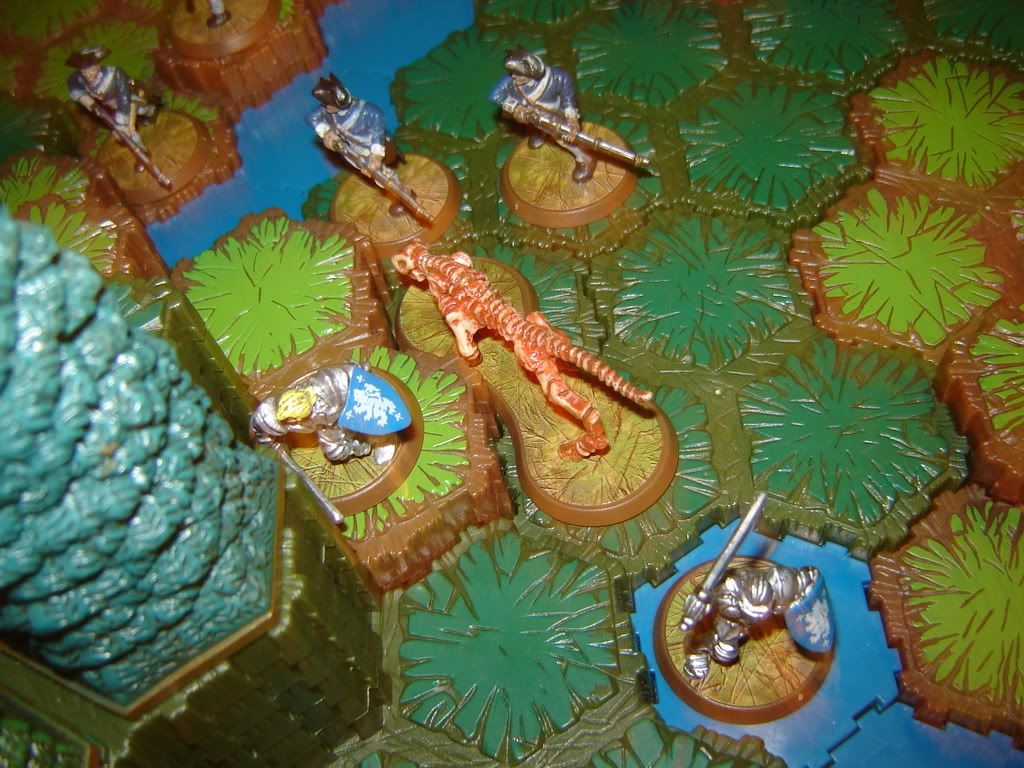 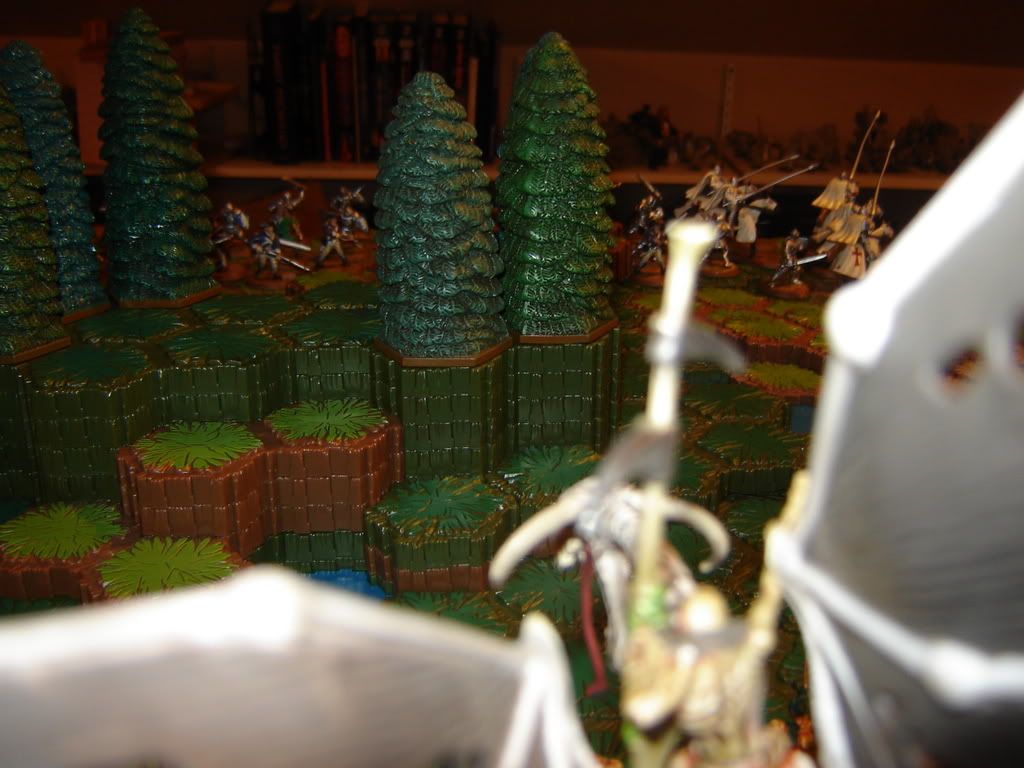 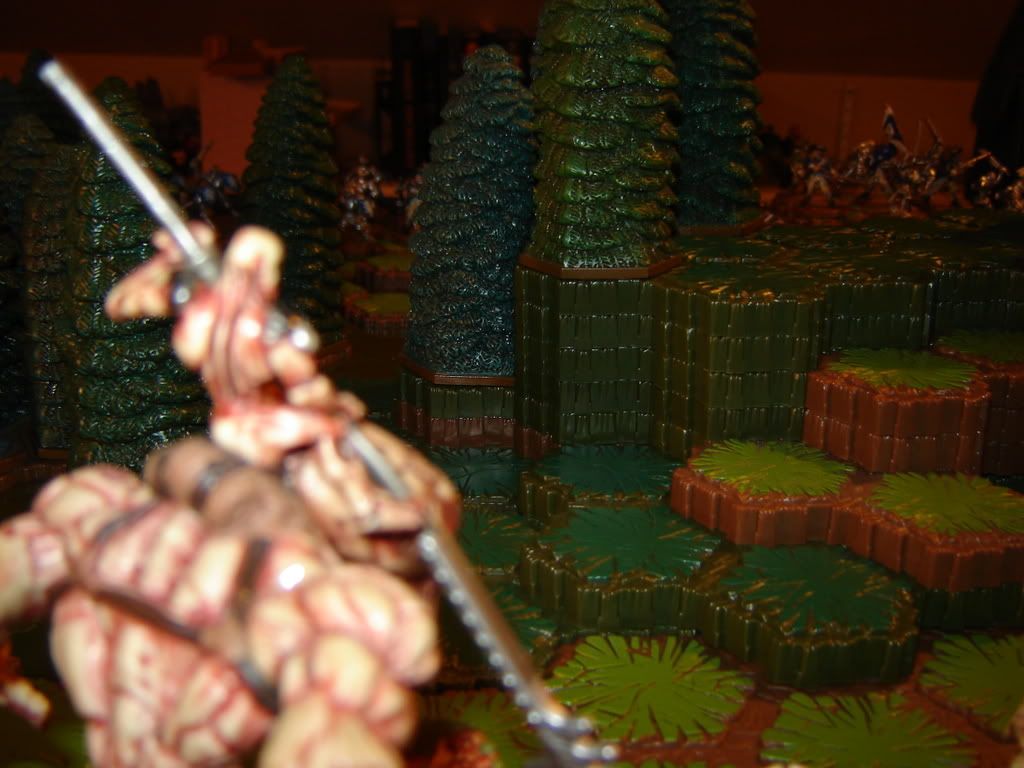 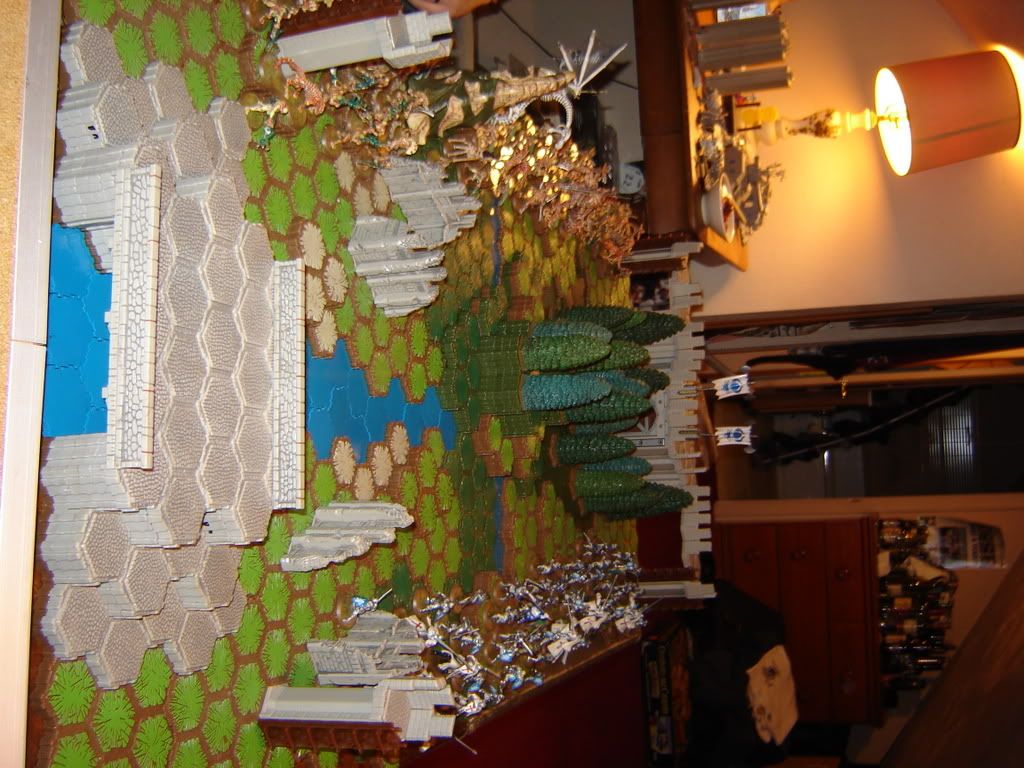 You need to flip this one 90 degrees! 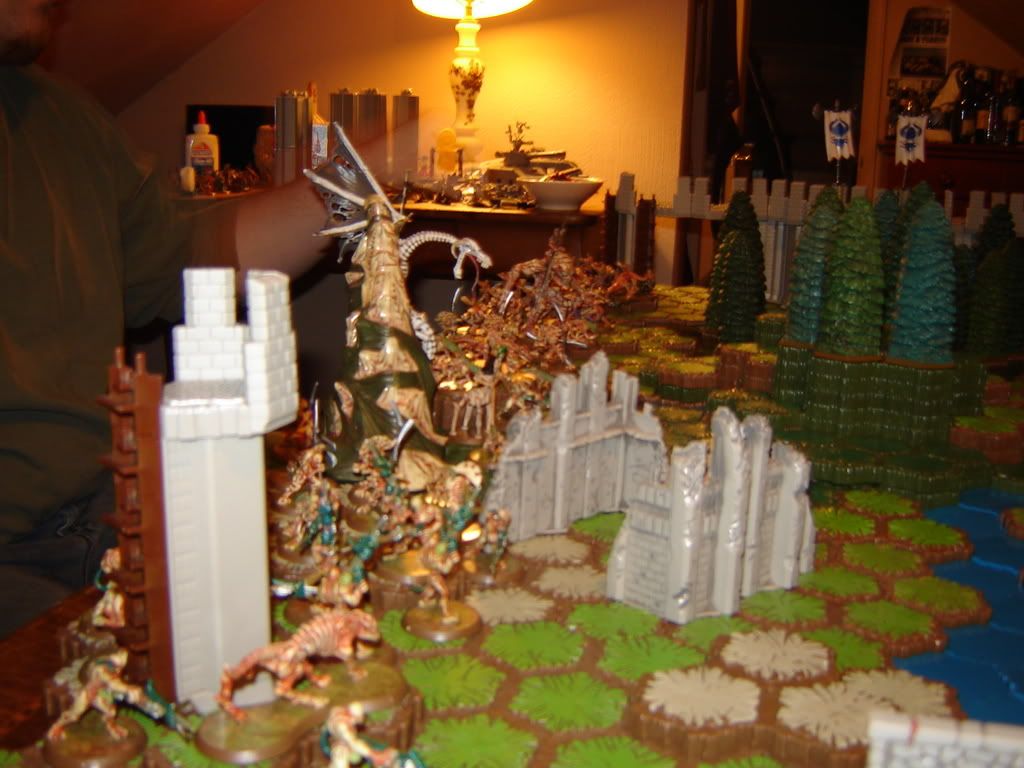 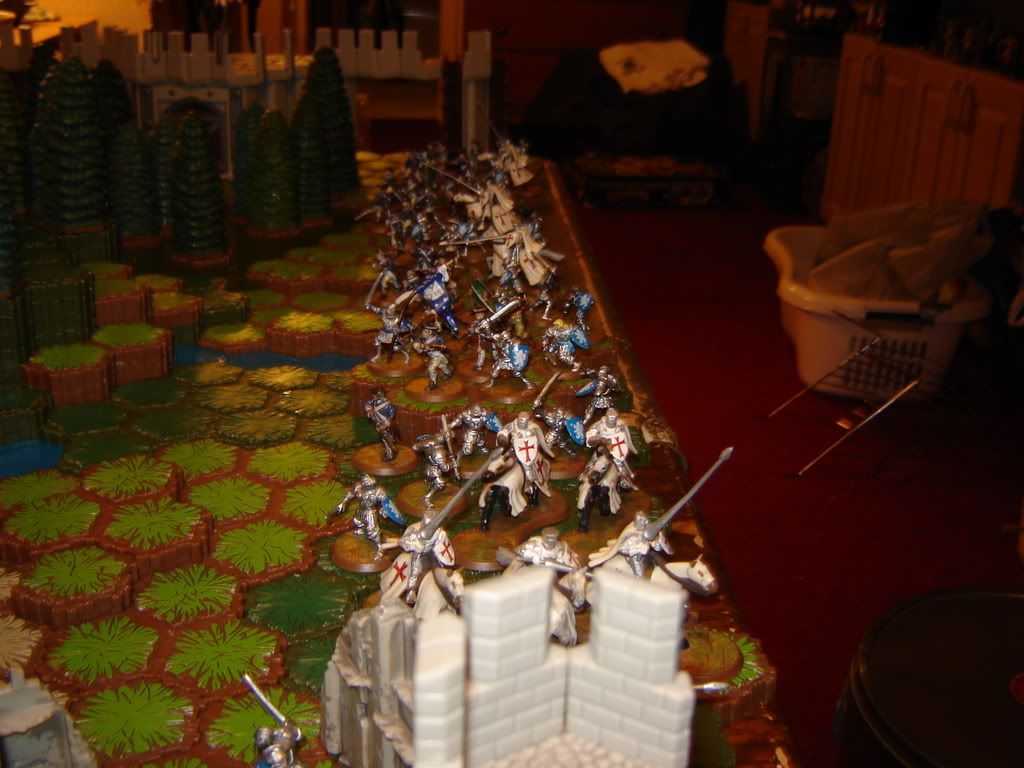 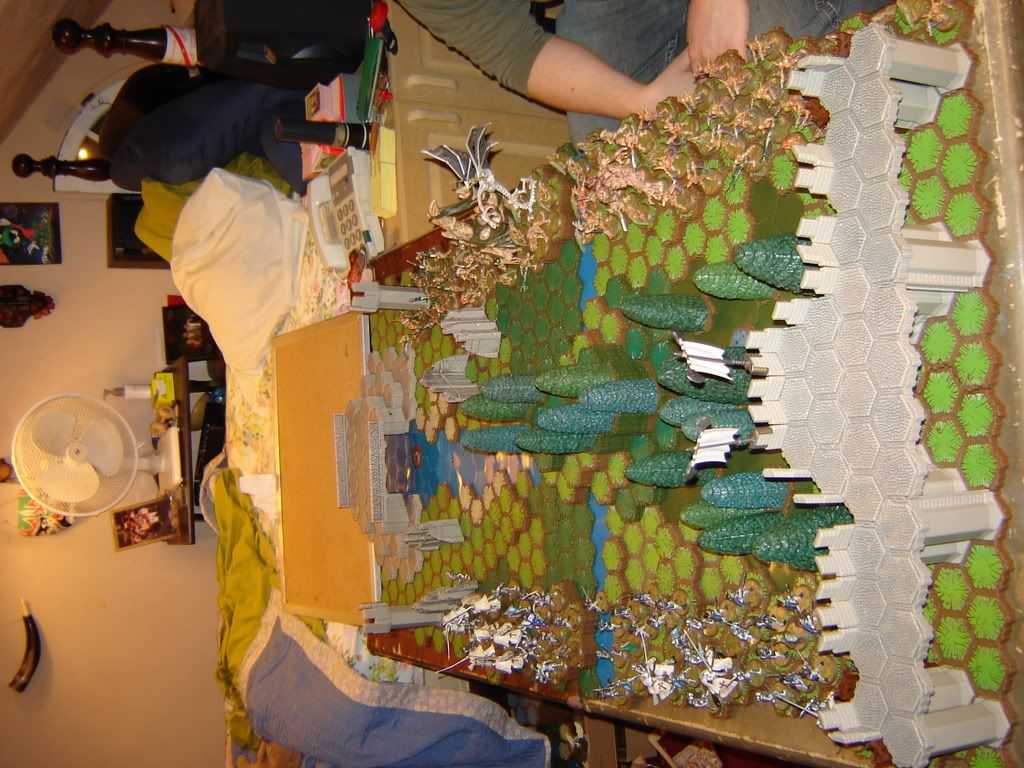 This one too!
|
|
#7
November 14th, 2007, 11:08 PM
|
||||
|
||||
|
ah thank you very much, nice big pictures!
AoCS Comic,AoCS: Finding of Steve, AoCS Holiday '08, AoCS: Holiday '09, AoCS: Conflict Brewing, Chedwick and Sven Comic Blog
|
|
#8
November 15th, 2007, 09:59 AM
|
||||
|
||||
|
Great map! Thank you for the pictures.
To add to my previous comments, I see that the Hive was badly positionned on the battlefield. Not only was it close to the ennemy line but it was also very easy to have height advantage against it. Like in the 3rd part of the Campaign, the Hive must be elevated to compensate for its weak defence and to give it a better chance to see its troops. Jandar' army composition was very good. With Sir Gilbert and the movement glyph on the board... no wonder the Marro has been disposed of that way! If I was living near you, I would ask for a rematch! Aranas Things you might have missed in the rulebook: Figures can't pass through friendly engaged figures. Figures can't attack themselves. SITE D'HEROSCAPE FRANCOPHONE, C'EST PAR ICI
|
|
#9
November 15th, 2007, 10:37 AM
|
||||
|
||||
|
WOW - great report.
I think the starting zone being wide and narrow really hur the marro's, if it was a deeper starrting zone, you could surround the hive and SBN, and not use them till the very end and keep them protected. I think with a deep starting zone it would have been a very different battle. I have never been a drone fan, I would have opted for way more hounds - one of my very favorite units. Great write up Heroscape - The Game I Have Waited My Whole Life For! GenCon - a must for any true Scaper!
|
|
#10
November 15th, 2007, 10:57 AM
|
||||
|
||||
|
Quote:
Must have been very fun anyway. Seeing all theses figures on the battlefield is impressive!!! Aranas Things you might have missed in the rulebook: Figures can't pass through friendly engaged figures. Figures can't attack themselves. SITE D'HEROSCAPE FRANCOPHONE, C'EST PAR ICI
|
|
#11
November 18th, 2007, 06:10 PM
|
||||
|
||||
|
Hey gamjuven, How many sets did you use to make that cool map?
My maps:  R.I.P. Ugly-Caco
|
|
#12
November 19th, 2007, 05:34 PM
|
||||
|
||||
|
Hmmm... honestly I am not too sure since all my terrain is all bundled up together. I have 3 SotM masters sets, like 3 castle sets, 4 road/tree sets, 2 original master sets. I used most of my 24 hexers, about 2 master sets worth of water probably, 1 set of swamp, almost all of my trees, all my 5 hex bridge sections to make that road bridge on the one end. The castle wall used only a gate and like 6 wall sections, but I used all of my double road hex castle thingies (the ones that have 6-9 hexes to them) for the legnth of the wall section. So all in all I would guess I used around 2 original master sets, 1 1/2 SotM master sets, 1 castle set (but 4 castle set's worth of the double hex things and a lot of my ladders), and all 4 of my road/tree sets.
As I said before it is difficult to tell how much I used since everything is stored in large bags and boxes. But it was a ton of terrain and took about 2 hours to build I'd say. Hope everyone enjoyed it! AoCS Comic,AoCS: Finding of Steve, AoCS Holiday '08, AoCS: Holiday '09, AoCS: Conflict Brewing, Chedwick and Sven Comic Blog
|
|
|
|||||||
|
|


 Linear Mode
